{% load static %}
<!DOCTYPE html>
<html>
<link rel="stylesheet" href="{% static 'myglobal.css' %}">
<body>
{% for x in fruits %}
<h1>{{ x }}</h1>
{% endfor %}
</body>
</html>
The Project - My Tennis Club
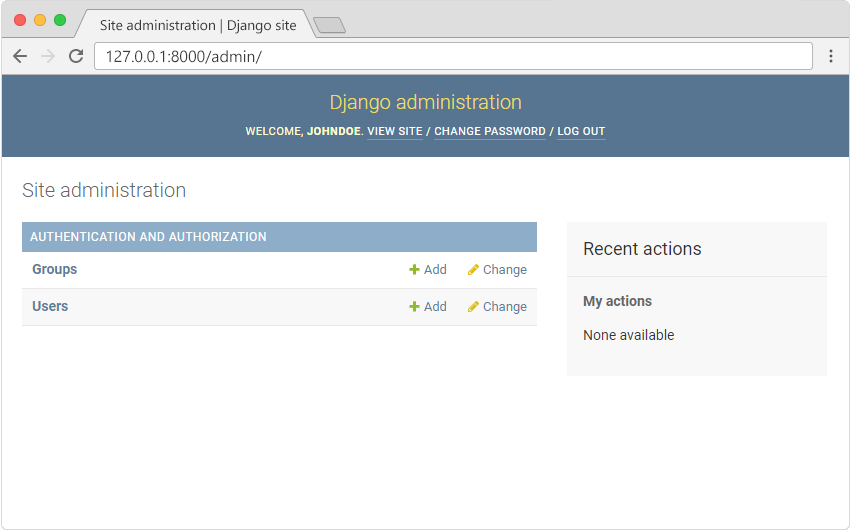
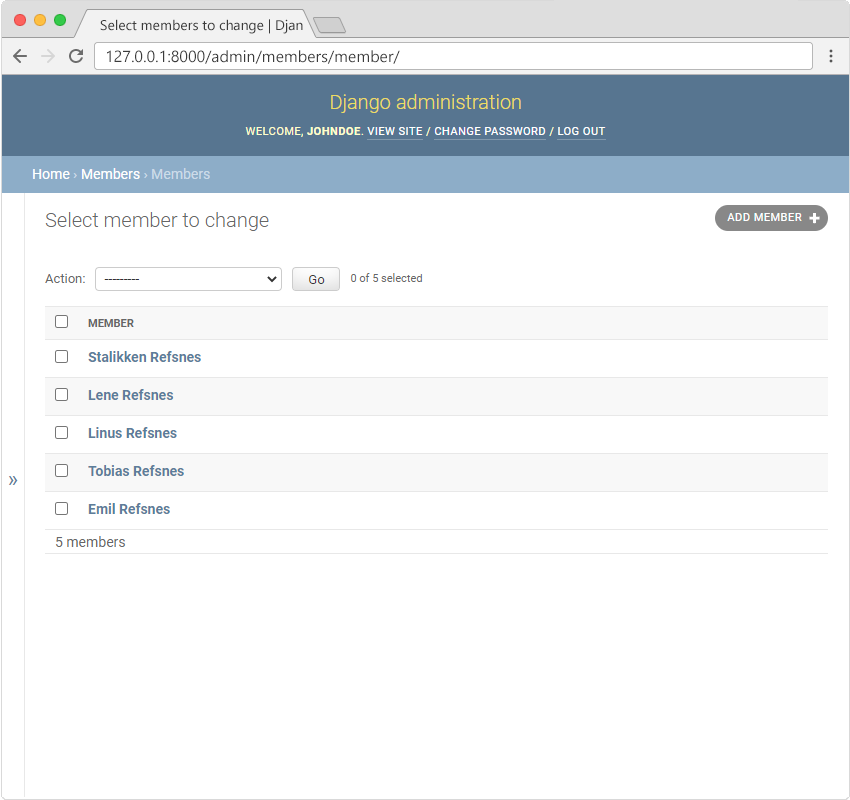
If you have followed the steps in the entire Django tutorial, you will have a my_tennis_club project on your computer, with 5 members:
We want to add a stylesheet to this project, and put it in the mystaticfiles folder:
my_tennis_club
manage.py
my_tennis_club/
members/
mystaticfiles/
mystyles.css
The name of the CSS file is your choice, we call it mystyles.css in this project.
Open the CSS file and insert the following:
my_tennis_club/mystaticfiles/mystyles.css:
body {
background-color: violet;
}
Modify the Master Template
Now you have a css file, the next step will be to include this file in the master template:
Open the master template file and add the following:
my_tennis_club/members/templates/master.html:
{% load static %}
<!DOCTYPE html>
<html>
<head>
<title>{% block title %}{% endblock %}</title>
<link rel="stylesheet" href="{% static 'mystyles.css' %}">
</head>
<body>
{% block content %}
{% endblock %}
</body>
</html>
Check Settings
Make sure your settings.py file contains a STATICFILES_DIRS list with a reference to the mystaticfiles folder on the root directory, and that you have specified a STATICFILES_ROOT folder:
my_tennis_club/my_tennis_club/settings.py:
.
.
STATIC_ROOT = BASE_DIR / 'productionfiles'
STATIC_URL = 'static/'
#Add this in your settings.py file:
STATICFILES_DIRS = [
BASE_DIR / 'mystaticfiles'
]
.
.
Collect Static Files
Every time you make a change in a static file, you must run the collectstatic command to make the changes take effect:
py manage.py collectstatic
If you have executed the command earlier in the project, Django will prompt you with a question:
You have requested to collect static files at the destination
location as specified in your settings:
C:UsersYour Namemyworldmy_tennis_clubproductionfiles
This will overwrite existing files!
Are you sure you want to do this?
Type 'yes' to continue, or 'no' to cancel:
Type 'yes'. This will update any changes done in the static files, and give you this result:
1 static file copied to 'C:UsersYour Nameminverdenmy_tennis_clubproductionfiles', 132 unmodified.
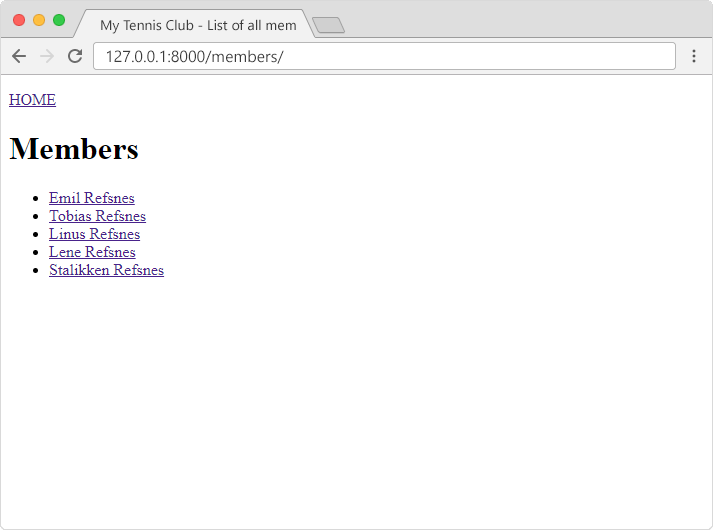
Now, if you run the project:
py manage.py runserver
It will look like this:
If you have followed all the steps on you own computer, you can see the result in your own browser:
In the browser window, type 127.0.0.1:8000/members/ in the address bar.
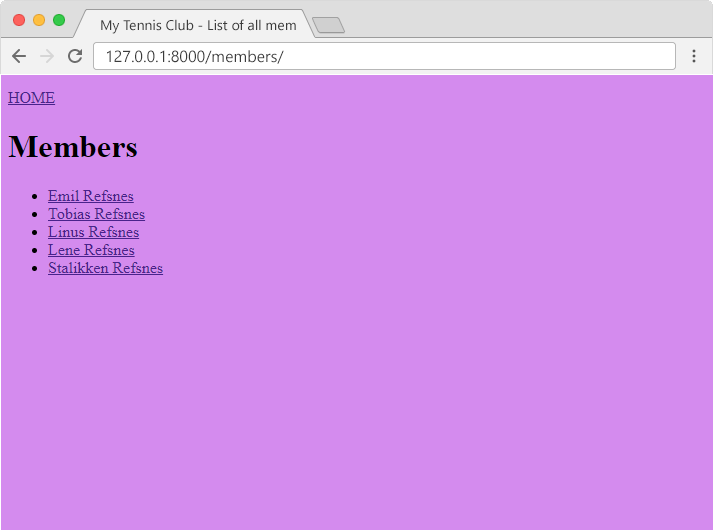
Spice up the Style!
In the example above we showed you how to include a stylesheet to your project.
We ended up with a purple web page, but CSS can do more than just change the background color.
We want to do more with the styles, and end up with a result like this:
First, replace the content of the mystyles.css file with this:
my_tennis_club/mystaticfiles/mystyles.css:
@import url('https://fonts.googleapis.com/css2?family=Source+Sans+Pro:wght@400;600&display=swap');
body {
Database Engines
Django comes with a SQLite database which is great for testing and debugging at the beginning of a project.
However, it is not very suitable for production.
Django also support these database engines:
- PostgreSQL
- MariaDB
- MySQL
- Oracle
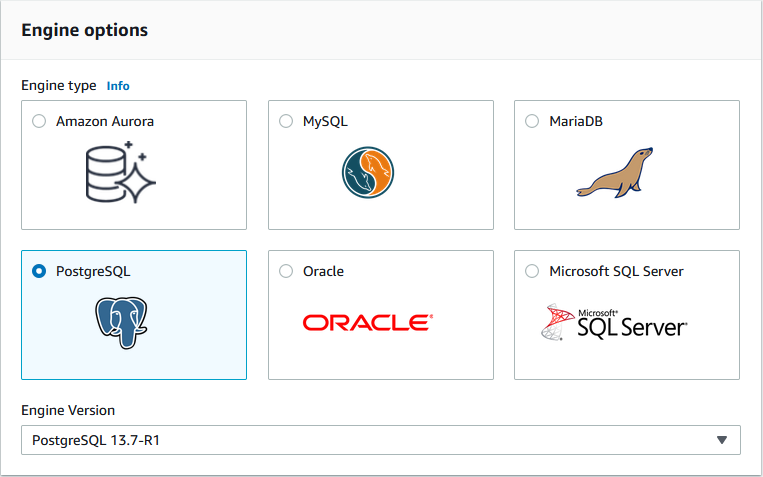
We will take a closer look at the PostgreSQL database engine.
PostgreSQL
PostgreSQL database is an open source relational database, which should cover
most demands you have when creating a database for a Django project.
It has a good reputation, it is reliable, and it perform well under most
circumstances.
We will add a PostgreSQL database to our Django project.
To be able to use PostgreSQL in Django we have to install a package called
psycopg2.
Install psycopg2
Type this command in the command line to install the package. Make sure you are still inn the virtual
environment:
pip install psycopg2-binary
The result should be something like this:
Collecting psycopg2-binary
  Downloading psycopg2_binary-2.9.5-cp39-cp39-win_amd64.whl (1.2 MB)
    |████████████████████████████████| 1.2 MB 3.3 MB/s
Installing collected packages: psycopg2-binary
Successfully installed psycopg2-binary-2.9.5
WARNING: You are using pip version 20.2.3; however, version 22.3.1 is available.
You should consider upgrading via the 'c:usersYour Namemyworldscriptspython.exe -m pip install --upgrade pip' command.
The psycopg2 package is a driver that is
necessary for PostgreSQL to work in Python.
We also need a server where we can host the database.
In this tutorial we have chosen the Amazon Web Services (AWS) platform,
you will learn more about that in the .
Why AWS?
There are many providers out there that can host Django projects and PostgreSQL databases.
In this tutorial we will use the Amazon Web Services (AWS) platform, mainly because they offer a free solution that can host both Django projects and PostgreSQL databases. All you need is an AWS account.
Note: you can choose whatever server provider you like, they will most likely all give you a satisfying result, but they will have some provider-specific settings that you should be aware of when following this tutorial.
AWS
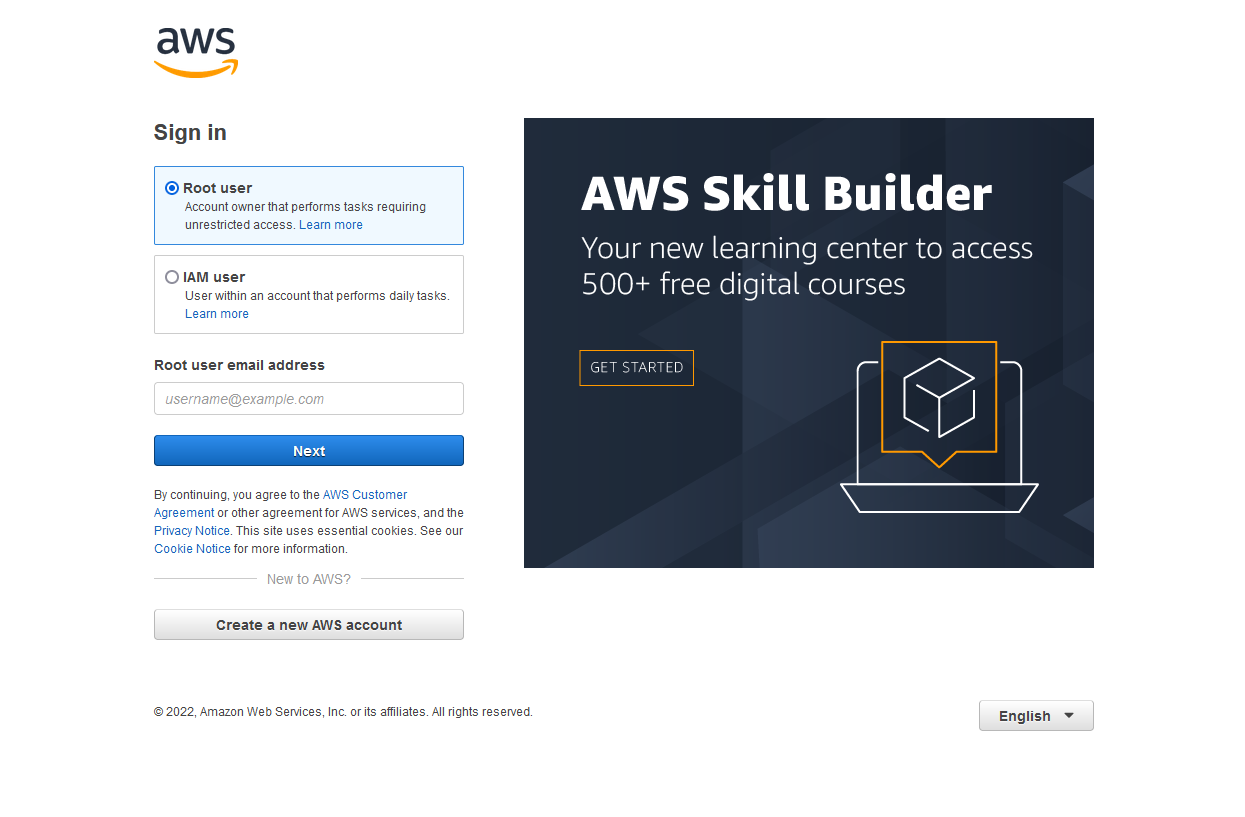
Go to aws.amazon.com, and create an account:
Sign In
Once you have created an AWS account, it is time to sign in for the first time:
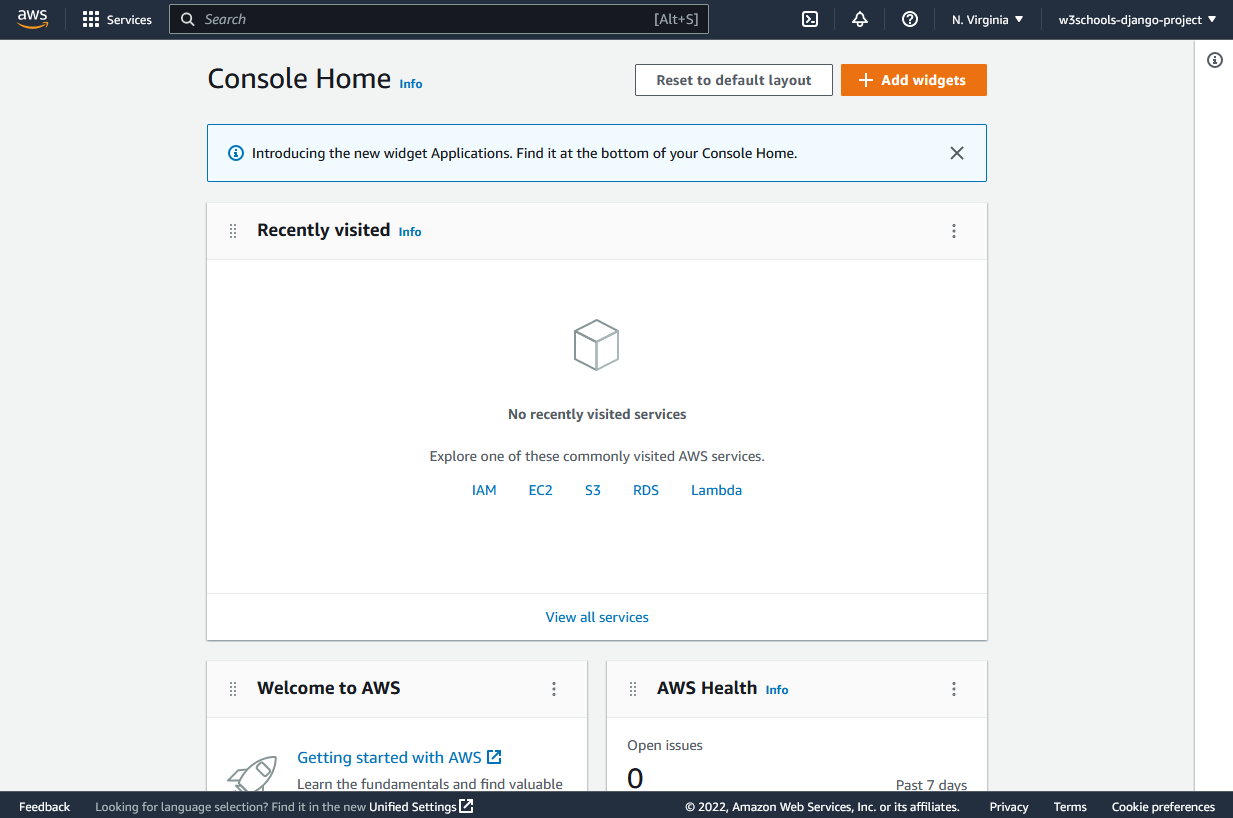
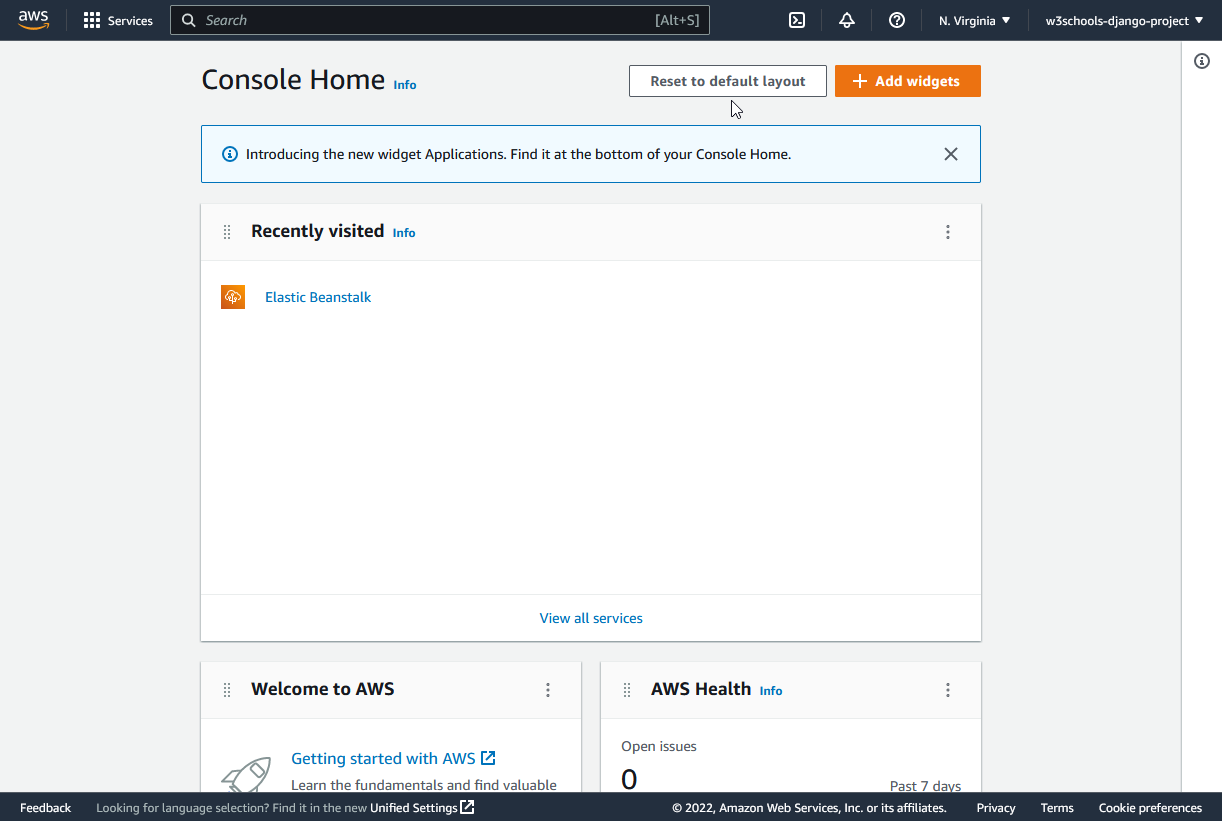
AWS Console
If this is your first time you sign into your AWS account, you will be directed to the AWS Console Home page:
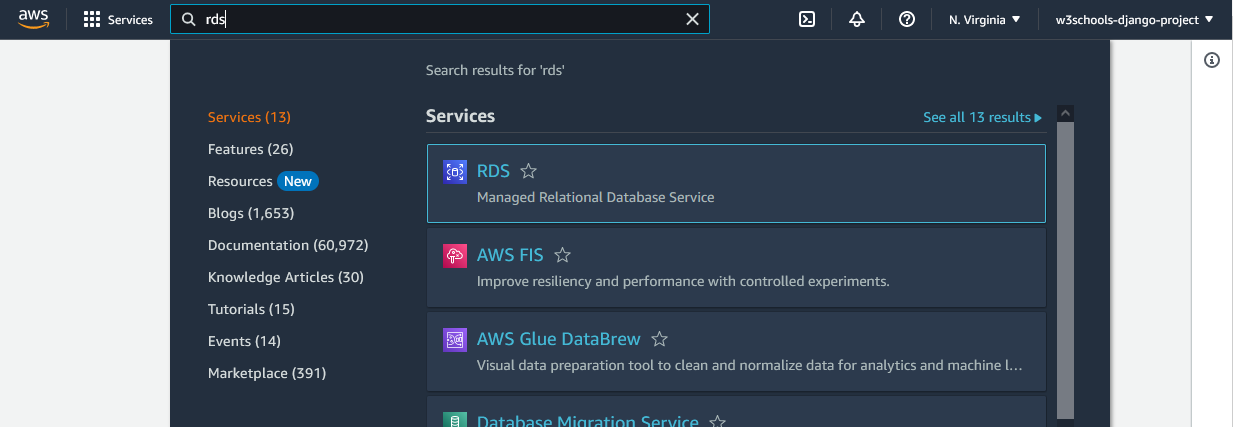
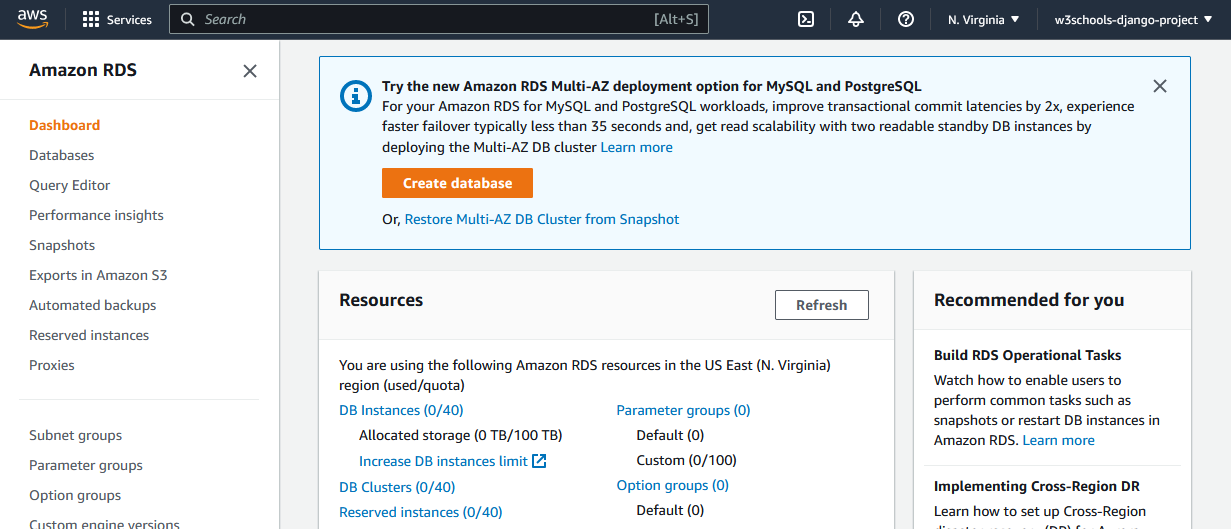
Add the RDS Service
Once you have an AWS account, you can start creating a database.
We will use a database service at AWS, called RDS.
In the search field, search for "RDS", and click to start the service:
Once the service has started, you should see something like this:
In the next chapter we will create the PostgreSQL database.
Create Database
Inside the RDS service, create a database, either by navigating to the Database section, or just click the "Create database" button:
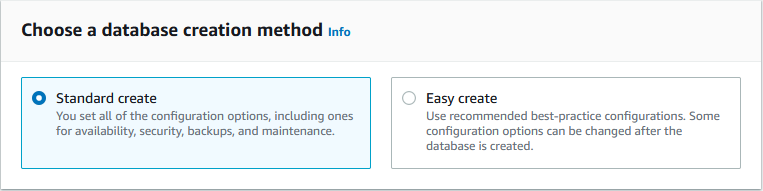
Settings
Once you have started creating a database, you will be given some choices for the type and settings of your database.
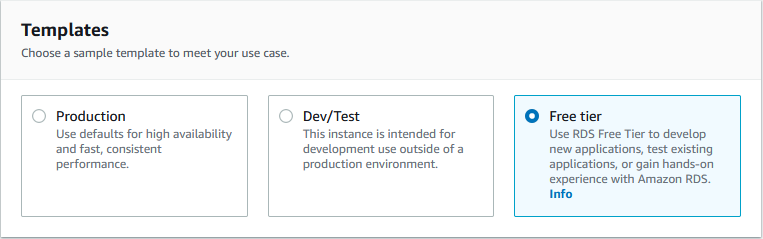
To add a PostgreSQL database to your Django project, choose the following options:
Standard creation method:
PostgreSQL engine method:
Free Tier Template:
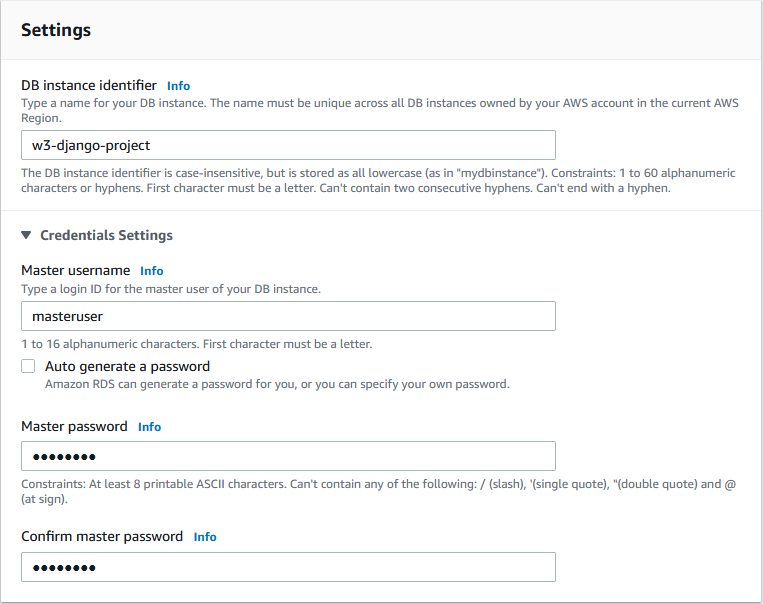
Name of database, username, and password
You can choose any name, username, and password:
Keep the default instance configuration:

Check off the storage autoscaling:
It can be a good thing to enable storage autoscaling, but for this tutorial it is not necessary.

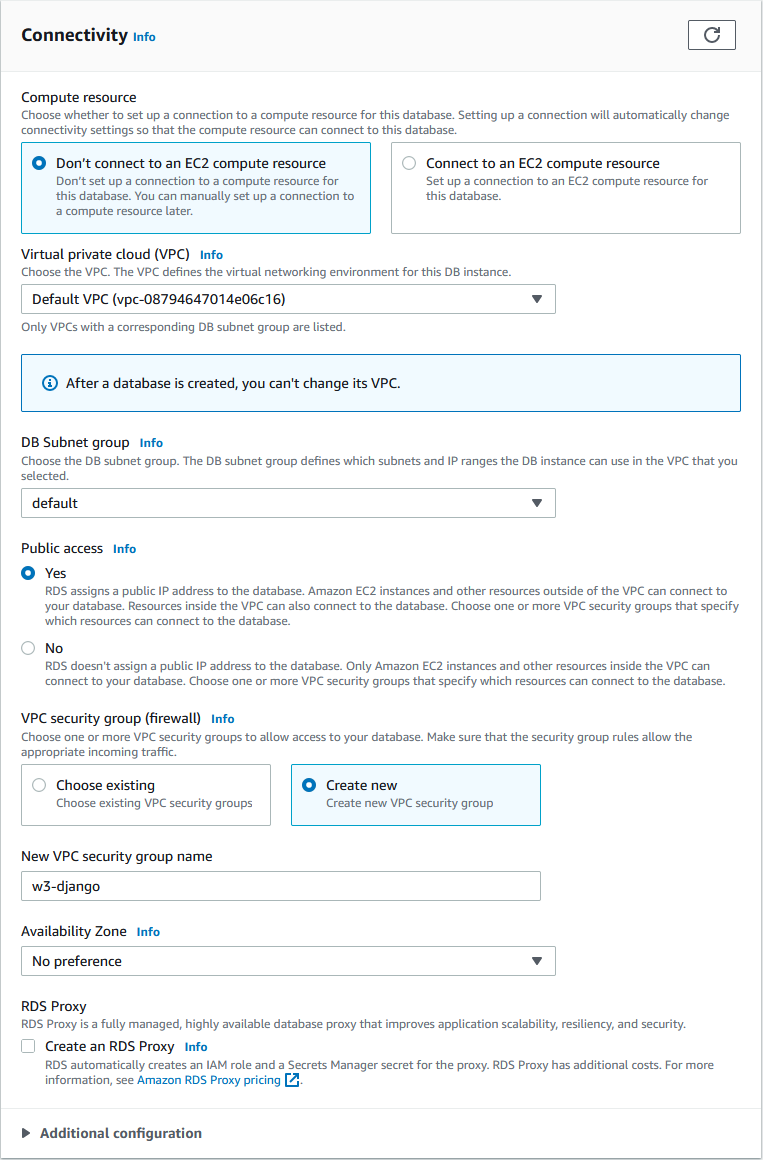
Grant public access, and create a new security group:
Give the security group a name, we will call it "w3-django":
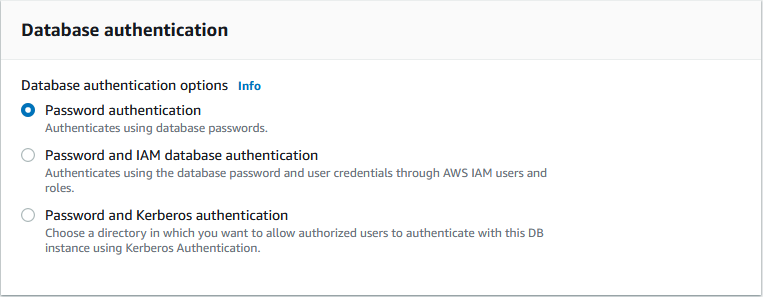
Keep default db authentications:
Keep default monitoring:
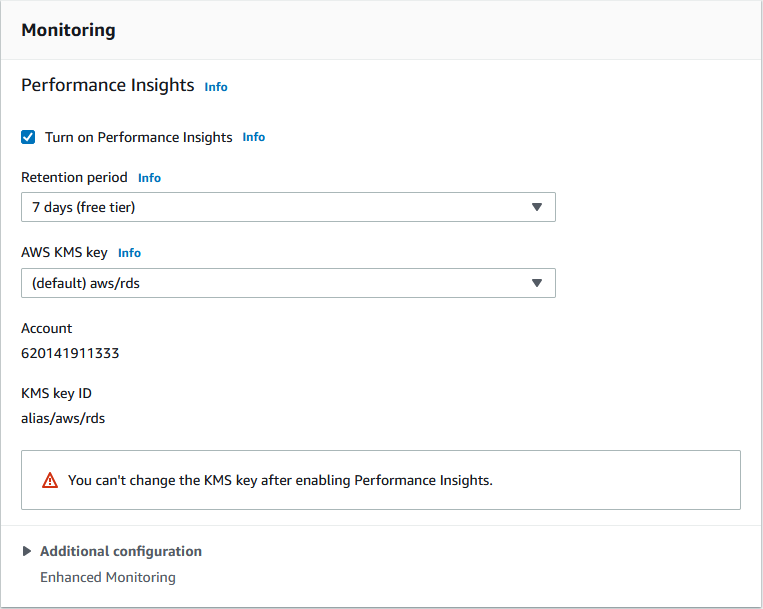
Click Create database:
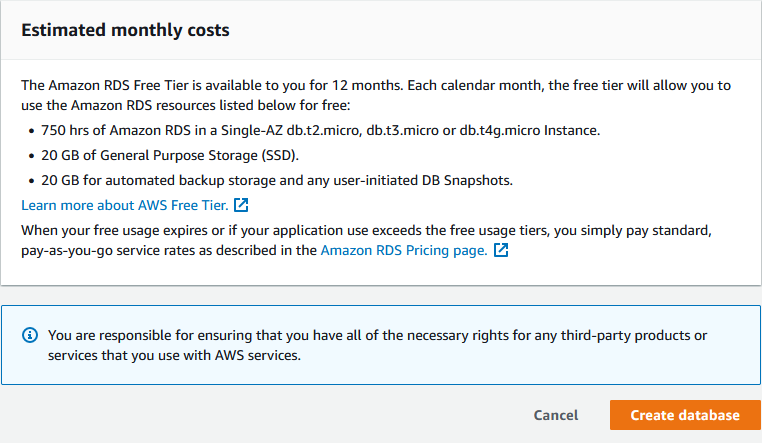
This will take a few minutes, but when it is finished, you will have a new PostgreSQL database, almost ready to run on your Django project!
In the next chapter you will learn how to connect your project to the database.
.jpg)
Modify Settings
To make Django able to connect to your database, you have to specify it in the DATABASES tuple in the settings.py file.
Before, it looked like this:
SQLite
my_tennis_club/my_tennis_club/settings.py:
.
.
DATABASES = {
'default': {
'ENGINE': 'django.db.backends.sqlite3',
'NAME': BASE_DIR / 'db.sqlite3',
}
}
.
Now, you should change it to look like this:
PostgreSQL
my_tennis_club/my_tennis_club/settings.py:
.
.
DATABASES = {
'default': {
'ENGINE': 'django.db.backends.postgresql',
'NAME': 'postgres',
'USER': 'masteruser',
'PASSWORD': '12345678',
'HOST': 'w3-django-project.cdxmgq9zqqlr.us-east-1.rds.amazonaws.com',
'PORT': '5432'
}
}
.
Note: The values will be different for your project.
Engine?
As you can see in the settings.py file, we insert postgresql instead of sqlite.
Name?
The database does not have a name, but you have to assign one in order to access the database.
If no name is given, the provider accepts 'postgres' as the name of the database.
Username and Password?
Insert the username and password that you specified when you created the database.
Host? Port?
As you can see in the settings.py file, we insert postgresql instead of sqlite, and insert the username and password that we specified when we created the database.
The HOST and PORT can be found under the "Connectivity & security" section in the RDS instance. They are described as "Endpoint" and "Port":
Which for my project is this:
'HOST': 'w3-django-project.cdxmgq9zqqlr.us-east-1.rds.amazonaws.com'
'PORT': '5432'
Migrate
Once we have done the changes in settings.py, we must run a migration in our virtual environment, before the changes will take place:
Which will give you this result:
Operations to perform:
Apply all migrations: admin, auth, contenttypes, members, sessions
Running migrations:
Applying contenttypes.0001_initial... OK
Applying auth.0001_initial... OK
Applying admin.0001_initial... OK
Applying admin.0002_logentry_remove_auto_add... OK
Applying admin.0003_logentry_add_action_flag_choices... OK
Applying contenttypes.0002_remove_content_type_name... OK
Applying auth.0002_alter_permission_name_max_length... OK
Applying auth.0003_alter_user_email_max_length... OK
Applying auth.0004_alter_user_username_opts... OK
Applying auth.0005_alter_user_last_login_null... OK
Applying auth.0006_require_contenttypes_0002... OK
Applying auth.0007_alter_validators_add_error_messages... OK
Applying auth.0008_alter_user_username_max_length... OK
Applying auth.0009_alter_user_last_name_max_length... OK
Applying auth.0010_alter_group_name_max_length... OK
Applying auth.0011_update_proxy_permissions... OK
Applying auth.0012_alter_user_first_name_max_length... OK
Applying members.0001_initial... OK
Applying members.0002_members_delete_member... OK
Applying members.0003_rename_members_member... OK
Applying sessions.0001_initial... OK
Now, if you run the project:
And view it in your browser:
.
You will get the home page of the project, but if you click on the "members" link, you will see that there are no members.
That is because the database is empty. In the we will fill the database with members.
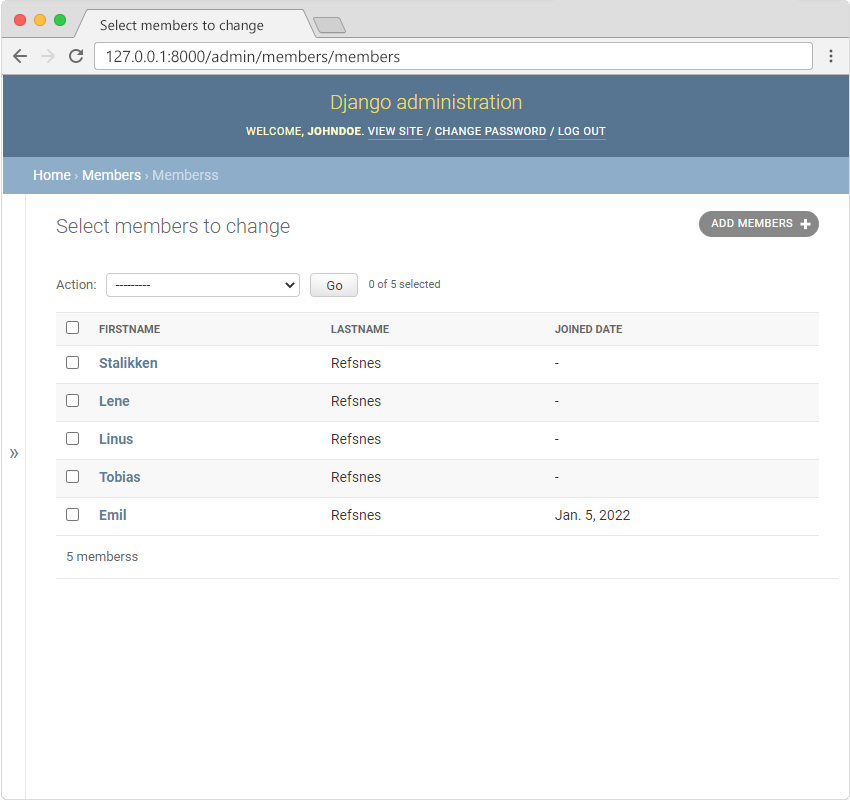
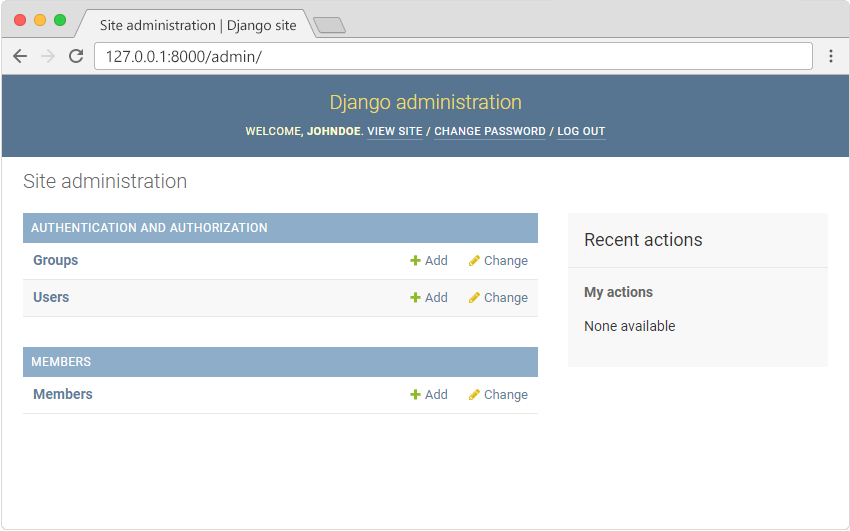
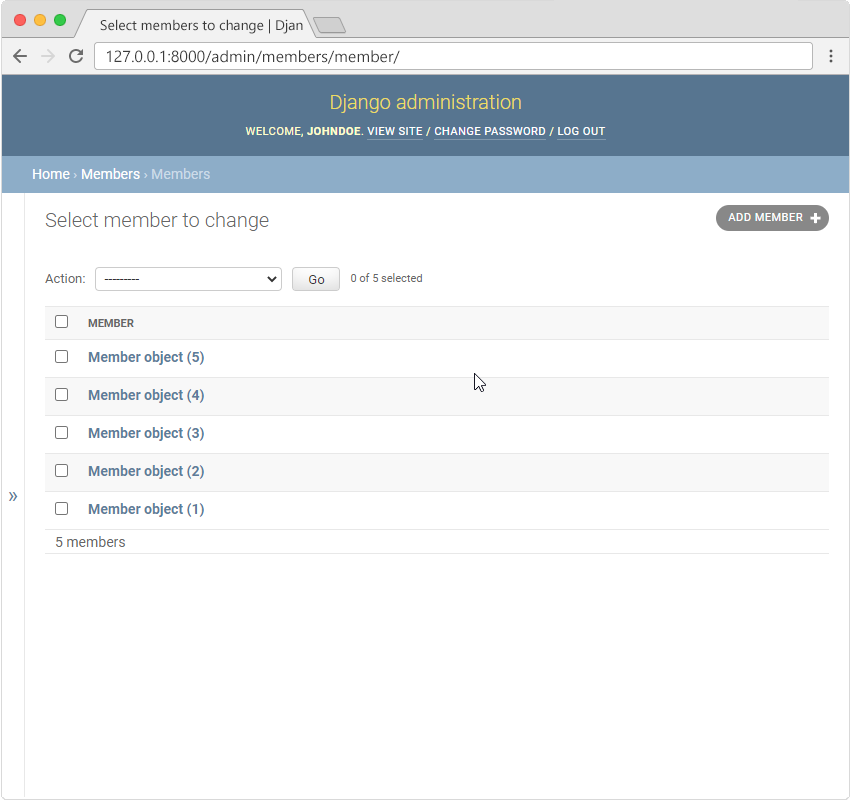
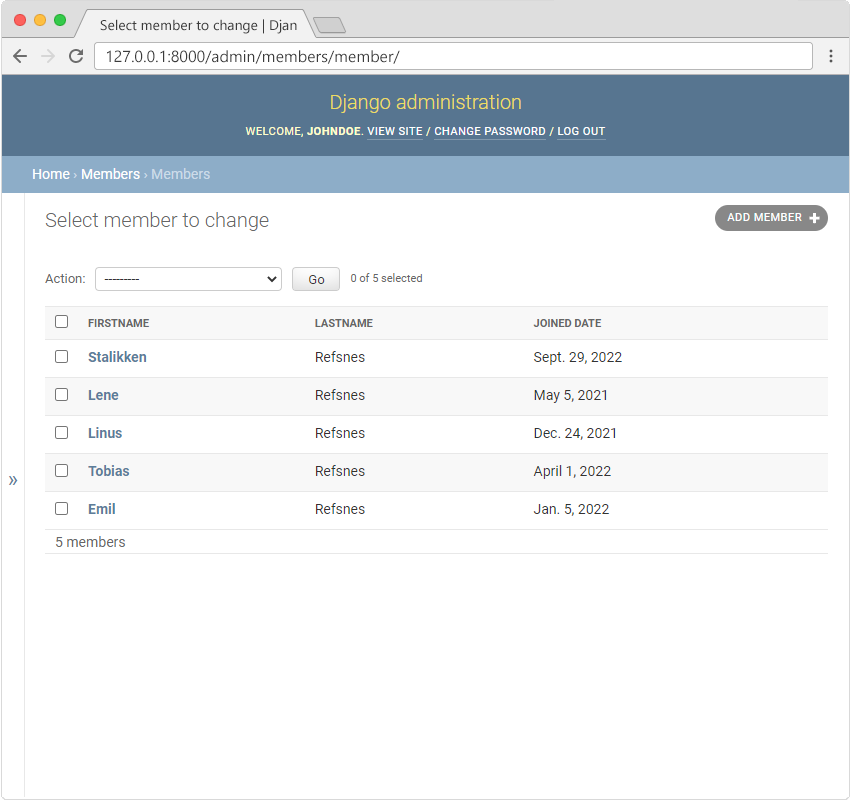
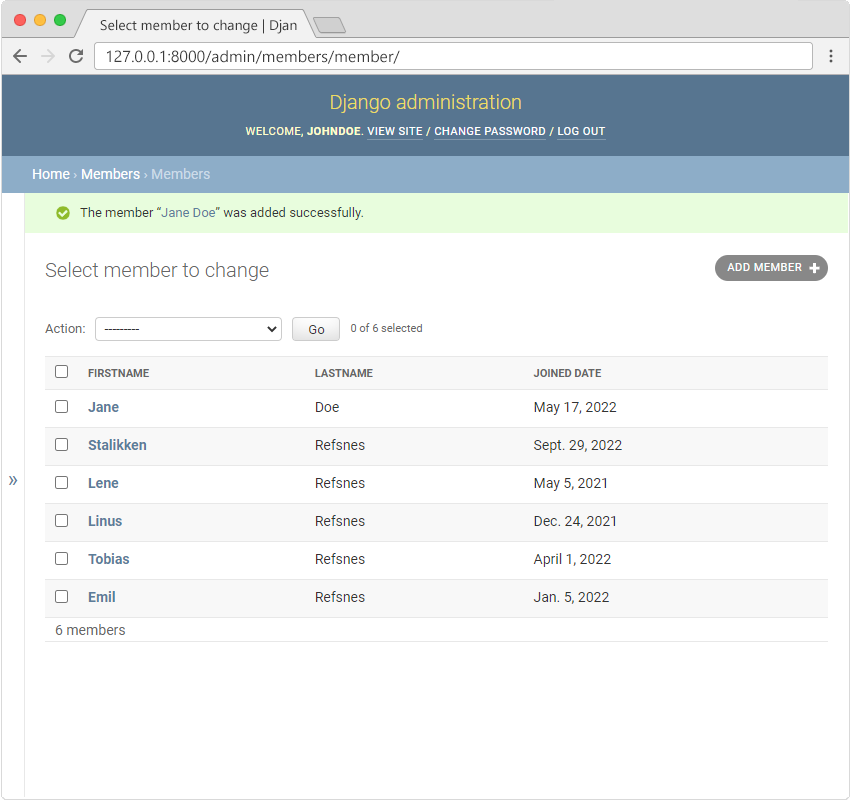
Members
The "My Tennis Club" project has no members: .
That is because we have created a brand new database, and it is empty.
The old SQLite database contained 5 members, so let us dive into the admin interface and add the same 5 members.
But first we have to create a new superuser.
Create superuser
Since we now have a new database, we have to create the superuser once again:
This is done by typing this command in the command view:
py manage.py createsuperuser
Which will give this prompt:
Here you must enter: username, e-mail address, (you can just pick a fake e-mail address), and password:
Username: johndoe
Email address:
[email protected]Password:
Password (again):
This password is too short. It must contain at least 8 characters.
This password is too common.
This password is entirely numeric.
Bypass password validation and create user anyway? [y/N]:
My password did not meet the criteria, but this is a test environment, and I choose to create user anyway, by enter y:
Bypass password validation and create user anyway? [y/N]: y
If you press [Enter], you should have successfully created a user:
Superuser created successfully.
Now start the server again:
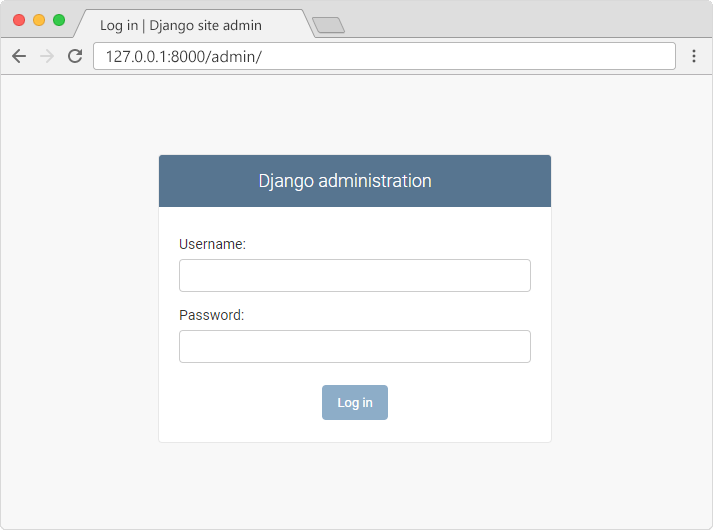
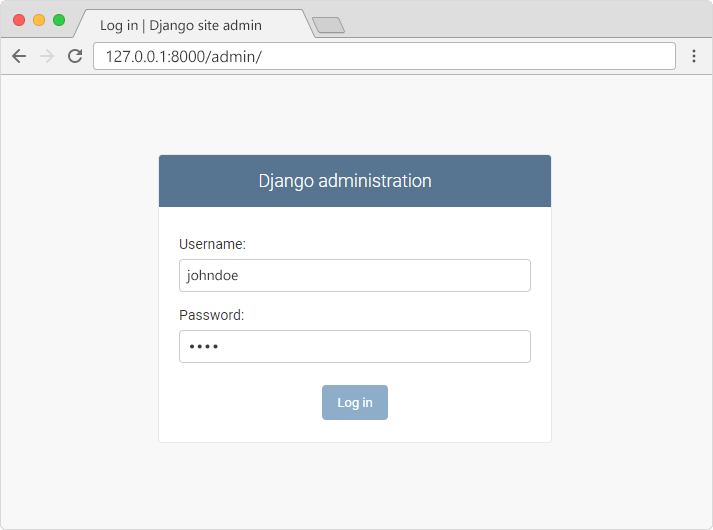
In the browser window, type in the address bar.
And fill in the form with the correct username and password:
Which should result in this interface:
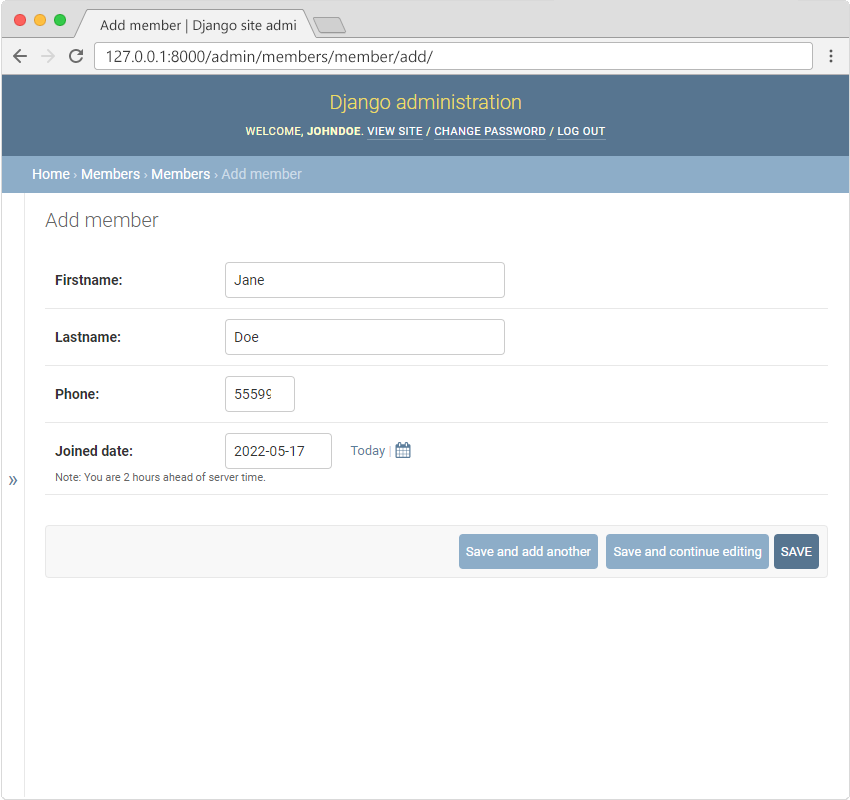
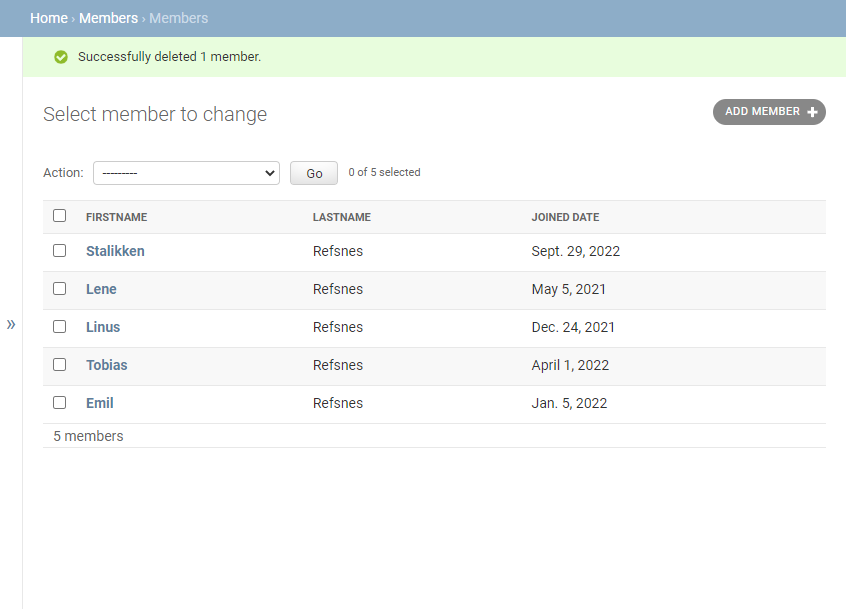
Add Members
When you are in the admin interface, click the "Add" button for "Members", and start inserting new members until you have a list like this:
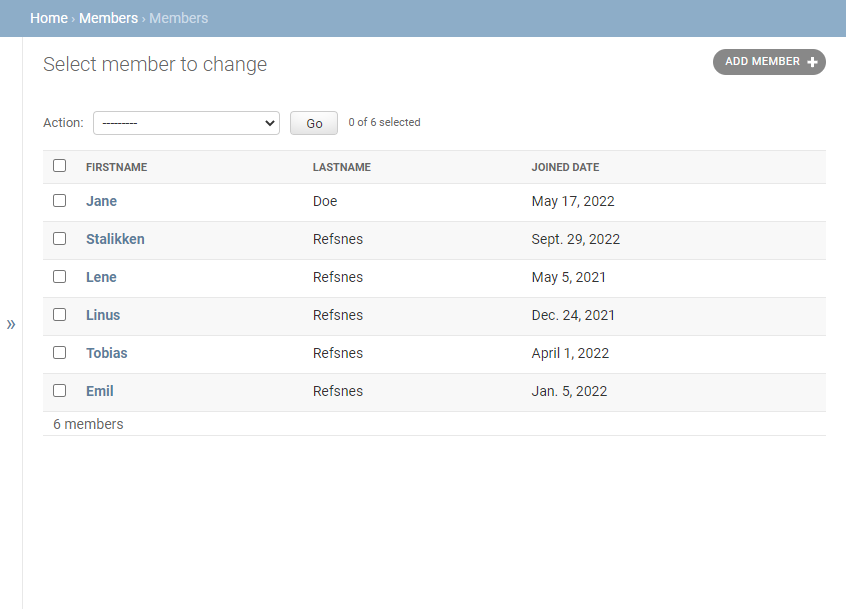
My Tennis Club
In the browser window, type in the address bar.
And once again you have a Tennis Club page with 5 members!
Next: let's , so that the whole world can see it!
.jpg)
Deploy to the World
To deploy a project means to make it visible for other people on the internet.
So far, in this tutorial, we have made a Django project that runs locally on your computer. This is often called, "in development", and when we have deployed it, we call it "in production".
Where to Deploy?
There are many providers out there that offers servers for Django projects. In this tutorial we will use the Amazon Web Services (AWS) platform, mainly because they offer a free solution that only requires you to create an AWS account.
Note: you can choose whatever server provider you like, they will all give you the same result, but they will have some provider-specific settings that you should be aware of when following this tutorial.
AWS
Log into your AWS account. (If you do not have an AWS account, follow the steps in the Create AWS Account chapter.)
AWS Console
Once you have signed in, you should be directed to the AWS Console Home page:
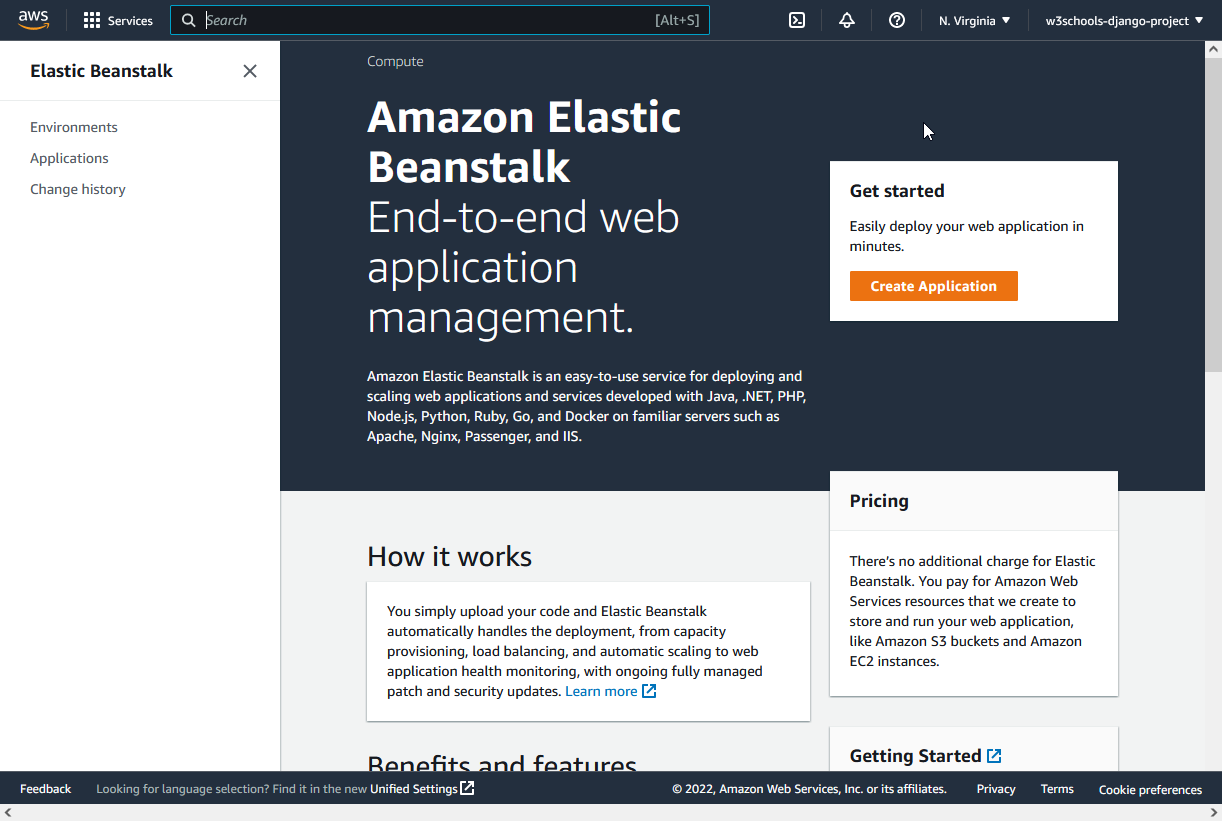
Elastic Beanstalk
We will be using a service called "Elastic Beanstalk" to deploy the Django project.
In the search field at the top, search for "elastic beanstalk", and click to start the service:
Lock in Dependencies
Once you have started the "Elastic Beanstalk" service, we could start with the deployment, but first we need to lock in some dependencies, which means to make you local Django project ready for deployment.
You will learn how to in the next chapters.
.png)
Lock in Dependencies
When you create a Django application, there are some Python packages that your project depends on.
Django itself is a Python package, and we have to make sure that the server where we deploy our project also has the Django package installed, and all the other packages your project requires.
Luckily there is a command for this as well, just run this command in the command view:
py -m pip freeze > requirements.txt
The result of the above command, is a file called requirements.txt being created in the project:
my_tennis_club
members/
my_tennis_club/
mystaticfiles/
productionfiles/
db.sqlite3
manage.py
requirements.txt
The file contains all the packages that this project depends on: with this content:
my_tennis_club/requirements.txt:
asgiref==3.5.2
Django==4.1.4
psycopg2-binary==2.9.5
sqlparse==0.4.3
tzdata==2022.7
whitenoise==6.2.0
Note: You can create this file on your own, and insert the packages manually, just make sure you get all the packages your project depends on, and you must name the file requirements.txt.
Now the hosting provider knows which packages to install when we deploy our project.
But Elastic Beanstalk needs more information, go to the to create an "EB" config file.
Provider-Specific Settings
We have chosen AWS as our hosting provider, and Elastic Beanstalk as a service to deploy the Django project, and it has some specific requirements.
.ebextension Folder
It requires that you create a folder on the root level of your project called .ebextensions:
my_tennis_club
.ebextensions/
members/
my_tennis_club/
mystaticfiles/
productionfiles/
db.sqlite3
manage.py
requirements.txt
Create django.config File
In the .ebextensions folder, create a file called django.config:
my_tennis_club
.ebextensions/
django.config
Open the file and insert these settings:
my_tennis_club/.ebextensions/django.config:
option_settings:
aws:elasticbeanstalk:container:python:
WSGIPath: my_tennis_club.wsgi:application
Note: These steps are specific for AWS and Elastic beanstalk, but every provider has some provider-specific settings.
The next step is to wrap all the dependencies into one .zip file, which you will learn in the .
Zip Your Project
To wrap your project into a .zip file, you cannot zip the entire project folder, but choose the files and folders manually.
The files to include in the .zip file are highlighted (blue) in the example below:
my_tennis_club
.ebextensions/
members/
my_tennis_club/
mystaticfiles/
productionfiles/
db.sqlite3
manage.py
requirements.txt
With your file explorer, navigate to the project folder, select these files and folders, right-click and choose to create a zip file.
Zip File
Now you have a .zip file of your project which you can upload to Elastic beanstalk:
my_tennis_club
.ebextensions/
members/
my_tennis_club/
mystaticfiles/
productionfiles/
db.sqlite3
manage.py
my_tennis_clup.zip
requirements.txt
Elastic Beanstalk
In AWS, navigate to the Elastic Beanstalk application, as we did in the Choose Provider chapter, and click the "Create application" button:
Create EB Application
Once you have clicked the "Create Application" button, you will be taken to this page, where you can give your Django project a name. I will name it "my-first-django":
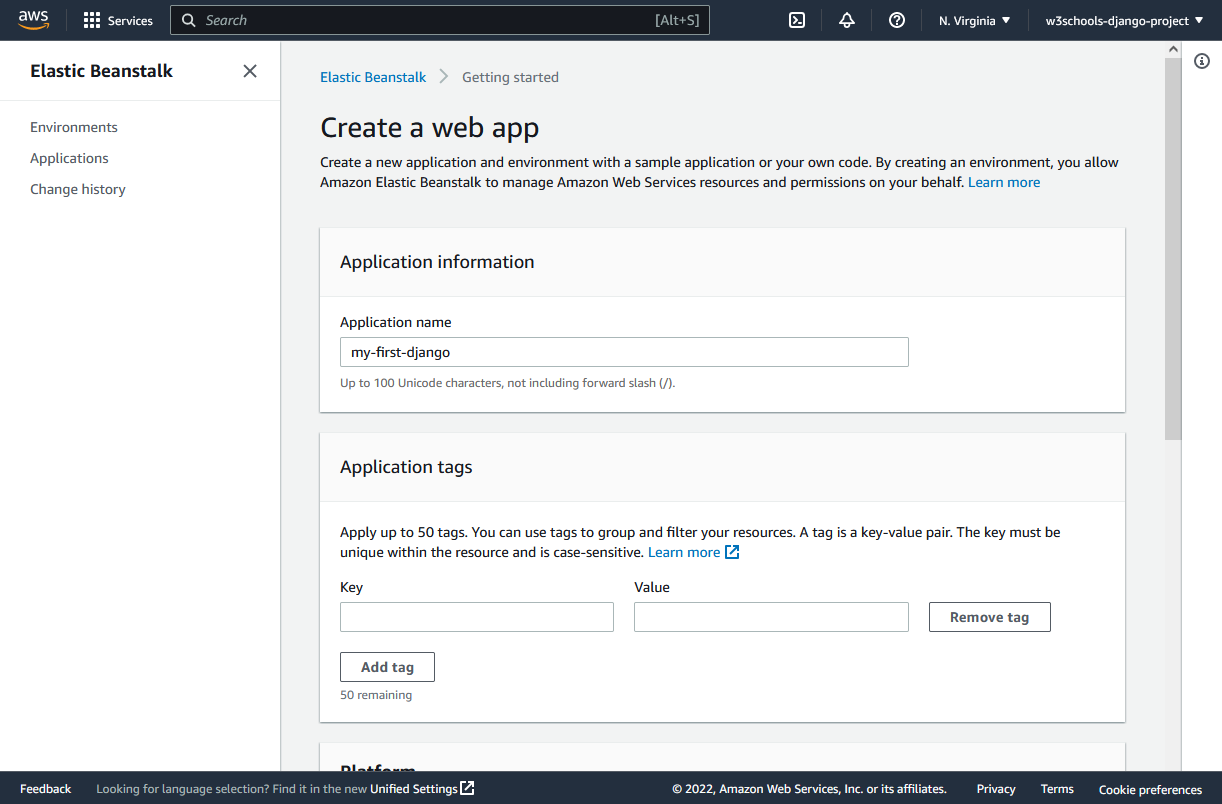
Choose Platform
Then scroll down until you see the "Platform" section, and choose "Python", with the recommended version:

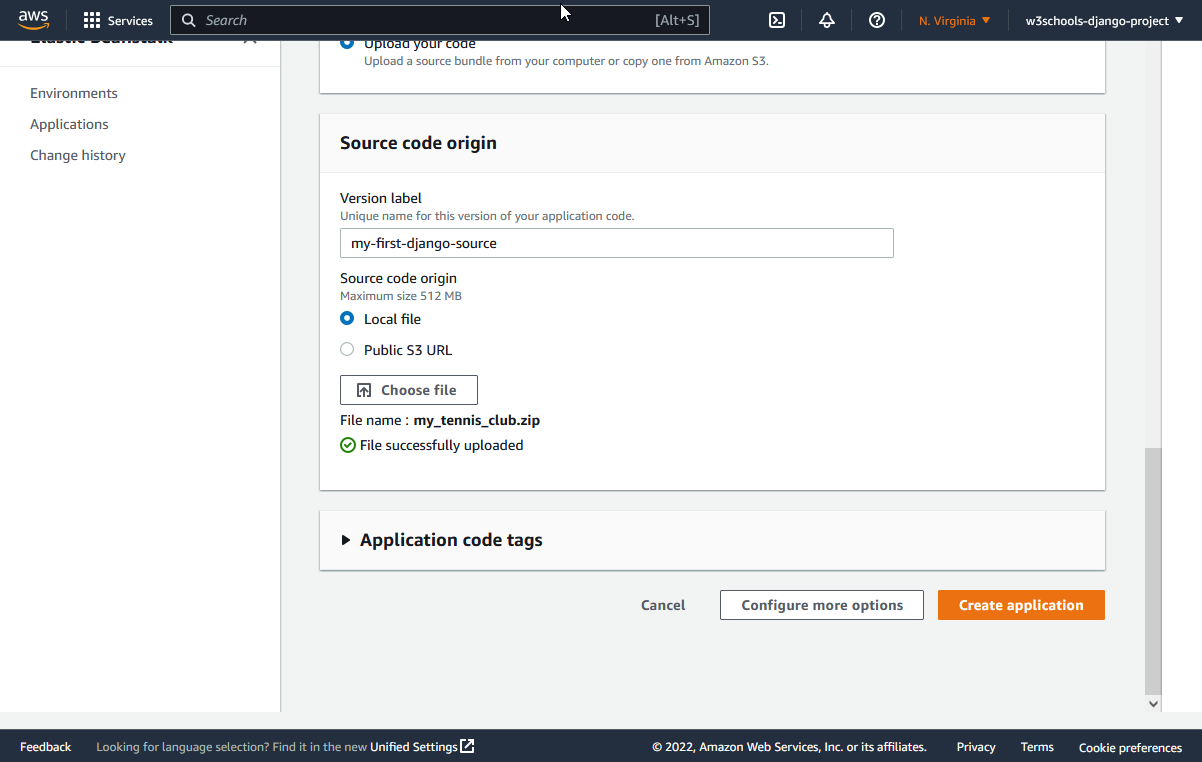
Upload .zip File
Next, scroll down to the next section, the "Application code" section, and choose "Upload your code".
Click on the "Choose file" button, navigate to the .zip file you created in the previous chapter and upload it:

The .zip file is uploaded, and we are ready to deploy!
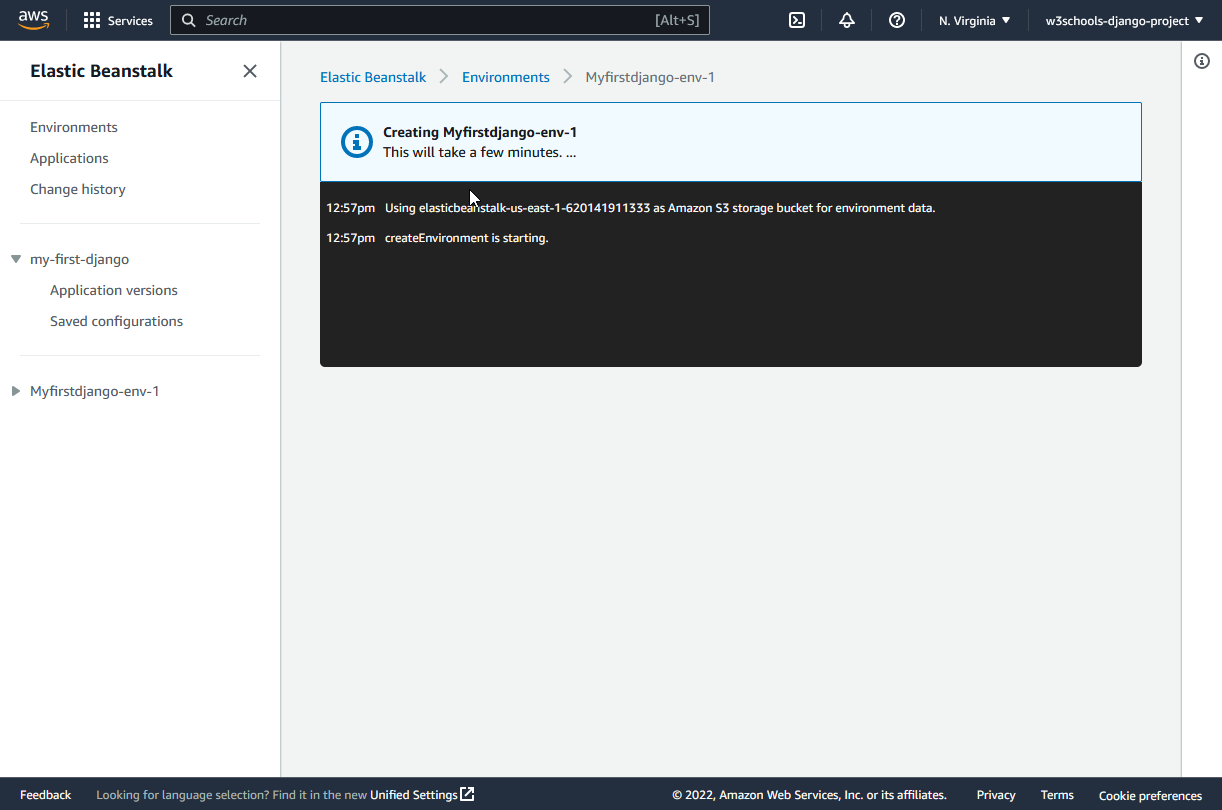
Deploy
Click the "Create application" button to start deploying.
Waiting
The deployment will take a few minutes.
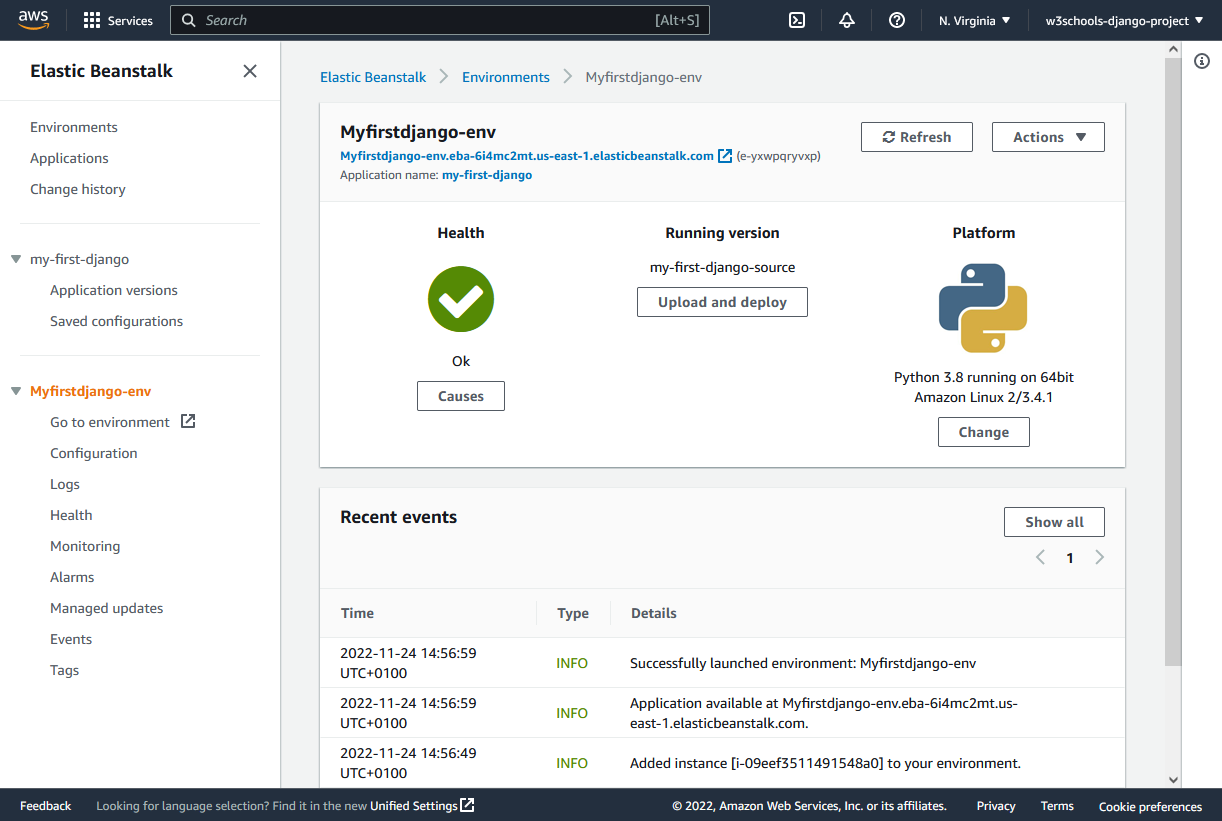
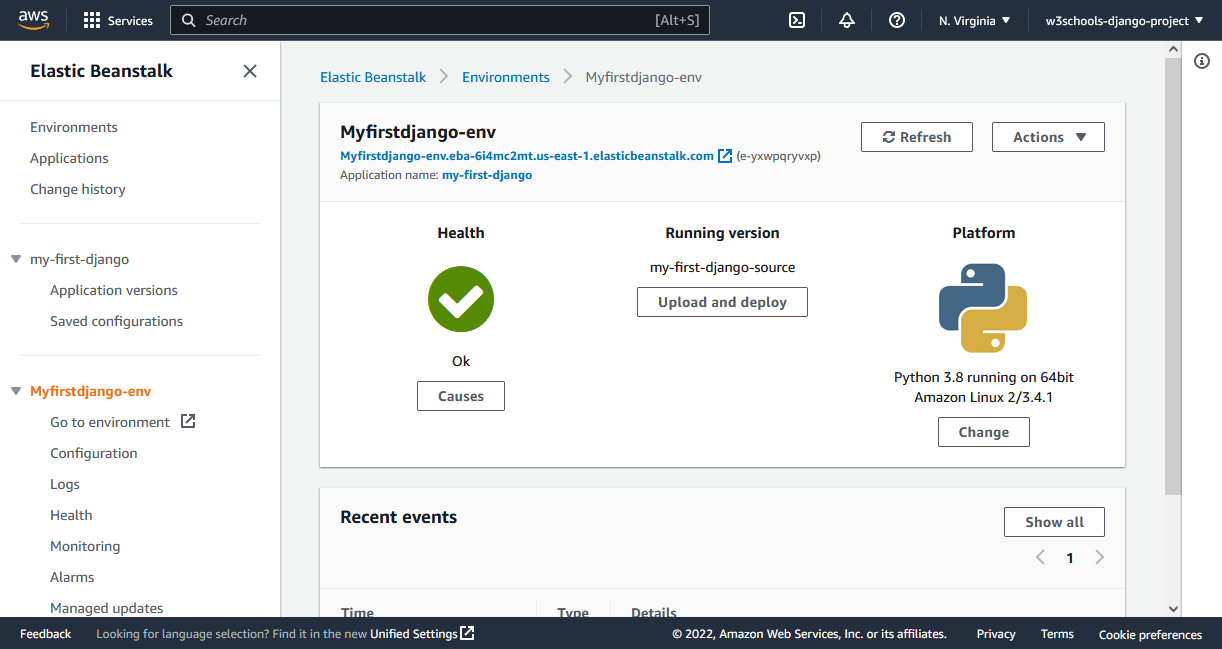
Success!
Finally the project is live, and you can view it by clicking the link below the Myfirstdjango-env header, or type the host address in your browser:
Deploy Changes
Any changes you do with the application locally, on your own computer, is not visible on the deployed version.
So if you make a change, and you want it to be visible on the deployed version, you have to upload a new .zip file.
Create .zip file
To wrap your project into a .zip file, follow the steps described in the Create .zip File chapter:
Start by selecting the relevant files and folders of your project, if you have the same project as we have in our tutorial, you should select the highlighted files in the example below:
my_tennis_club
.ebextensions/
members/
my_tennis_club/
mystaticfiles/
productionfiles/
db.sqlite3
manage.py
requirements.txt
Right-click and choose to create a .zip file.
Now you have a .zip file, containing the changes, and you can upload it to Elastic beanstalk:
my_tennis_club
.ebextensions/
members/
my_tennis_club/
mystaticfiles/
productionfiles/
db.sqlite3
manage.py
my_tennis_clup.zip
requirements.txt
Upload to Elastic Beanstalk
Log into your Amazon Web Services account, and find your project under the "Elastic Beanstalk" application:
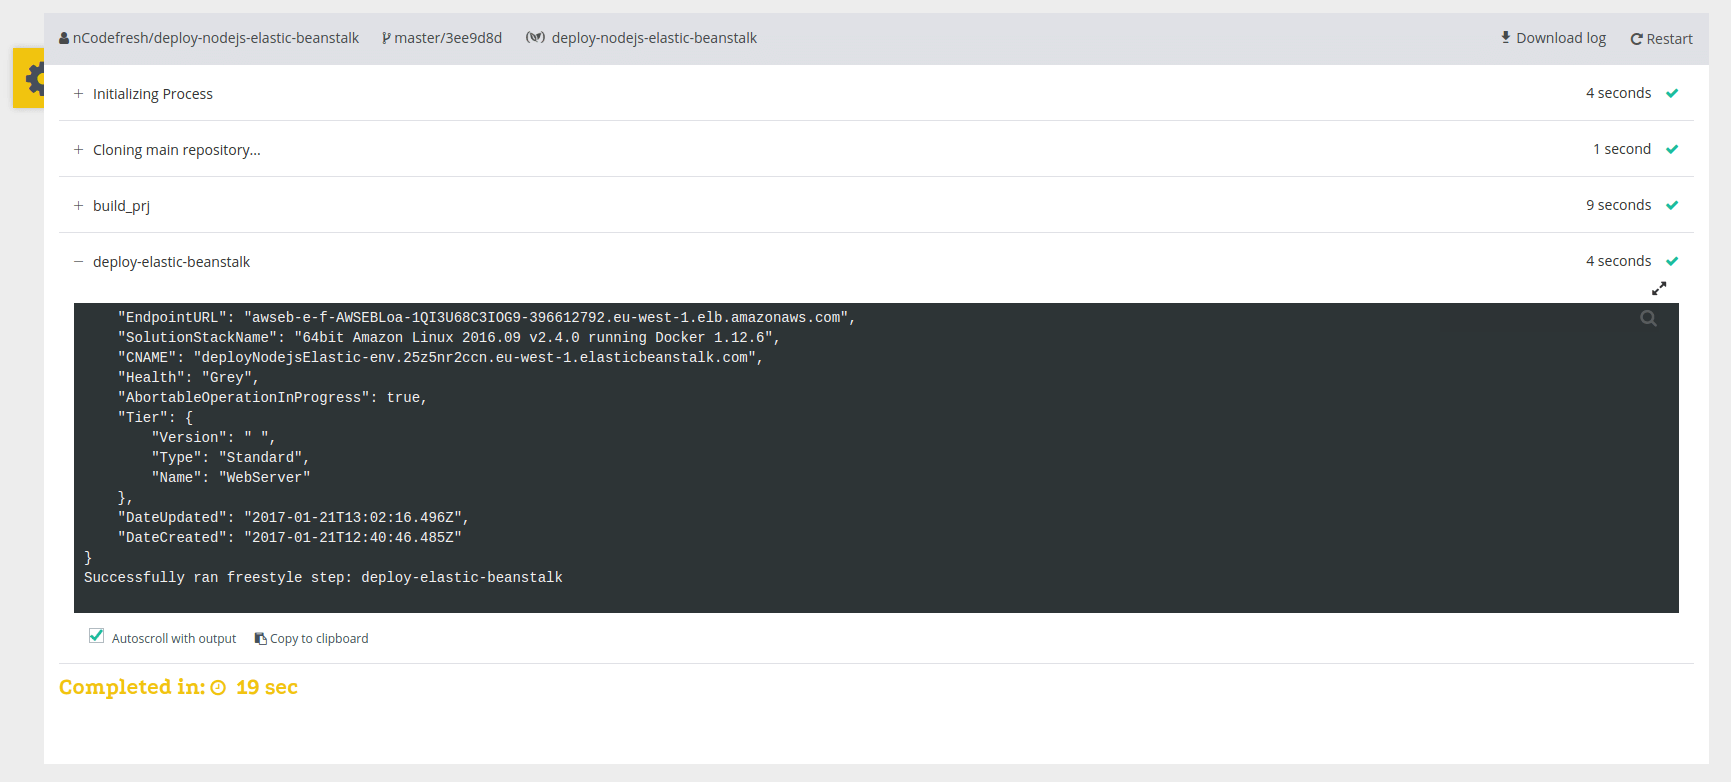
Click the "Upload and deploy" button.
Choose .zip File
Click the "Choose file" button to upload the .zip file you just created:

Deploy
Click the "Deploy" button:
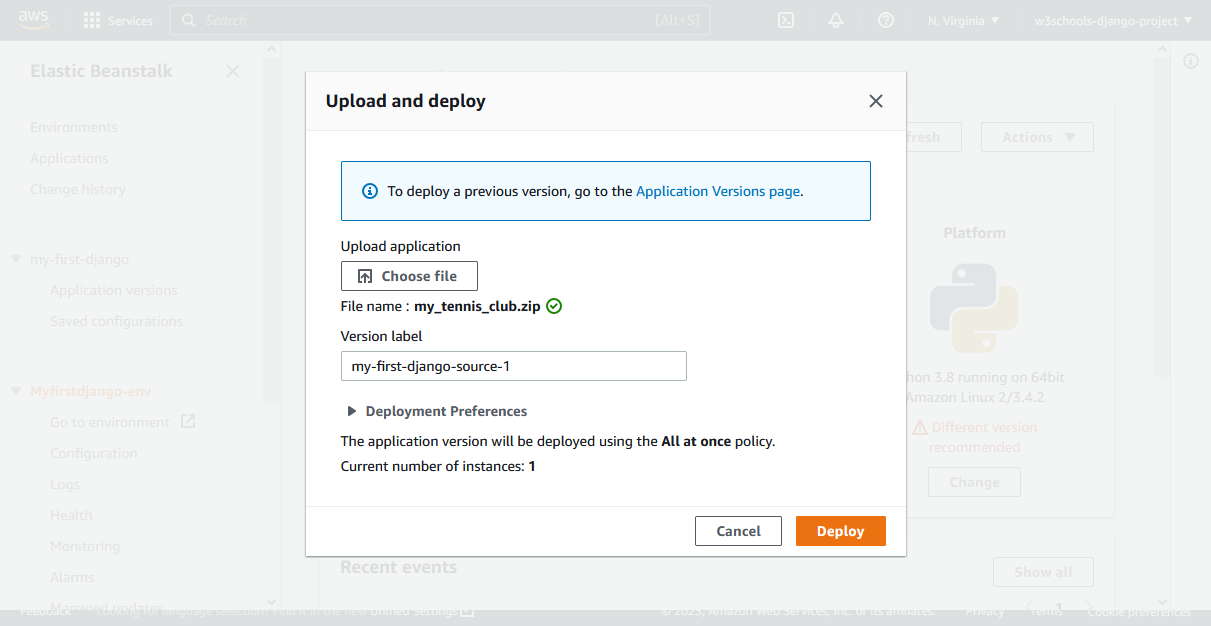
Uploaded!
That's it, your project is updated with all the new changes.
Note: Follow these steps every time you want to update your project.
What is Slug?
Have you ever seen url's that look like this:
w3schools.com/django/learn-about-slug-field
The "learn-about-slug-field" part is a slug.
It is a description containing only letters, hyphens, numbers or underscores.
It is often used in url's to make them easier to read, but also to make them more search engine friendly.
Url Without Slug
If you have followed our Django Project created in this tutorial, you will have a small Django project looking like this:
And if you click the first member, you will jump to this page:
Check out the address bar:
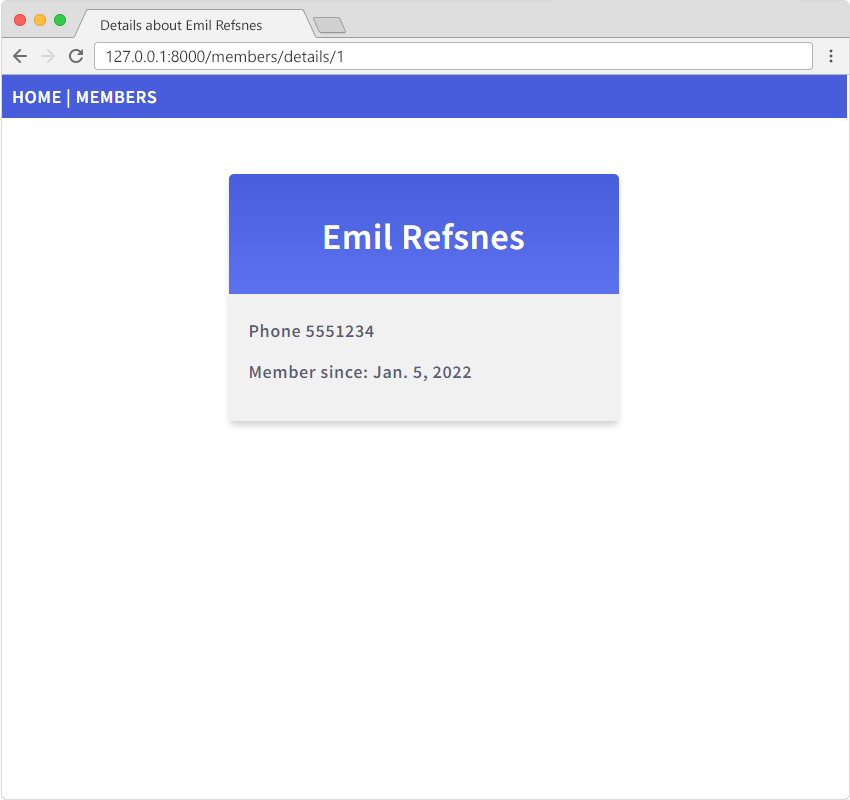
127.0.0.1:8000/members/details/1
The number "1" refers to the ID of that particular record in the database.
Makes sense to the developer, but probably not to anyone else.
Url With Slug
It would have made more sense if the url looked like this:
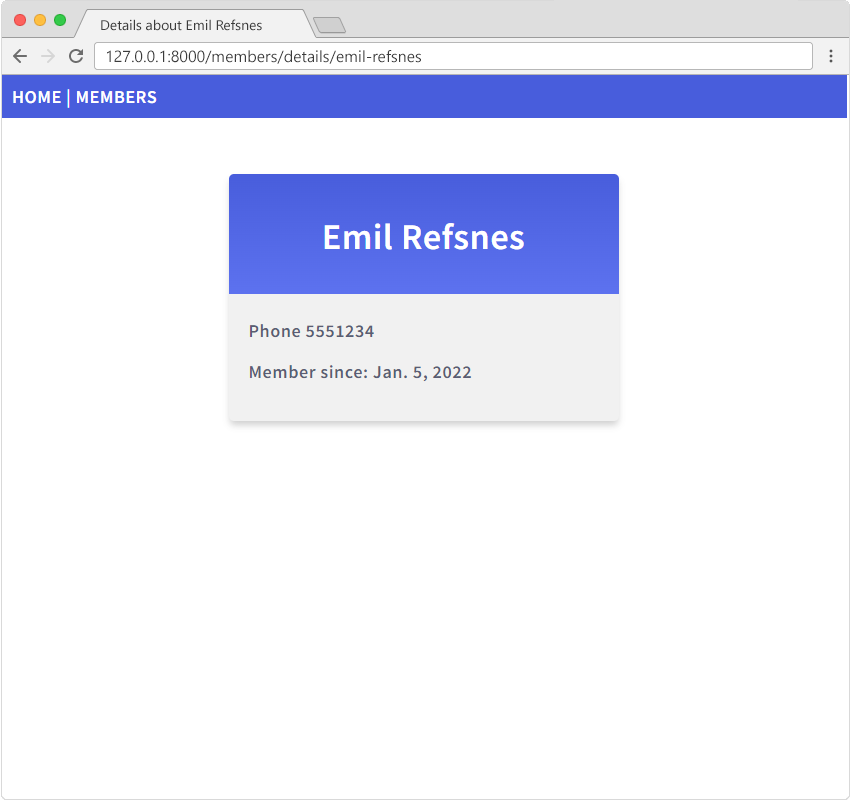
Check out the address bar:
127.0.0.1:8000/members/details/emil-refsnes
That is a more user friendly url, and Django can help you create such url's in your project.
Modify the models.py File
Start by adding a new field in the database.
Open the models.py file and add a field called slug with the data type SlugField:
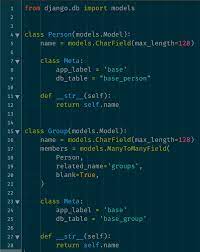
my_tennis_club/members/models.py:
from django.db import models

class Member(models.Model):
  firstname = models.CharField(max_length=255)
  lastname = models.CharField(max_length=255)
  phone = models.IntegerField(null=True)
  joined_date = models.DateField(null=True)
slug = models.SlugField(default="", null=False)
def __str__(self):
return f"{self.firstname} {self.lastname}"
This is a change in the Model's structure, and therefor we have to make a migration to tell Django that it has to update the database:
py manage.py makemigrations
And the migrate command:
py manage.py migrate
Change Admin
Now we have a new field in the database, but we also want this field to be updated automatically when we set the firstname or lastname of a member.
This can be done with a built-in Django feature called prepopulated_fields where you specify the field you want to pre-populate, and a tuple with the field(s) you want to populate it with.
This is done in the admin.py file:
my_tennis_club/members/admin.py:
from django.contrib import admin
from .models import Member
# Register your models here.
class MemberAdmin(admin.ModelAdmin):
list_display = ("firstname", "lastname", "joined_date",)
prepopulated_fields = {"slug": ("firstname", "lastname")}
admin.site.register(Member, MemberAdmin)
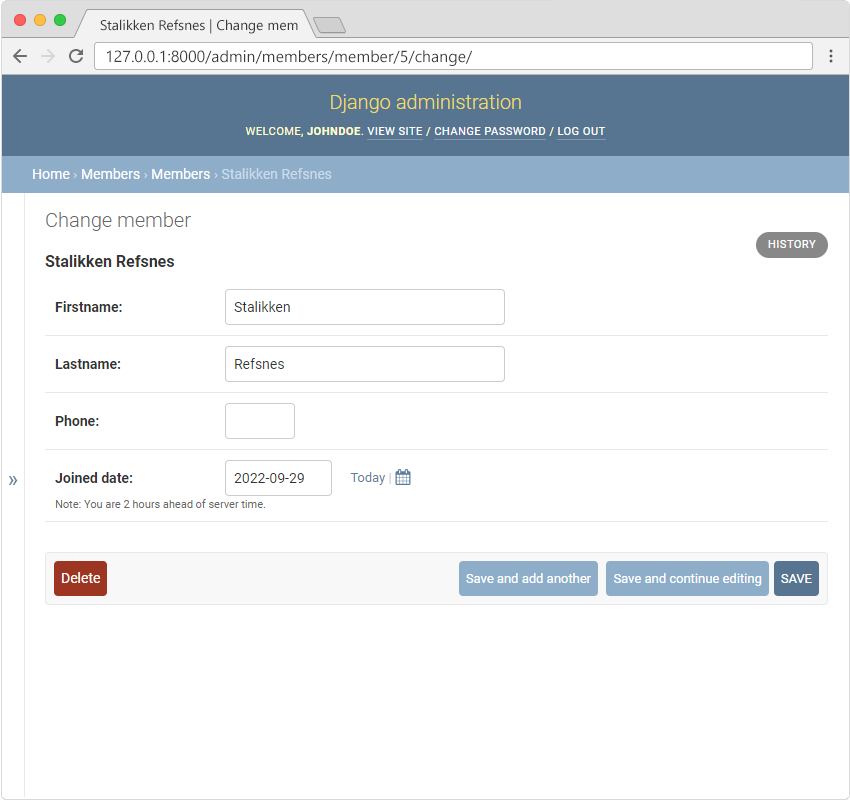
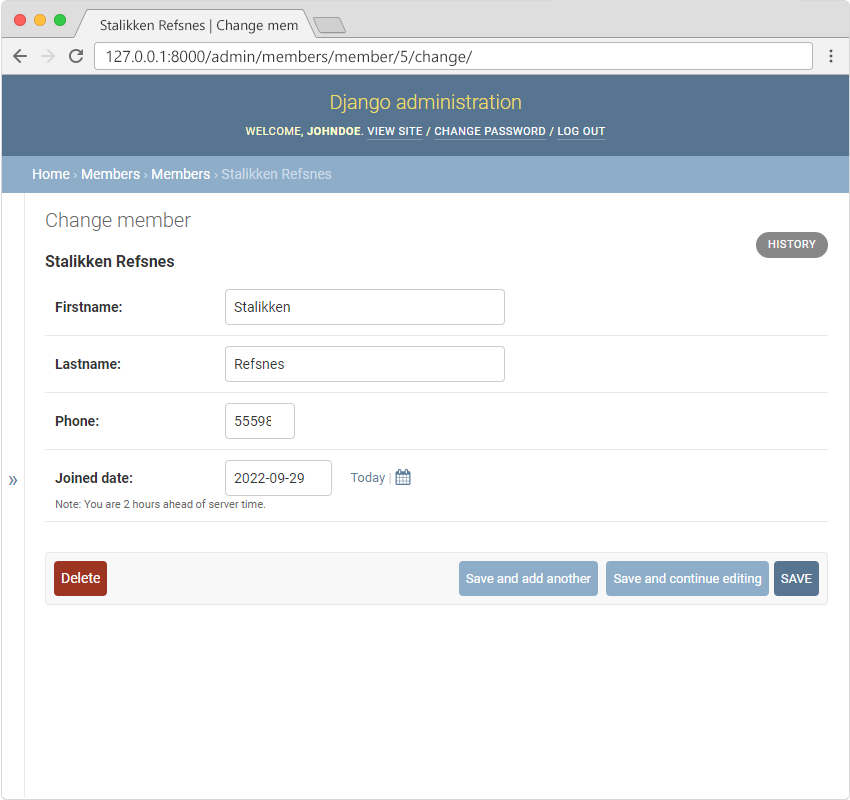
Enter the Admin interface and open a record for editing:

Click "SAVE" and the "slug" field will be auto populated with the firstname and the lastname, and since the "slug" field is of type SlugField, it will "slugify" the value, meaning it will put a hyphen between each word.
Next time you open the member for editing you will see the slug field with value:
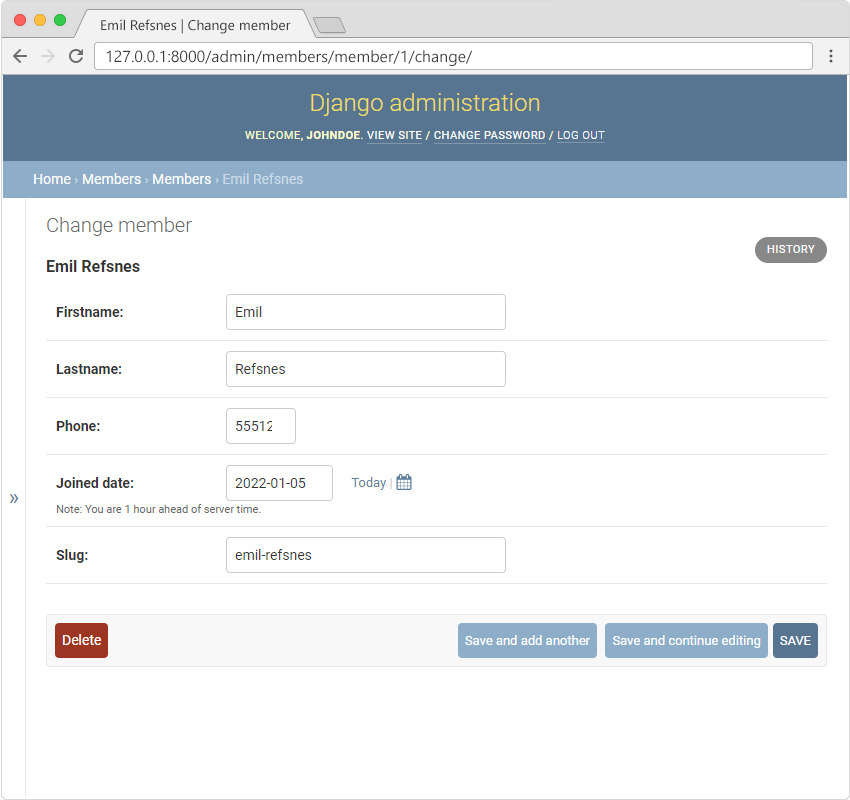
Note: Since the new field is empty by default, you have to do this save operation for each member.
Modify Template
Now we can replace the ID field with the slug field throughout the project.

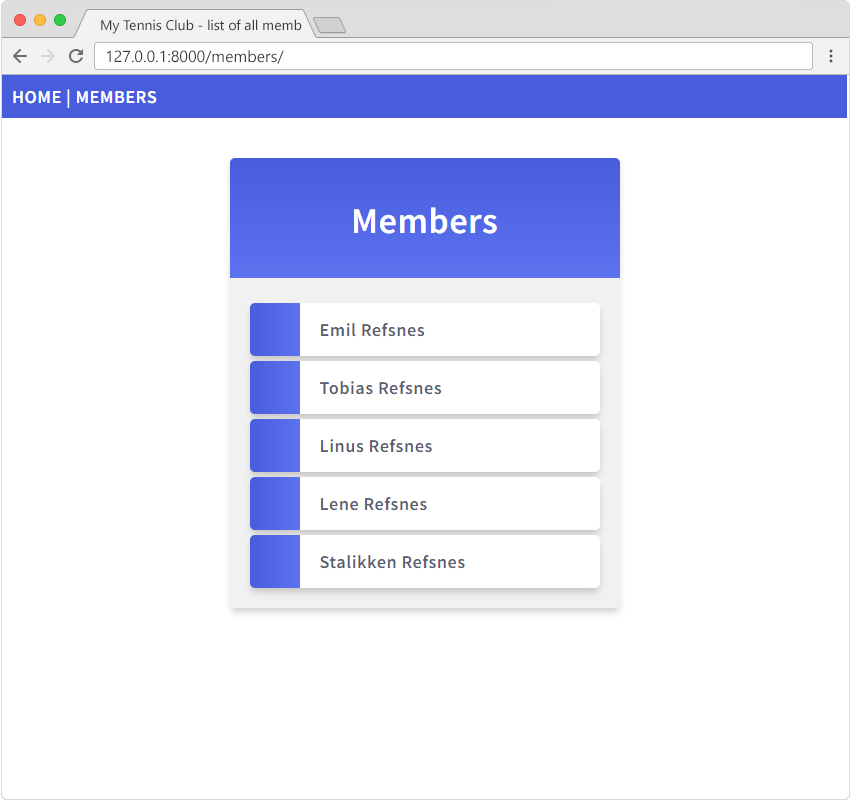
Add Bootstrap 5
There are two main methods to use bootstrap in your Django project. Either by downloading the required files and include them in your project, or you can install the bootstrap 5 module in your .
We will use the second method, installing Bootstrap 5 in the virtual environment.
Install Bootstrap 5
Bootstrap 5 should be installed in the virtual environment.
We will install it in an existing project, the , created earlier in this tutorial.
Open the command view, navigate to the virtual environment folder and activate the virtual environment:
Once you are inside the virtual environment, install Bootstrap 5 with this command:
pip install django-bootstrap-v5
Which will give you a result like this:
Collecting django-bootstrap-v5
Downloading django_bootstrap_v5-1.0.11-py3-none-any.whl (24 kB)
Requirement already satisfied: django<5.0,>=2.2 in c:usersyour namemyworldlibsite-packages (from django-bootstrap-v5) (4.1.4)
Collecting beautifulsoup4<5.0.0,>=4.8.0
Downloading beautifulsoup4-4.11.1-py3-none-any.whl (128 kB)
|████████████████████████████████| 128 kB 6.4 MB/s
Requirement already satisfied: tzdata; sys_platform == "win32" in c:usersyour namemyworldlibsite-packages (from django<5.0,>=2.2->django-bootstrap-v5) (2022.7)
Requirement already satisfied: asgiref<4,>=3.5.2 in c:usersyour namemyworldlibsite-packages (from django<5.0,>=2.2->django-bootstrap-v5) (3.5.2)
Requirement already satisfied: sqlparse>=0.2.2 in c:usersyour namemyworldlibsite-packages (from django<5.0,>=2.2->django-bootstrap-v5) (0.4.3)
Collecting soupsieve>1.2
Downloading soupsieve-2.3.2.post1-py3-none-any.whl (37 kB)
Installing collected packages: soupsieve, beautifulsoup4, django-bootstrap-v5
Successfully installed beautifulsoup4-4.11.1 django-bootstrap-v5-1.0.11 soupsieve-2.3.2.post1
Update Settings
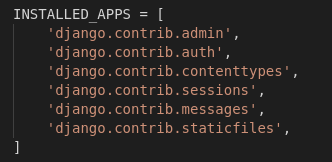
Next step is to include the bootstrap module in the INSTALLED_APPS list in settings.py:
my_tennis_club/my_tennis_club/settings.py:
INSTALLED_APPS = [
'django.contrib.admin',
'django.contrib.auth',
'django.contrib.contenttypes',
'django.contrib.sessions',
'django.contrib.messages',
'django.contrib.staticfiles',
'members',
'bootstrap5',
]
Bootstrap 5 is now ready to use in your project!
Remove Old Styling
ThThe My Tennis Club project already has a stylesheet, remove it and the Members page without styling will look like this:
Add Bootstrap 5 to Template
To use Bootstrap 5 in the project, start by inserting some lines of code in the master.html template:
my_tennis_club/members/templates/master.html:
{% load bootstrap5 %}
{% bootstrap_css %}
{% bootstrap_javascript %}
{% block content %} {% endblock %}
As you can see, we inserted these three lines in the section:
{% load bootstrap5 %}
{% bootstrap_css %}
{% bootstrap_javascript %}
The first line tells Django that it should load the Bootstrap 5 module in this template.
The second line inserts the element with the referral to the bootstrap stylesheet.
The third line inserts the
A list of all template tags:
|
Tag
|
Description
|
|
autoescape
|
Specifies if autoescape mode is on or off
|
|
block
|
Specifies a block section
|
|
comment
|
Specifies a comment section
|
|
csrf_token
|
Protects forms from Cross Site Request Forgeries
|
|
cycle
|
Specifies content to use in each cycle of a loop
|
|
debug
|
Specifies debugging information
|
|
extends
|
Specifies a parent template
|
|
filter
|
Filters content before returning it
|
|
firstof
|
Returns the first not empty variable
|
|
for
|
Specifies a for loop
|
|
if
|
Specifies a if statement
|
|
ifchanged
|
Used in for loops. Outputs a block only if a value has changed since the last iteration
|
|
include
|
Specifies included content/template
|
|
load
|
Loads template tags from another library
|
|
lorem
|
Outputs random text
|
|
now
|
Outputs the current date/time
|
|
regroup
|
Sorts an object by a group
|
|
resetcycle
|
Used in cycles. Resets the cycle
|
|
spaceless
|
Removes whitespace between HTML tags
|
|
templatetag
|
Outputs a specified template tag
|
|
url
|
Returns the absolute URL part of a URL
|
|
verbatim
|
Specifies contents that should not be rendered by the template engine
|
|
widthratio
|
Calculates a width value based on the ratio between a given value and a max value
|
|
with
|
Specifies a variable to use in the block
|

A list of all filter keywords:
|
Keyword
|
Description
|
|
add
|
Adds a specified value.
|
|
addslashes
|
Adds a slash before any quote characters, to escape strings.
|
|
capfirst
|
Returns the first letter in uppercase.
|
|
center
|
Centers the value in the middle of a specified width.
|
|
cut
|
Removes any specified character or phrases.
|
|
date
|
Returns dates in the specified format.
|
|
default
|
Returns a specified value if the value is False.
|
|
default_if_none
|
Returns a specified value if the value is None.
|
|
dictsort
|
Sorts a dictionary by the given value.
|
|
dictsortreversed
|
Sorts a dictionary reversed, by the given value.
|
|
divisibleby
|
Returns True if the value can be divided by the specified number, otherwise it returns False.
|
|
escape
|
Escapes HTML code from a string.
|
|
escapejs
|
Escapes JavaScript code from a string.
|
|
filesizeformat
|
Returns a number into a file size format.
|
|
first
|
Returns the first item of an object (for Strings, the first character is returned).
|
|
floatformat
|
Rounds floating numbers to a specified number of decimals, default one decimal.
|
|
force_escape
|
Escapes HTML code from a string.
|
|
get_digit
|
Returns a specific digit of a number.
|
|
iriencode
|
Convert an IRI into a URL friendly string.
|
|
join
|
Returns the items of a list into a string.
|
|
json_script
|
Returns an object into a JSON object surrounded by <script></script> tags.
|
|
last
|
Returns the last item of an object (for Strings, the last character is returned).
|
|
length
|
Returns the number of items in an object, or the number of characters in a string.
|
|
length_is
|
Returns True if the length is the same as the specified number
|
|
linebreaks
|
Returns the text with <br> instead of line breaks, and <p> instead of more than one line break.
|
|
linebreaksbr
|
Returns the text with <br> instead of line breaks.
|
|
linenumbers
|
Returns the text with line numbers for each line.
|
|
ljust
|
Left aligns the value according to a specified width
|
|
lower
|
Returns the text in lower case letters.
|
|
make_list
|
Converts a value into a list object.
|
|
phone2numeric
|
Converts phone numbers with letters into numeric phone numbers.
|
|
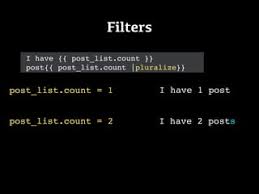
pluralize
|
Adds a 's' at the end of a value if the specified numeric value is not 1.
|
|
pprint
|
|
|
random
|
Returns a random item of an object
|
|
rjust
|
Right aligns the value according to a specified width
|
|
safe
|
Marks that this text is safe and should not be HTML escaped.
|
|
safeseq
|
Marks each item of an object as safe and the item should not be HTML escaped.
|
|
slice
|
Returns a specified slice of a text or object.
|
|
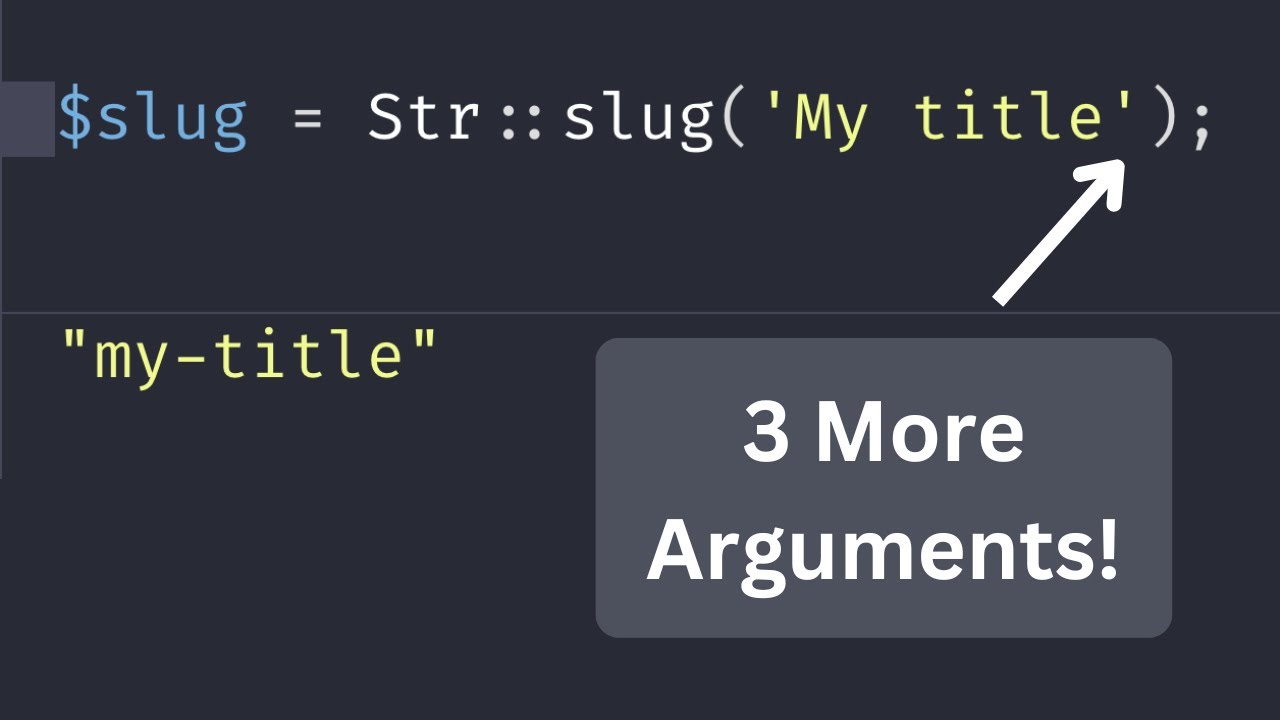
slugify
|
Converts text into one long alphanumeric-lower-case word.
|
|
stringformat
|
Converts the value into a specified format.
|
|
striptags
|
Removes HTML tags from a text.
|
|
time
|
Returns a time in the specified format.
|
|
timesince
|
Returns the difference between two datetimes.
|
|
timeuntil
|
Returns the difference between two datetimes.
|
|
title
|
Upper cases the first character of each word in a text, all other characters are converted to lower case.
|
|
truncatechars
|
Shortens a string into the specified number of characters.
|
|
truncatechars_html
|
Shortens a string into the specified number of characters, not considering the length of any HTML tags.
|
|
truncatewords
|
Shortens a string into the specified number of words.
|
|
truncatewords_html
|
Shortens a string into the specified number of words, not considering any HTML tags.
|
|
unordered_list
|
Returns the items of an object as an unordered HTML list.
|
|
upper
|
Returns the text in upper case letters.
|
|
urlencode
|
URL encodes a string.
|
|
urlize
|
Returns any URLs in a string as HTML links.
|
|
urlizetrunc
|
Returns any URLs in a string as HTML links, but shortens the links into the specified number of characters.
|
|
wordcount
|
Returns the number of words in a text.
|
|
wordwrap
|
.png)
Field Lookups Reference
A list of all field look up keywords:
|
Keyword
|
Description
|
|
contains
|
Contains the phrase
|
|
icontains
|
Same as contains, but case-insensitive
|
|
date
|
Matches a date
|
|
day
|
Matches a date (day of month, 1-31) (for dates)
|
|
endswith
|
Ends with
|
|
iendswith
|
Same as endswidth, but case-insensitive
|
|
exact
|
An exact match
|
|
iexact
|
Same as exact, but case-insensitive
|
|
in
|
Matches one of the values
|
|
isnull
|
Matches NULL values
|
|
gt
|
Greater than
|
|
gte
|
Greater than, or equal to
|
|
hour
|
Matches an hour (for datetimes)
|
|
lt
|
Less than
|
|
lte
|
Less than, or equal to
|
|
minute
|
Matches a minute (for datetimes)
|
|
month
|
Matches a month (for dates)
|
|
quarter
|
Matches a quarter of the year (1-4) (for dates)
|
|
range
|
Match between
|
|
regex
|
Matches a regular expression
|
|
iregex
|
Same as regex, but case-insensitive
|
|
second
|
Matches a second (for datetimes)
|
|
startswith
|
Starts with
|
|
istartswith
|
Same as startswith, but case-insensitive
|
|
time
|
Matches a time (for datetimes)
|
|
week
|
Matches a week number (1-53) (for dates)
|
|
week_day
|
Matches a day of week (1-7) 1 is Sunday
|
|
iso_week_day
|
Matches a ISO 8601 day of week (1-7) 1 is Monday
|
|
year
|
Matches a year (for dates)
|
|
iso_year
|
Matches an ISO 8601 year (for dates)
|
Django Compiler (Editor)
If you want to create your own website or build Python applications using Django, check out onedoubt.com.
onedoubt.com is a website-building tool that enables you to create and share your own website, as well as develop and host your Python applications using Django.
You have full control over the website's appearance and functionality by editing the code directly in your web browser.
onedoubt.com Spaces is user-friendly and requires no setup, making it easy to use.
Get started with Django by selecting the Python environment in Spaces.
The code editor is packed with features to help you achieve more:
- Templates: Start from scratch or use a template
- Cloud-based: no installations required. You only need your browser
- Terminal & Log: debug and troubleshoot your code easily
- File Navigator: switch between files inside the code editor
- And much more!
Learn Faster
Practice is key to mastering coding, and the best way to put your Django knowledge into practice is by getting practical with code.
Use onedoubt.com to build, test and deploy code.
The code editor lets you write and practice different types of computer languages. It includes Django, but you can use it for other languages too.
New languages are added all the time:
Learn More
If you don't know Django, we suggest that you read our Django Tutorial from scratch.
If you don't know Python, we suggest that you read our Python Tutorial from scratch.
Easy Package Management
Get an overview of your packages and easily add or delete frameworks and libraries. Then, with just one click, you can make changes to your packages without manual installation.

Build Powerful Websites
You can use the code editor in onedoubt.com to build frontend or full-stack websites from scratch.
Or you can use the 60+ templates available and save time
Create your Spaces account today and explore them all!
Share Your Website With The World
Host and publish your websites in no time with onedoubt.com.
W3Schools subdomain and SSL certificate are included for free with onedoubt.com. An SSL certificate makes your website safe and secure. It also helps people trust your website and makes it easier to find it online.
Want a custom domain for your website?
You can buy a domain or transfer an existing one and connect it to your space.
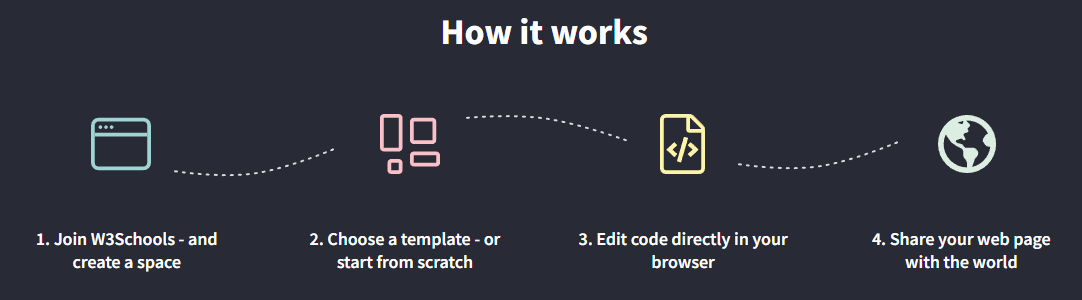
How Does It Work?
Get started in a few clicks with W3School Spaces.
Django Exercises
You can test your Django skills with W3Schools' Exercises.
Exercises
We have gathered a variety of Django exercises (with answers) for each Django Chapter.
Try to solve an exercise by editing some code, or show the answer to see what you've done wrong.
Count Your Score
You will get 1 point for each correct answer. Your score and total score will always be displayed.
Start Django Exercises
Good luck!
If you don't know Django, we suggest that you read our from scratch.
Django Quiz
You can test your Django skills with W3Schools' Quiz.
The Test
The test contains 25 questions and there is no time limit.
The test is not official, it's just a nice way to see how much you know about Django.
Count Your Score
You will get 1 point for each correct answer. At the end of the Quiz, your total score will be displayed. Maximum score is 25 points.
Start the Quiz
Good luck!
If you do not know Django, we suggest that you read our from scratch.
Document your skills
Improve your career
Study at your own pace
Save time and money
Known brand
Trusted by top companies
Who Should Consider Getting Certified?
Any student or professional within the digital industry.
Certifications are valuable assets to gain trust and demonstrate knowledge to your clients, current or future employers on a ever increasing competitive market.
W3Schools is Trusted by Top Companies
W3Schools has over two decades of experience with teaching coding online.
Our certificates are recognized and valued by companies looking to employ skilled developers.
Save Time and Money
Show the world your coding skills by getting a certification.
The prices is a small fraction compared to the price of traditional education.
Document and validate your competence by getting certified!
Exam overview
Fee: 95 USD
Number of questions: 70
Requirement to pass: 75% correct answers
Time limit: 70 minutes
Number of attempts to pass: Two
Exam deadline: None
Certification Expiration: None
Format: Online, multiple choice
Advance Faster in Your Career
Getting a certificate proves your commitment to upgrading your skills.
The certificate can be added as credentials to your CV, Resume, LinkedIn profile, and so on.
It gives you the credibility needed for more responsibilities, larger projects, and a higher salary.
Knowledge is power, especially in the current job market.
Documentation of your skills enables you to advance your career or helps you to start a new one.
How Does It Work?
- Study for free at W3Schools.com
- Study at your own speed
- Test your skills with W3Schools online quizzes
- Apply for your certificate by paying an exam fee
- Take your exam online, at any time, and from any location
Get Your Certificate and Share It With The World
Example certificate:

Each certificate gets a unique link that can be shared with others.
Validate your certification with the link or QR code.
Check how it looks like in this .
Share your certificate on LinkedIn in the Certifications section in just one click!
Document Your Skills
Getting a certificate proves your commitment to upgrade your skills, gives you the credibility needed for more responsibilities, larger projects, and a higher salary.
Looking to add multiple users?
Are you an educator, manager or business owner looking for courses or certifications?
We are working with schools, companies and organizations from all over the world.

Template Variables
In Django templates, you can render variables by putting them inside {{ }} brackets:
Example
templates/template.html:
<h1>Hello {{ firstname }}, how are you?</h1>
Create Variable in View
The variable firstname in the example above was sent to the template via a view:
views.py:
from django.http import HttpResponse
from django.template import loader
def testing(request):
template = loader.get_template('template.html')
context = {
'firstname': 'Linus',
}
return HttpResponse(template.render(context, request))
As you can see in the view above, we create an object named context and fill it with data, and send it as the first parameter in the template.render() function.
Create Variables in Template
You can also create variables directly in the template, by using the {% with %} template tag.
The variable is available until the {% endwith %} tag appears:
Example
templates/template.html:
{% with firstname="Tobias" %}
<h1>Hello {{ firstname }}, how are you?</h1>
{% endwith %}
You will learn more about template tags in the next chapter.
Data From a Model
The example above showed a easy approach on how to create and use variables in a template.
Normally, most of the external data you want to use in a template, comes from a model.
We have created a model in the previous chapters, called Member, which we will use in many examples in the next chapters of this tutorial.
To get data from the Member model, we will have to import it in the views.py file, and extract data from it in the view:
members/views.py:
from django.http import HttpResponse, HttpResponseRedirect
from django.template import loader
from .models import Member
def testing(request):
mymembers = Member.objects.all().values()
template = loader.get_template('template.html')
context = {
'mymembers': mymembers,
}
return HttpResponse(template.render(context, request))
Now we can use the data in the template:
templates/template.html:
<ul>
{% for x
A list of all filter keywords:
|
Keyword
|
Description
|
|
add
|
Adds a specified value.
|
|
addslashes
|
Adds a slash before any quote characters, to escape strings.
|
|
capfirst
|
Returns the first letter in uppercase.
|
|
center
|
Centers the value in the middle of a specified width.
|
|
cut
|
Removes any specified character or phrases.
|
|
date
|
Returns dates in the specified format.
|
|
default
|
Returns a specified value if the value is False.
|
|
default_if_none
|
Returns a specified value if the value is None.
|
|
dictsort
|
Sorts a dictionary by the given value.
|
|
dictsortreversed
|
Sorts a dictionary reversed, by the given value.
|
|
divisibleby
|
Returns True if the value can be divided by the specified number, otherwise it returns False.
|
|
escape
|
Escapes HTML code from a string.
|
|
escapejs
|
Escapes JavaScript code from a string.
|
|
filesizeformat
|
Returns a number into a file size format.
|
|
first
|
Returns the first item of an object (for Strings, the first character is returned).
|
|
floatformat
|
Rounds floating numbers to a specified number of decimals, default one decimal.
|
|
force_escape
|
Escapes HTML code from a string.
|
|
get_digit
|
Returns a specific digit of a number.
|
|
iriencode
|
Convert an IRI into a URL friendly string.
|
|
join
|
Returns the items of a list into a string.
|
|
json_script
|
Returns an object into a JSON object surrounded by <script></script> tags.
|
|
last
|
Returns the last item of an object (for Strings, the last character is returned).
|
|
length
|
Returns the number of items in an object, or the number of characters in a string.
|
|
length_is
|
Returns True if the length is the same as the specified number
|
|
linebreaks
|
Returns the text with <br> instead of line breaks, and <p> instead of more than one line break.
|
|
linebreaksbr
|
Returns the text with <br> instead of line breaks.
|
|
linenumbers
|
Returns the text with line numbers for each line.
|
|
ljust
|
Left aligns the value according to a specified width
|
|
lower
|
Returns the text in lower case letters.
|
|
make_list
|
Converts a value into a list object.
|
|
phone2numeric
|
Converts phone numbers with letters into numeric phone numbers.
|
|
pluralize
|
Adds a 's' at the end of a value if the specified numeric value is not 1.
|
|
pprint
|
|
|
random
|
Returns a random item of an object
|
|
rjust
|
Right aligns the value according to a specified width
|
|
safe
|
Marks that this text is safe and should not be HTML escaped.
|
|
safeseq
|
Marks each item of an object as safe and the item should not be HTML escaped.
|
|
slice
|
Returns a specified slice of a text or object.
|
|
slugify
|
Converts text into one long alphanumeric-lower-case word.
|
|
stringformat
|
Converts the value into a specified format.
|
|
striptags
|
Removes HTML tags from a text.
|
|
time
|
Returns a time in the specified format.
|
|
timesince
|
Returns the difference between two datetimes.
|
|
timeuntil
|
Returns the difference between two datetimes.
|
|
title
|
Upper cases the first character of each word in a text, all other characters are converted to lower case.
|
|
truncatechars
|
Shortens a string into the specified number of characters.
|
|
truncatechars_html
|
Shortens a string into the specified number of characters, not considering the length of any HTML tags.
|
|
truncatewords
|
Shortens a string into the specified number of words.
|
|
truncatewords_html
|
Shortens a string into the specified number of words, not considering any HTML tags.
|
|
unordered_list
|
Returns the items of an object as an unordered HTML list.
|
|
upper
|
Returns the text in upper case letters.
|
|
urlencode
|
URL encodes a string.
|
|
urlize
|
Returns any URLs in a string as HTML links.
|
|
urlizetrunc
|
Returns any URLs in a string as HTML links, but shortens the links into the specified number of characters.
|
|
wordcount
|
Returns the number of words in a text.
|
|
wordwrap
|
Wrap words at a specified number of characters.
|
|
yesno
|
Converts Booleans values into specified values.
|
|
i18n
|
|
|
l10n
|
|
|
tz
|
|
Template Variables
In Django templates, you can render variables by putting them inside {{ }} brackets:
ExampleGet your own Django Server
templates/template.html:
<h1>Hello {{ firstname }}, how are you?</h1>
Create Variable in View
The variable firstname in the example above was sent to the template via a view:
views.py:
from django.http import HttpResponse
from django.template import loader
def testing(request):
template = loader.get_template('template.html')
context = {
'firstname': 'Linus',
}
return HttpResponse(template.render(context, request))
As you can see in the view above, we create an object named context and fill it with data, and send it as the first parameter in the template.render() function.
Create Variables in Template
You can also create variables directly in the template, by using the {% with %} template tag.
The variable is available until the {% endwith %} tag appears:
Example
templates/template.html:
{% with firstname="Tobias" %}
<h1>Hello {{ firstname }}, how are you?</h1>
{% endwith %}
You will learn more about template tags in the next chapter.
Data From a Model
The example above showed a easy approach on how to create and use variables in a template.
Normally, most of the external data you want to use in a template, comes from a model.
We have created a model in the previous chapters, called Member, which we will use in many examples in the next chapters of this tutorial.
To get data from the Member model, we will have to import it in the views.py file, and extract data from it in the view:
members/views.py:
from django.http import HttpResponse, HttpResponseRedirect
from django.template import loader
from .models import Member
def testing(request):
mymembers = Member.objects.all().values()
template = loader.get_template('template.html')
context = {
'mymembers': mymembers,
}
return HttpResponse(template.render(context, request))
Now we can use the data in the template:
templates/template.html:
<ul>
{% for x in mymembers %}
<li>{{ x.firstname }}</li>
{% endfor %}
</ul>
We use the Django template tag {% for %} to loop through the members.
You will learn more about template tags in the next chapter.
Template Variables
In Django templates, you can render variables by putting them inside {{ }} brackets:
Example
templates/template.html:
<h1>Hello {{ firstname }}, how are you?</h1>
Create Variable in View
The variable firstname in the example above was sent to the template via a view:
views.py:
from django.http import HttpResponse
from django.template import loader
def testing(request):
template = loader.get_template('template.html')
context = {
'firstname': 'Linus',
}
return HttpResponse(template.render(context, request))
As you can see in the view above, we create an object named context and fill it with data, and send it as the first parameter in the template.render() function.
Create Variables in Template
You can also create variables directly in the template, by using the {% with %} template tag.
The variable is available until the {% endwith %} tag appears:
Example
templates/template.html:
{% with firstname="Tobias" %}
<h1>Hello {{ firstname }}, how are you?</h1>
{% endwith %}
You will learn more about template tags in the next chapter.
Data From a Model
The example above showed a easy approach on how to create and use variables in a template.
Normally, most of the external data you want to use in a template, comes from a model.
We have created a model in the previous chapters, called Member, which we will use in many examples in the next chapters of this tutorial.
To get data from the Member model, we will have to import it in the views.py file, and extract data from it in the view:
members/views.py:
from django.http import HttpResponse, HttpResponseRedirect
from django.template import loader
from .models import Member
def testing(request):
mymembers = Member.objects.all().values()
template = loader.get_template('template.html')
context = {
'mymembers': mymembers,
}
return HttpResponse(template.render(context, request))
Now we can use the data in the template:
templates/template.html:
Template Tags
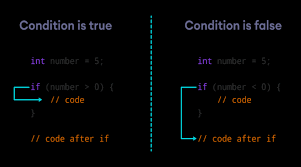
In Django templates, you can perform programming logic like executing if statements and for loops.
These keywords, if and for, are called "template tags" in Django.
To execute template tags, we surround them in {% %} brackets.
Example
templates/template.html:
{% if greeting == 1 %}
<h1>Hello</h1>
{% else %}
<h1>Bye</h1>
{% endif %}
Django Code
The template tags are a way of telling Django that here comes something else than plain HTML.
The template tags allows us to to do some programming on the server before sending HTML to the client.
templates/template.html:
<ul>
{% for x in mymembers %}
<li>{{ x.firstname }}</li>
{% endfor %}
</ul>
In the next chapters you will learn about the most common template tags.
Tag Reference
A list of all template tags:
|
Tag
|
Description
|
|
autoescape
|
Specifies if autoescape mode is on or off
|
|
block
|
Specifies a block section
|
|
comment
|
Specifies a comment section
|
|
csrf_token
|
Protects forms from Cross Site Request Forgeries
|
|
cycle
|
Specifies content to use in each cycle of a loop
|
|
debug
|
Specifies debugging information
|
|
extends
|
Specifies a parent template
|
|
filter
|
Filters content before returning it
|
|
firstof
|
Returns the first not empty variable
|
|
for
|
Specifies a for loop
|
|
if
|
Specifies a if statement
|
|
ifchanged
|
Used in for loops. Outputs a block only if a value has changed since the last iteration
|
|
include
|
Specifies included content/template
|
|
load
|
Loads template tags from another library
|
|
lorem
|
Outputs random text
|
|
now
|
Outputs the current date/time
|
|
regroup
|
Sorts an object by a group
|
|
resetcycle
|
Used in cycles. Resets the cycle
|
|
spaceless
|
Removes whitespace between HTML tags
|
|
templatetag
|
Outputs a specified template tag
|
|
url
|
Returns the absolute URL part of a URL
|
|
verbatim
|
Specifies contents that should not be rendered by the template engine
|
|
widthratio
|
Calculates a width value based on the ratio between a given value and a max value
|
|
with
|
Specifies a variable to use in the block
|
For Loops
A for loop is used for iterating over a sequence, like looping over items in an array, a list, or a dictionary.
Example
Loop through the items of a list:
{% for x in fruits %}
<h1>{{ x }}</h1>
{% endfor %}
Example
Loop through a list of dictionaries:
{% for x in cars %}
<h1>{{ x.brand }}</h1>
<p>{{ x.model }}</p>
<p>{{ x.year }}</p>
{% endfor %}
Data From a Model
Data in a model is like a table with rows and columns.
The Member model we created earlier has five rows, and each row has three columns:
|
id
|
firstname
|
lastname
|
phone
|
joined_date
|
|
1
|
Emil
|
Refsnes
|
5551234
|
2022-01-05
|
|
2
|
Tobias
|
Refsnes
|
5557777
|
2022-04-01
|
|
3
|
Linus
|
Refsnes
|
5554321
|
2021-12-24
|
|
4
|
Lene
|
Refsnes
|
5551234
|
2021-05-01
|
|
5
|
Stalikken
|
Refsnes
|
5559876
|
2022-09-29
|
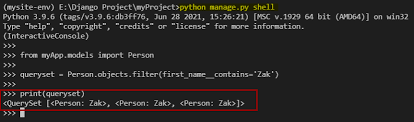
When we fetch data from the model, it comes as a QuerySet object, with a similar format as the cars example above: a list with dictionaries:
<QuerySet [
{
'id': 1,
'firstname': 'Emil',
'lastname': 'Refsnes',
'phone': 5551234,
'joined_date': datetime.date(2022, 1, 5)
},
{
'id': 2,
'firstname': 'Tobias',
'lastname': 'Refsnes'
'phone': 5557777,
'joined_date': datetime.date(2021, 4, 1
Django QuerySet
A QuerySet is a collection of data from a database.
A QuerySet is built up as a list of objects.
QuerySets makes it easier to get the data you actually need, by allowing you to filter and order the data at an early stage.
In this tutorial we will be querying data from the Member table.
Member:
|
id
|
firstname
|
lastname
|
phone
|
joined_date
|
|
1
|
Emil
|
Refsnes
|
5551234
|
2022-01-05
|
|
2
|
Tobias
|
Refsnes
|
5557777
|
2022-04-01
|
|
3
|
Linus
|
Refsnes
|
5554321
|
2021-12-24
|
|
4
|
Lene
|
Refsnes
|
5551234
|
2021-05-01
|
|
5
|
Stalikken
|
Refsnes
|
5559876
|
2022-09-29
|
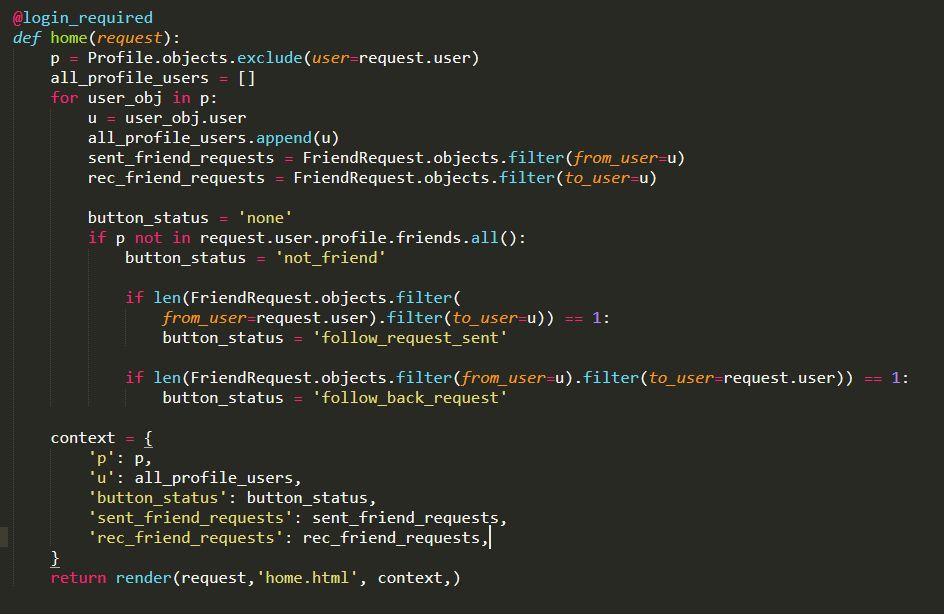
Querying Data
In views.py, we have a view for testing called testing where we will test different queries.
In the example below we use the .all() method to get all the records and fields of the Member model:
View
views.py:
from django.http import HttpResponse
from django.template import loader
from .models import Member
def testing(request):
mydata = Member.objects.all()
template = loader.get_template('template.html')
context = {
'mymembers': mydata,
}
return HttpResponse(template.render(context, request))
The object is placed in a variable called mydata, and is sent to the template via the context object as mymembers, and looks like this:
<QuerySet [
<Member: Member object (1)>,
<Member: Member object (2)>,
<Member: Member object (3)>,
<Member: Member object (4)>,
<Member: Member object (5)>
]>
As you can see, our Member model contains 5 records, and are listed inside the QuerySet as 5 objects.
In the template you can use the mymembers object to generate content:
Template
templates/template.html:
<table border='1'>
<tr>
<th>ID</th>
<th>Firstname</th>
<th>Lastname</th>
</tr>
{% for x in mymembers %}
<tr>
<td>{{ x.id }}</td>
<td>{{ x.firstname
Create Static Folder
When building web applications, you probably want to add some static files like images or css files.
Start by creating a folder named static in your project, the same place where you created the templates folder:
The name of the folder has to be static.
my_tennis_club
manage.py
my_tennis_club/
members/
templates/
static/
Add a CSS file in the static folder, the name is your choice, we will call it myfirst.css in this example:
my_tennis_club
manage.py
my_tennis_club/
members/
templates/
static/
myfirst.css
Open the CSS file and insert the following:
my_tennis_club/members/static/myfirst.css:
body {
background-color: lightblue;
font-family: verdana;
}
Modify the Template
Now you have a CSS file, with some CSS styling. The next step will be to include this file in a HTML template:
Open the HTML file and add the following:
{% load static %}
And:
<link rel="stylesheet" href="{% static 'myfirst.css' %}">
Example
my_tennis_club/members/templates/template.html:
{% load static %}
<!DOCTYPE html>
<html>
<link rel="stylesheet" href="{% static 'myfirst.css' %}">
<body>

{% for x in fruits %}
  <h1>{{ x }}</h1>
{% endfor %}

</body>
</html>
Restart the server for the changes to take effect:
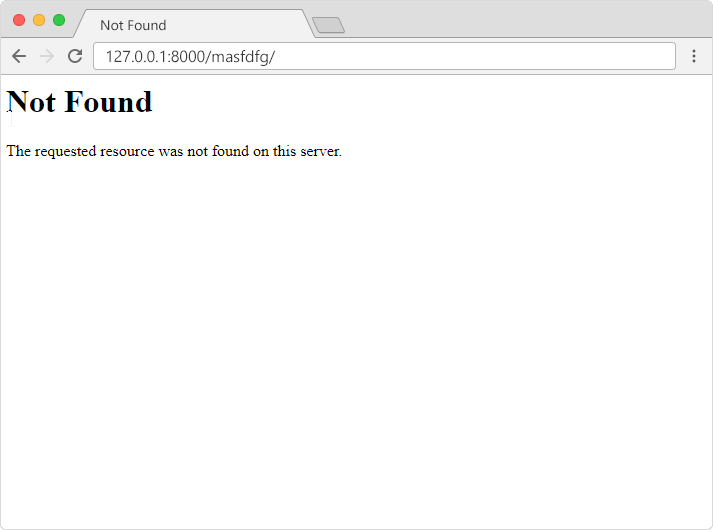
And check out the result in your own browser: 127.0.0.1:8000/testing/.
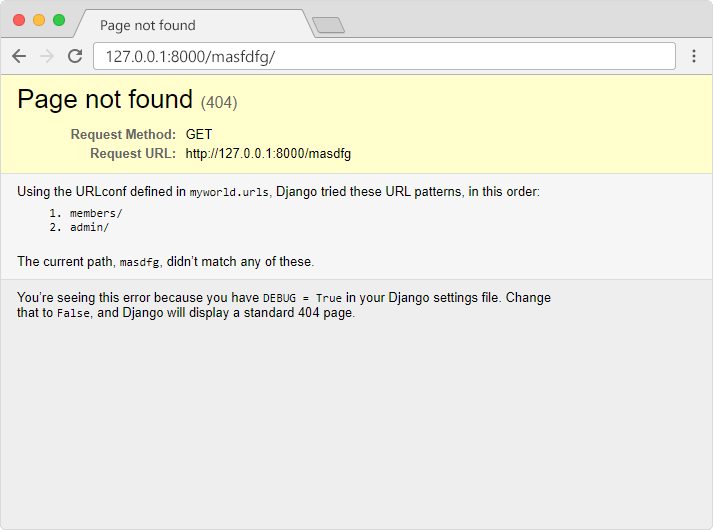
Didn't Work?
Just testing? If you just want to play around, and not going to deploy your work, you can set DEBUG = True in the settings.py file, and the example above will work.
Plan to deploy? If you plan to deploy your work, you should set DEBUG = False in the settings.py file. The example above will fail, because Django has no built-in solution for serving static files, but there are other ways to serve static files, you will learn how in the next chapter.
Example (in development):
my_tennis_club/my_tennis_club/settings.py:
.
.
# SECURITY WARNING: don't run with debug turned on in production!
DEBUG = True
.
.
This will make the example work, but we want you to choose DEBUG = False, because that is the best way to learn how to work with Django.
Choose Debug = False
For the rest of this tutorial, we will run with DEBUG = False, even in development, because that is the best way to learn how to work with Django.
Example:
my_tennis_club/my_tennis_club/settings.py:
.
.
# SECURITY WARNING: don't run with debug turned on in production!
DEBUG = False
ALLOWED_HOSTS = ['*']
Login
|


.jpg)


.jpg)

 gives us this result:
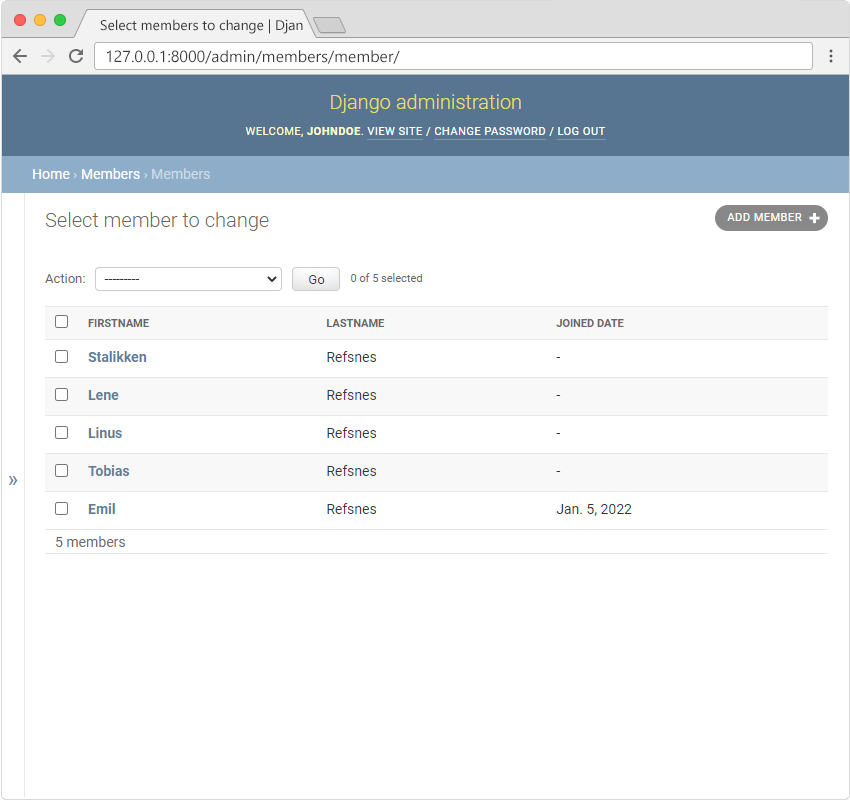

.png)
.jpg)

.png)
.jpg)