WebGrid - One of many useful ASP.NET Web Helpers.
Doing the HTML Yourself
In a previous chapter, you displayed database data by using razor code, and doing the HTML markup yourself:
Database Example
@{
var db = Database.Open("SmallBakery");
var selectQueryString = "SELECT * FROM Product ORDER BY Name";
}
<html>
<body>
<h1>Small Bakery Products</h1>
<table>
<tr>
<th>Id</th>
<th>Product</th>
<th>Description</th>
<th>Price</th>
</tr>
@foreach(var row in db.Query(selectQueryString))
{
<tr>
<td>@row.Id</td>
<td>@row.Name</td>
<td>@row.Description</td>
<td style="text-align:right">@row.Price</td>
</tr>
}
</table>
</body>
</html>
Using The WebGrid Helper
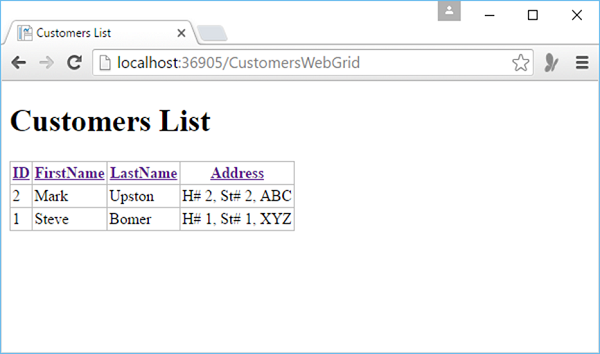
Using the WebGrid helper is an easier way to display data.
The WebGrid helper:
- Automatically sets up an HTML table to display data
- Supports different options for formatting
- Supports paging through data
- Supports Sorting by clicking on column headings
WebGrid Example
@{
var db = Database.Open("SmallBakery") ;
var selectQueryString = "SELECT * FROM Product ORDER BY Name";
var data = db.Query(selectQueryString);
var grid = new WebGrid(data);
}
<html>
<head>
<title>Displaying Data Using the WebGrid Helper</title>
</head>
<body>
<h1>Small Bakery Products</h1>
<div id="grid">
@grid.GetHtml()
</div>
</body>
</html>
WebGrid Object Reference
|
Helper
|
Description
|
|
WebGrid(data)
|
Creates a new WebGrid object using data from a query.
|
|
WebGrid.GetHtml()
|
Renders markup to display data in an HTML table.
|
|
WebGrid.Pager()
|
Renders a pager for the WebGrid object.
|
ASP.NET Web Pages - The Chart Helper
The Chart Helper - One of many useful ASP.NET Web Helpers.
The Chart Helper
In the previous chapters, you learned how to use an ASP.NET "Helper".
You learned how to display data in a grid using the "WebGrid Helper".
This chapter explains how to display data in graphical form, using the "Chart Helper".
The "Chart Helper" can create chart images of different types with many formatting options and labels. It can create standard charts like area charts, bar charts, column charts, line charts, and pie charts, along with more specialized charts like stock charts.
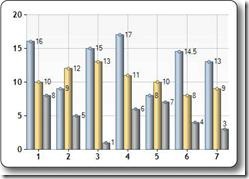 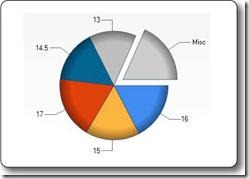
The data you display in a chart can be from an array, from a database, or from data in a file.
Chart From an Array
The example below shows the code needed to display a chart from an array of values:
Example
@{
var myChart = new Chart(width: 600, height: 400)
.AddTitle("Employees")
.AddSeries(chartType: "column",
xValue: new[] { "Peter", "Andrew", "Julie", "Mary", "Dave" },
yValues: new[] { "2", "6", "4", "5", "3" })
.Write();
}
- new Chart creates a new chart object and sets its width and height
- the AddTitle method specifies the chart title
- the AddSeries method adds data to the chart
- the chartType parameter defines the type of chart
- the xValue parameter defines x-axis names
- the yValues parameter defines the y-axis values
- the Write() method displays the chart
Chart From Database Data
You can run a database query and then use data from the results to create a chart:
Example
@{
var db = Database.Open("SmallBakery");
var dbdata = db.Query("SELECT Name, Price FROM Product");
var myChart = new Chart(width: 600, height: 400)
.AddTitle("Product Sales")
.DataBindTable(dataSource: dbdata, xField: "Name")
.Write();
}
- var db = Database.Open opens the database (and assigns the database object to the variable db)
- var dbdata = db.Query runs a database query and stores the result in dbdata
- new Chart creates a chart new object and sets its width and height
- the AddTitle method specifies the chart title
- the DataBindTable method binds the data source to the chart
- the Write() method displays the chart
An alternative to using the DataBindTable method is to use AddSeries (See previous example). DataBindTable is easier to use, but AddSeries is more flexible because you can specify the chart and data more explicitly:
Example
@{
var db = Database.Open("SmallBakery");
var dbdata = db.Query("SELECT Name, Price FROM Product");
var myChart = new Chart(width: 600, height: 400)
.AddTitle("Product Sales")
.AddSeries(chartType:"Pie",
xValue: dbdata, xField: "Name",
yValues: dbdata, yFields: "Price")
.Write();
}
Chart From XML Data
The third option for charting is to use an XML file as the data for the chart:
Example
@using System.Data;
@{
var dataSet = new DataSet();
dataSet.ReadXmlSchema(Server.MapPath("data.xsd"));
dataSet.ReadXml(Server.MapPath("data.xml"));
var dataView = new DataView(dataSet.Tables[0]);
var myChart = new Chart(width: 600, height: 400)
.AddTitle("Sales Per Employee")
.AddSeries("Default", chartType: "Pie",
xValue: dataView, xField: "Name",
yValues: dataView, yFields: "Sales")
.Write();}
}
Chart Object Reference
| Helper |
Description |
| Chart(width, height [, template] [, templatePath]) |
Initializes a chart. |
| Chart.AddLegend([title] [, name]) |
Adds a legend to a chart. |
Chart.AddSeries([name] [, chartType] [, chartArea]
[, axisLabel] [, legend] [, markerStep] [, xValue]
[, xField] [, yValues] [, yFields] [, options]) |
Adds a series of values to the chart. |
The WebMail Helper - One of many useful ASP.NET Web Helpers.
With the WebMail object you can easily send emails from a web page.
The WebMail Helper
The WebMail Helper makes it easy to send an email from a web application using SMTP (Simple Mail transfer Protocol).
Scenario: Email Support
To demonstrate the use of email, we will create an input page for support, let the user submit the page to another page, and send an email about the support problem.
First: Edit Your AppStart Page
If you have built the Demo application in this tutorial, you already have a page called _AppStart.cshtml with the following content:
_AppStart.cshtml
@{
WebSecurity.InitializeDatabaseConnection("Users", "UserProfile", "UserId", "Email", true);
}
To initiate the WebMail helper, add the the following WebMail properties to your AppStart page:
_AppStart.cshtml
@{
WebSecurity.InitializeDatabaseConnection("Users", "UserProfile", "UserId", "Email", true);
WebMail.SmtpServer = "smtp.example.com";
WebMail.SmtpPort = 25;
WebMail.EnableSsl = false;
WebMail.UserName = "[email protected]";
WebMail.Password = "password-goes-here";
WebMail.From = "[email protected]";
}
Properties explained:
SmtpServer: The name the SMTP server that will be used to send the emails.
SmtpPort: The port the server will use to send SMTP transactions (emails).
EnableSsl: True, if the server should use SSL (Secure Socket Layer) encryption.
UserName: The name of the SMTP email account used to send the email.
Password: The password of the SMTP email account.
From: The email to appear in the from address (often the same as UserName).
Second: Create an Email Input Page
Then create an input page, and name it Email_Input:
Email_Input.cshtml
<!DOCTYPE html>
<html>
<body>
<h1>Request for Assistance</h1>
<form method="post" action="EmailSend.cshtml">
<label>Username:</label>
<input type="text" name="customerEmail" />
<label>Details about the problem:</label>
<textarea name="customerRequest" cols="45" rows="4"></textarea>
<p><input type="submit" value="Submit" /></p>
</form>
</body>
</html>
The purpose of the input page is to collect information, then submit the data to a new page that can send the information as an email.
Third: Create An Email Send Page
Then create the page that will be used to send the email, and name it Email_Send:
Email_Send.cshtml
@{ // Read input
var customerEmail = Request["customerEmail"];
var customerRequest = Request["customerRequest"];
try
{
// Send email
WebMail.Send(to:"[email protected]", subject: "Help request from - " + customerEmail, body: customerRequest );
}
catch (Exception ex )
{
<text>@ex</text>
}
}
WebMail Object Reference - Properties
|
Properties
|
Description
|
|
SmtpServer
|
The name the SMTP server that will send the emails
|
|
SmtpPort
|
The port the server will use to send SMTP emails
|
|
EnableSsl
|
True, if the server should use SSL encryption
|
|
UserName
|
The name of the SMTP account used to send the email
|
|
Password
|
The password of the SMTP account
|
|
From
|
The email to appear in the from address
|
WebMail Object Reference - Methods
|
Method
|
Description
|
|
Send()
|
Sends an email message to an SMTP server for delivery
|
The Send() method has the following parameters:
|
Parameter
|
Type
|
Description
|
|
to
|
String
|
The Email recipients (separated by semicolon)
|
|
subject
|
String
|
The subject line
|
|
body
|
String
|
The body of the message
|
And the following optional parameters:
|
Parameter
|
Type
|
Description
|
|
from
|
String
|
The email of the sender
|
|
cc
|
String
|
The cc emails (separated by semicolon)
|
|
filesToAttach
|
Collection
|
Filenames
|
|
isBodyHtml
|
Boolean
|
True if the email body is in HTML
|
|
additionalHeaders
|
Collection
|
Additional headers
|
Technical Data
|
Name
|
Value
|
|
Class
|
System.Web.Helpers.WebMail
|
|
Namespace
|
System.Web.Helpers
|
|
Assembly
|
System.Web.Helpers.dll
|
Initializing the WebMail Helper
To use the WebMail helper, you need access to an SMTP server. SMTP is the "output" part of email. If you use a web host, you probably already know the name of the SMTP server. If you work in a corporate network, your IT department can give you the name. If you are working at home, you might be able to use your ordinary email provider.
In order to send an email you will need:
- The name of the SMTP server
- The port number (most often 25)
- An email user name
- An email password
In the root of your web, create a page (or edit the page ) named _AppStart.cshtml.
Put the following code inside the file:
_AppStart.cshtml
@{
WebMail.SmtpServer = "smtp.example.com";
WebMail.SmtpPort = 25;
WebMail.EnableSsl = false;
WebMail.UserName = "[email protected]";
WebMail.Password = "password";
WebMail.From = "[email protected]"
}
The code above will run each time the web site (application) starts. It feeds your WebMail Object with initial values.
Please substitute:
smtp.example.com with the name the SMTP server that will be used to send the emails.
25 with the port number the server will use to send SMTP transactions (emails).
false with true, if the server should use SSL (Secure Socket Layer) encryption.
[email protected] with the name of the SMTP email account used to send emails.
password with the password of the SMTP email account.
john@example with the email to appear in the from address.
You don't have to initiate the WebMail object in your AppStart file, but you must set these properties before you call the WebMail.Send() method.
Description
The WebSecurity Object provides security and authentication for ASP.NET Web Pages applications.
With the WebSecurity object you can create user accounts, login and logout users, reset or change passwords, and more.
WebSecurity Object Reference - Properties
WebSecurity Object Reference - Methods
Initializing the WebSecurity Database
You must create or initialize an WebSecurity database before you can use the WebSecurity object in your code.
In the root of your web, create a page (or edit the page ) named _AppStart.cshtml.
Put the following code inside the file:
_AppStart.cshtml
@{
WebSecurity.InitializeDatabaseConnection("Users", "UserProfile", "UserId", "Email", true);
}
The code above will run each time the web site (application) starts. It initializes the WebSecurity database.
"Users" is the name of the WebSecurity database (Users.sdf).
"UserProfile" is the name of the database table that contains the user profile information.
"UserId" is the name of the column that contains the user IDs (primary key).
"Email" is the name of the column that contains user names.
The last parameter true is a boolean value indicating that the user profile and membership tables should be created automatically if they don't exist, otherwise false.
Although true indicates automatic creation of the database tables, the database itself will not be created automatically. It must exist.
The WebSecurity Database
The UserProfile table contains one record for each user, with a user ID (primary key) and the user's name (email):
The Membership table will contain membership information about when the user was created and if (and when) the membership was confirmed.
Much like this (some columns are not shown):
|
User
Id
|
Create
Date
|
Confirmation
Token
|
Is
Confirmed
|
Last
Password
Failure
|
Password
|
Password
Change
|
|
1
|
12.04.2012 16:12:17
|
NULL
|
True
|
NULL
|
AFNQhWfy....
|
12.04.2012 16:12:17
|
Simple Membership Configuration
You might get errors using the WebSecurity object, if your site is not configured to use the ASP.NET Web Pages membership system SimpleMembership.
This can occur if a hosting provider's server is configured differently than your local server. To fix this, add the following element to the site's Web.config file:
<appSettings>
<add key="enableSimpleMembership" value="true" />
</appSettings>

1. Use the Latest Version of ASP.NET
Before you continue, make sure your hosting computer runs the latest version of ASP.NET (4.0 or 4.5).
2. Copy the Web Folders
Copy your website (all folders and content) from your development computer to an application folder on your remote hosting computer (server).
If your application contains data, don't copy the data (see point 4 below).
3. The DLL Files
Make sure the bin folder, on your remote hosting computer, contains the same dll files as on your development computer.
After copying the bin folder, it should contain files like this:
Microsoft.Web.Infrastructure.dll
NuGet.Core.dll
System.Web.Helpers.dll
System.Web.Razor.dll
System.Web.WebPages.Administration.dll
System.Web.WebPages.Deployment.dll
System.Web.WebPages.dll
System.Web.WebPages.Razor.dll
WebMatrix.Data.dll
WebMatrix.WebData
4. Copy Your Data
If your application contains data or a database. For instance an SQL Server Compact database (a .sdf file in App_Data folder), consider the following:
Do you want to publish your test data to the remote server?
Most likely not.
If you have test data on your development computer, it may overwrite production data on your remote hosting computer.
If you have to copy an SQL database (.sdf file), perhaps you should delete everything in the database, and then copy the empty .sdf file from your development computer to the server.
THAT'S IT. GOOD LUCK !

ASP.NET Web Pages - Examples in C# and VB
Learn ASP.NET Web Pages by C# and Visual Basic examples.
| Examples in C# |
Examples in VB |
Basic Web Pages
|
Basic Web Pages
|
Basic C#
|
Basic VB
|
Working with Databases
|
Working with Databases
|
Using the Chart Helper
|
Using the Chart Helper
|
ASP.NET Web Pages - Classes
ASP.NET Classes Reference
| Method |
Description |
| AsBool(), AsBool(true|false) |
Converts a string value to a Boolean value (true/false). Returns false or the specified value if the string does not represent true/false. |
| AsDateTime(), AsDateTime(value) |
Converts a string value to date/time. Returns DateTime. MinValue or the specified value if the string does not represent a date/time. |
| AsDecimal(), AsDecimal(value) |
Converts a string value to a decimal value. Returns 0.0 or the specified value if the string does not represent a decimal value. |
| AsFloat(), AsFloat(value) |
Converts a string value to a float. Returns 0.0 or the specified value if the string does not represent a decimal value. |
| AsInt(), AsInt(value) |
Converts a string value to an integer. Returns 0 or the specified value if the string does not represent an integer. |
| Href(path [, param1 [, param2]]) |
Creates a browser-compatible URL from a local file path, with optional additional path parts. |
| Html.Raw(value) |
Renders value as HTML markup instead of rendering it as HTML-encoded output. |
| IsBool(), IsDateTime(), IsDecimal(), IsFloat(), IsInt() |
Returns true if the value can be converted from a string to the specified type. |
| IsEmpty() |
Returns true if the object or variable has no value. |
| IsPost |
Returns true if the request is a POST. (Initial requests are usually a GET.) |
| Layout |
Specifies the path of a layout page to apply to this page. |
| PageData[key], PageData[index], Page |
Contains data shared between the page, layout pages, and partial pages in the current request. You can use the dynamic Page property to access the same data, as in the following example: |
| RenderBody() |
(Layout pages) Renders the content of a content page that is not in any named sections. |
RenderPage(path, values)
RenderPage(path[, param1 [, param2]]) |
Renders a content page using the specified path and optional extra data. You can get the values of the extra parameters from PageData by position (example 1) or key (example 2). |
| RenderSection(sectionName [, required = true|false]) |
(Layout pages) Renders a content section that has a name. Set required to false to make a section optional. |
| Request.Cookies[key] |
Gets or sets the value of an HTTP cookie. |
| Request.Files[key] |
Gets the files that were uploaded in the current request. |
| Request.Form[key] |
Gets data that was posted in a form (as strings). Request[key] checks both the Request.Form and the Request.QueryString collections. |
| Request.QueryString[key] |
Gets data that was specified in the URL query string. Request[key] checks both the Request.Form and the Request.QueryString collections. |
Request.Unvalidated(key)
Request.Unvalidated().QueryString|Form|Cookies|Headers[key] |
Selectively disables request validation for a form element, query-string value, cookie, or header value. Request validation is enabled by default and prevents users from posting markup or other potentially dangerous content. |
| Response.AddHeader(name, value) |
Adds an HTTP server header to the response. |
| Response.OutputCache(seconds [, sliding] [, varyByParams]) |
Caches the page output for a specified time. Optionally set sliding to reset the timeout on each page access and varyByParams to cache different versions of the page for each different query string in the page request. |
| Response.Redirect(path) |
Redirects the browser request to a new location. |
| Response.SetStatus(httpStatusCode) |
Sets the HTTP status code sent to the browser. |
| Response.WriteBinary(data [, mimetype]) |
Writes the contents of data to the response with an optional MIME type. |
| Response.WriteFile(file) |
Writes the contents of a file to the response. |
| @section(sectionName) { content } |
(Layout pages) Defines a content section that has a name. |
| Server.HtmlDecode(htmlText) |
Decodes a string that is HTML encoded. |
| Server.HtmlEncode(text) |
Encodes a string for rendering in HTML markup. |
| Server.MapPath(virtualPath) |
Returns the server physical path for the specified virtual path. |
| Server.UrlDecode(urlText) |
Decodes text from a URL. |
| Server.UrlEncode(text) |
Encodes text to put in a URL. |
| Session[key] |
Gets or sets a value that exists until the user closes the browser. |
| ToString() |
Displays a string representation of the object's value. |
| UrlData[index] |
Gets additional data from the URL (for example, /MyPage/ExtraData). |
Razor is not a programming language. It's a server side markup language.
What is Razor?
Razor is a markup syntax that lets you embed server-based code (Visual Basic and C#) into web pages.
Server-based code can create dynamic web content on the fly, while a web page is written to the browser. When a web page is called, the server executes the server-based code inside the page before it returns the page to the browser. By running on the server, the code can perform complex tasks, like accessing databases.
Razor is based on ASP.NET, and designed for creating web applications. It has the power of traditional ASP.NET markup, but it is easier to use, and easier to learn.
Razor Syntax
Razor uses a syntax very similar to PHP and Classic ASP.
Razor:
<ul>
@for (int i = 0; i < 10; i++) {
<li>@i</li>
}
</ul>
PHP:
<ul>
<?php
for ($i = 0; $i < 10; $i++) {
echo("<li>$i</li>");
}
?>
</ul>
Classic ASP:
<ul>
<%for i = 0 to 10%>
<li><%=i%></li>
<%next%>
</ul>
Razor Helpers
ASP.NET helpers are components that can be accessed by single lines of Razor code.
You can build your own helpers using Razor syntax, or use built-in ASP.NET helpers.
Below is a short description of some useful Razor helpers:
- Web Grid
- Web Graphics
- Google Analytics
- Facebook Integration
- Twitter Integration
- Sending Email
- Validation
Razor Programming Languages
Razor supports both C# (C sharp) and VB (Visual Basic).
Razor supports both C# (C sharp) and VB (Visual Basic).
Main Razor Syntax Rules for C#
- Razor code blocks are enclosed in @{ ... }
- Inline expressions (variables and functions) start with @
- Code statements end with semicolon
- Variables are declared with the var keyword
- Strings are enclosed with quotation marks
- C# code is case sensitive
- C# files have the extension .cshtml
C# Example
<!-- Single statement block -->
@{ var myMessage = "Hello World"; }
<!-- Inline expression or variable -->
<p>The value of myMessage is: @myMessage</p>
<!-- Multi-statement block -->
@{
var greeting = "Welcome to our site!";
var weekDay = DateTime.Now.DayOfWeek;
var greetingMessage = greeting + " Here in Huston it is: " + weekDay;
}
<p>The greeting is: @greetingMessage</p>
Main Razor Syntax Rules for VB
- Razor code blocks are enclosed in @Code ... End Code
- Inline expressions (variables and functions) start with @
- Variables are declared with the Dim keyword
- Strings are enclosed with quotation marks
- VB code is not case sensitive
- VB files have the extension .vbhtml
Example
<!-- Single statement block -->
@Code dim myMessage = "Hello World" End Code
<!-- Inline expression or variable -->
<p>The value of myMessage is: @myMessage</p>
<!-- Multi-statement block -->
@Code
dim greeting = "Welcome to our site!"
dim weekDay = DateTime.Now.DayOfWeek
dim greetingMessage = greeting & " Here in Huston it is: " & weekDay
End Code
<p>The greeting is: @greetingMessage</p>
How Does it Work?
Razor is a simple programming syntax for embedding server code in web pages.
Razor syntax is based on the ASP.NET framework, the part of the Microsoft.NET Framework that's specifically designed for creating web applications.
The Razor syntax gives you all the power of ASP.NET, but is using a simplified syntax that's easier to learn if you're a beginner, and makes you more productive if you're an expert.
Razor web pages can be described as HTML pages with two kinds of content: HTML content and Razor code.
When the server reads the page, it runs the Razor code first, before it sends the HTML page to the browser. The code that is executed on the server can perform tasks that cannot be done in the browser, for example accessing a server database. Server code can create dynamic HTML content on the fly, before it is sent to the browser. Seen from the browser, the HTML generated by server code is no different than static HTML content.
ASP.NET web pages with Razor syntax have the special file extension cshtml (Razor using C#) or vbhtml (Razor using VB).
Working With Objects
Server coding often involves objects.
The "DateTime" object is a typical built-in ASP.NET object, but objects can also be self-defined, a web page, a text box, a file, a database record, etc.
Objects may have methods they can perform. A database record might have a "Save" method, an image object might have a "Rotate" method, an email object might have a "Send" method, and so on.
Objects also have properties that describe their characteristics. A database record might have a FirstName and a LastName property (among others).
The ASP.NET DateTime object has a Now property (written as DateTime.Now), and the Now property has a Day property (written as DateTime.Now.Day). The example below shows how to access some properties of the DateTime object:
Example
<table border="1">
<tr>
<th width="100px">Name</th>
<td width="100px">Value</td>
</tr>
<tr>
<td>Day</td><td>@DateTime.Now.Day</td>
</tr>
<tr>
<td>Hour</td><td>@DateTime.Now.Hour</td>
</tr>
<tr>
<td>Minute</td><td>@DateTime.Now.Minute</td>
</tr>
<tr>
<td>Second</td><td>@DateTime.Now.Second</td>
</tr>
</td>
</table>
If and Else Conditions
An important feature of dynamic web pages is that you can determine what to do based on conditions.
The common way to do this is with the if ... else statements:
Example
@{
var txt = "";
if(DateTime.Now.Hour > 12)
{txt = "Good Evening";}
else
{txt = "Good Morning";}
}
<html>
<body>
<p>The message is @txt</p>
</body>
</html>
Reading User Input
Another important feature of dynamic web pages is that you can read user input.
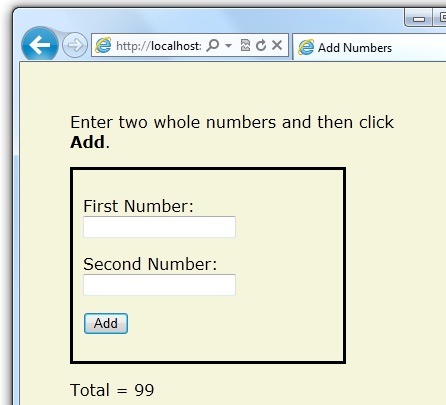
Input is read by the Request[] function, and posting (input) is tested by the IsPost condition:
Example
@{
var totalMessage = "";
if(IsPost)
{
var num1 = Request["text1"];
var num2 = Request["text2"];
var total = num1.AsInt() + num2.AsInt();
totalMessage = "Total = " + total;
}
}
<html>
<body style="background-color: beige; font-family: Verdana, Arial;">
<form action="" method="post">
<p><label for="text1">First Number:</label><br>
<input type="text" name="text1" /></p>
<p><label for="text2">Second Number:</label><br>
<input type="text" name="text2" /></p>
<p><input type="submit" value=" Add " /></p>
</form>
<p>@totalMessage</p>
</body>
</html>
Variables are named entities used to store data.
Variables
Variables are used to store data.
The name of a variable must begin with an alphabetic character and cannot contain whitespace or reserved characters.
A variable can be of a specific type, indicating the kind of data it stores. String variables store string values ("Welcome to W3Schools"), integer variables store number values (103), date variables store date values, etc.
Variables are declared using the var keyword, or by using the type (if you want to declare the type), but ASP.NET can usually determine data types automatically.
Examples
// Using the var keyword:
var greeting = "Welcome to W3Schools";
var counter = 103;
var today = DateTime.Today;
// Using data types:
string greeting = "Welcome to W3Schools";
int counter = 103;
DateTime today = DateTime.Today;
Data Types
Below is a list of common data types:
|
Type
|
Description
|
Examples
|
|
int
|
Integer (whole numbers)
|
103, 12, 5168
|
|
float
|
Floating-point number
|
3.14, 3.4e38
|
|
decimal
|
Decimal number (higher precision)
|
1037.196543
|
|
bool
|
Boolean
|
true, false
|
|
string
|
String
|
"Hello W3Schools", "John"
|
Operators
An operator tells ASP.NET what kind of command to perform in an expression.
The C# language supports many operators. Below is a list of common operators:
|
Operator
|
Description
|
Example
|
|
=
|
Assigns a value to a variable.
|
i=6
|
|
+
-
*
/
|
Adds a value or variable.
Subtracts a value or variable.
Multiplies a value or variable.
Divides a value or variable.
|
i=5+5
i=5-5
i=5*5
i=5/5
|
|
+=
-=
|
Increments a variable.
Decrements a variable.
|
i += 1
i -= 1
|
|
==
|
Equality. Returns true if values are equal.
|
if (i==10)
|
|
!=
|
Inequality. Returns true if values are not equal.
|
if (i!=10)
|
|
<
>
<=
>=
|
Less than.
Greater than.
Less than or equal.
Greater than or equal.
|
if (i<10)
if (i>10)
if (i<=10)
if (i>=10)
|
|
+
|
Adding strings (concatenation).
|
"w3" + "schools"
|
|
.
|
Dot. Separate objects and methods.
|
DateTime.Hour
|
|
()
|
Parenthesis. Groups values.
|
(i+5)
|
|
()
|
Parenthesis. Passes parameters.
|
x=Add(i,5)
|
|
[]
|
Brackets. Accesses values in arrays or collections.
|
name[3]
|
|
!
|
Not. Reverses true or false.
|
if (!ready)
|
|
&&
||
|
Logical AND.
Logical OR.
|
if (ready && clear)
if (ready || clear)
|
Converting Data Types
Converting from one data type to another is sometimes useful.
The most common example is to convert string input to another type, such as an integer or a date.
As a rule, user input comes as strings, even if the user entered a number. Therefore, numeric input values must be converted to numbers before they can be used in calculations.
Below is a list of common conversion methods:
|
Method
|
Description
|
Example
|
|
AsInt()
IsInt()
|
Converts a string to an integer.
|
if (myString.IsInt())
{myInt=myString.AsInt();}
|
|
AsFloat()
IsFloat()
|
Converts a string to a floating-point number.
|
if (myString.IsFloat())
{myFloat=myString.AsFloat();}
|
|
AsDecimal()
IsDecimal()
|
Converts a string to a decimal number.
|
if (myString.IsDecimal())
{myDec=myString.AsDecimal();}
|
|
AsDateTime()
IsDateTime()
|
Converts a string to an ASP.NET DateTime type.
|
myString="10/10/2012";
myDate=myString.AsDateTime();
|
|
AsBool()
IsBool()
|
Converts a string to a Boolean.
|
myString="True";
myBool=myString.AsBool();
|
|
ToString()
|
Converts any data type to a string.
|
myInt=1234;
myString=myInt.ToString();
|
Statements can be executed repeatedly in loops.
For Loops
If you need to run the same statements repeatedly, you can program a loop.
If you know how many times you want to loop, you can use a for loop. This kind of loop is especially useful for counting up or counting down:
Example
<html>
<body>
@for(var i = 10; i < 21; i++)
{<p>Line @i</p>}
</body>
</html>
For Each Loops
If you work with a collection or an array, you often use a for each loop.
A collection is a group of similar objects, and the for each loop lets you carry out a task on each item. The for each loop walks through a collection until it is finished.
The example below walks through the ASP.NET Request.ServerVariables collection.
Example
<html>
<body>
<ul>
@foreach (var x in Request.ServerVariables)
{<li>@x</li>}
</ul>
</body>
</html>
While Loops
The while loop is a general purpose loop.
A while loop begins with the while keyword, followed by parentheses, where you specify how long the loop continues, then a block to repeat.
While loops typically add to, or subtract from, a variable used for counting.
In the example below, the += operator adds 1 to the variable i, each time the loop runs.
Example
<html>
<body>
@{
var i = 0;
while (i < 5)
{
i += 1;
<p>Line @i</p>
}
}
</body>
</html>
Arrays
An array is useful when you want to store similar variables but don't want to create a separate variable for each of them:
Example
@{
string[] members = {"Jani", "Hege", "Kai", "Jim"};
int i = Array.IndexOf(members, "Kai")+1;
int len = members.Length;
string x = members[2-1];
}
<html>
<body>
<h3>Members</h3>
@foreach (var person in members)
{
<p>@person</p>
}
<p>The number of names in Members are @len</p>
<p>The person at position 2 is @x</p>
<p>Kai is now in position @i</p>
</body>
</html>
Programming Logic: Execute code based on conditions.
The If Condition
C# lets you execute code based on conditions.
To test a condition you use an if statement. The if statement returns true or false, based on your test:
- The if statement starts a code block
- The condition is written inside parenthesis
- The code inside the braces is executed if the test is true
Example
@{var price=50;}
<html>
<body>
@if (price>30)
{
<p>The price is too high.</p>
}
</body>
</html>
The Else Condition
An if statement can include an else condition.
The else condition defines the code to be executed if the condition is false.
Example
@{var price=20;}
<html>
<body>
@if (price>30)
{
<p>The price is too high.</p>
}
else
{
<p>The price is OK.</p>
}
</body>
</html>
Note: In the example above, if the first condition is true, it will be executed. The else condition covers "everything else".
The Else If Condition
Multiple conditions can be tested with an else if condition:
Example
@{var price=25;}
<html>
<body>
@if (price>=30)
{
<p>The price is high.</p>
}
else if (price>20 && price<30)
{
<p>The price is OK.</p>
}
else
{
<p>The price is low.</p>
}
</body>
</html>
In the example above, if the first condition is true, it will be executed.
If not, then if the next condition is true, this condition will be executed.
You can have any number of else if conditions.
If none of the if and else if conditions are true, the last else block (without a condition) covers "everything else".
Switch Conditions
A switch block can be used to test a number of individual conditions:
Example
@{
var weekday=DateTime.Now.DayOfWeek;
var day=weekday.ToString();
var message="";
}
<html>
<body>
@switch(day)
{
case "Monday":
message="This is the first weekday.";
break;
case "Thursday":
message="Only one day before weekend.";
break;
case "Friday":
message="Tomorrow is weekend!";
break;
default:
message="Today is " + day;
break;
}
<p>@message</p>
</body>
</html>
The test value (day) is in parentheses. Each individual test condition has a case value that ends with a colon, and any number of code lines ending with a break statement. If the test value matches the case value, the code lines are executed.
A switch block can have a default case (default:) for "everything else" that runs if none of the cases are true.
Variables are named entities used to store data.
Variables
Variables are used to store data.
The name of a variable must begin with an alphabetic character and cannot contain whitespace or reserved characters.
A variable can be of a specific type, indicating the kind of data it stores. String variables store string values ("Welcome to W3Schools"), integer variables store number values (103), date variables store date values, etc.
Variables are declared using the Dim keyword, or by using the type (if you want to declare the type), but ASP.NET can usually determine data types automatically.
Examples
// Using the Dim keyword:
Dim greeting = "Welcome to W3Schools"
Dim counter = 103
Dim today = DateTime.Today
// Using data types:
Dim greeting As String = "Welcome to W3Schools"
Dim counter As Integer = 103
Dim today As DateTime = DateTime.Today
Data Types
Below is a list of common data types:
|
Type
|
Description
|
Examples
|
|
integer
|
Integer (whole numbers)
|
103, 12, 5168
|
|
double
|
64 bit floating-point number
|
3.14, 3.4e38
|
|
decimal
|
Decimal number (higher precision)
|
1037.196543
|
|
boolean
|
Boolean
|
true, false
|
|
string
|
String
|
"Hello W3Schools", "John"
|
Operators
An operator tells ASP.NET what kind of command to perform in an expression.
The VB language supports many operators. Below is a list of common operators:
|
Operator
|
Description
|
Example
|
|
=
|
Assigns a value to a variable.
|
i=6
|
|
+
-
*
/
|
Adds a value or variable.
Subtracts a value or variable.
Multiplies a value or variable.
Divides a value or variable.
|
i=5+5
i=5-5
i=5*5
i=5/5
|
|
+=
-=
|
Increments a variable.
Decrements a variable.
|
i += 1
i -= 1
|
|
=
|
Equality. Returns true if values are equal.
|
if i=10
|
|
<>
|
Inequality. Returns true if values are not equal.
|
if <>10
|
|
<
>
<=
>=
|
Less than.
Greater than.
Less than or equal.
Greater than or equal.
|
if i<10
if i>10
if i<=10
if i>=10
|
|
&
|
Adding strings (concatenation).
|
"w3" & "schools"
|
|
.
|
Dot. Separate objects and methods.
|
DateTime.Hour
|
|
()
|
Parenthesis. Groups values.
|
(i+5)
|
|
()
|
Parenthesis. Passes parameters.
|
x=Add(i,5)
|
|
()
|
Parenthesis. Accesses values in arrays or collections.
|
name(3)
|
|
Not
|
Not. Reverses true or false.
|
if Not ready
|
|
And
OR
|
Logical AND.
Logical OR.
|
if ready And clear
if ready Or clear
|
|
AndAlso
orElse
|
Extended Logical AND.
Extended Logical OR.
|
if ready AndAlso clear
if ready OrElse clear
|
Converting Data Types
Converting from one data type to another is sometimes useful.
The most common example is to convert string input to another type, such as an integer or a date.
As a rule, user input comes as strings, even if the user entered a number. Therefore, numeric input values must be converted to numbers before they can be used in calculations.
Below is a list of common conversion methods:
|
Method
|
Decryptions
|
Example
|
|
AsInt()
IsInt()
|
Converts a string to an integer.
|
if myString.IsInt() then
myInt=myString.AsInt()
end if
|
|
AsFloat()
IsFloat()
|
Converts a string to a floating-point number.
|
if myString.IsFloat() then
myFloat=myString.AsFloat()
end if
|
|
AsDecimal()
IsDecimal()
|
Converts a string to a decimal number.
|
if myString.IsDecimal() then
myDec=myString.AsDecimal()
end if
|
|
AsDateTime()
IsDateTime()
|
Converts a string to an ASP.NET DateTime type.
|
myString="10/10/2012"
myDate=myString.AsDateTime()
|
|
AsBool()
IsBool()
|
Converts a string to a Boolean.
|
myString="True"
myBool=myString.AsBool()
|
|
ToString()
|
Converts any data type to a string.
|
myInt=1234
myString=myInt.ToString()
|
Statements can be executed repeatedly in loops.
For Loops
If you need to run the same statements repeatedly, you can program a loop.
If you know how many times you want to loop, you can use a for loop. This kind of loop is especially useful for counting up or counting down:
Example
<html>
<body>
@For i=10 To 21
@<p>Line #@i</p>
Next i
</body>
</html>
For Each Loops
If you work with a collection or an array, you often use a for each loop.
A collection is a group of similar objects, and the for each loop lets you carry out a task on each item. The for each loop walks through a collection until it is finished.
The example below walks through the ASP.NET Request.ServerVariables collection.
Example
<html>
<body>
<ul>
@For Each x In Request.ServerVariables
@<li>@x</li>
Next x
</ul>
</body>
</html>
While Loops
The while loop is a general purpose loop.
A while loop begins with the while keyword, followed by parentheses, where you specify how long the loop continues, then a block to repeat.
While loops typically add to, or subtract from, a variable used for counting.
In the example below, the += operator adds 1 to the variable i, each time the loop runs.
Example
<html>
<body>
@Code
Dim i=0
Do While i<5
i += 1
@<p>Line #@i</p>
Loop
End Code
</body>
</html>
Arrays
An array is useful when you want to store similar variables but don't want to create a separate variable for each of them:
Example
@Code
Dim members As String()={"Jani","Hege","Kai","Jim"}
i=Array.IndexOf(members,"Kai")+1
len=members.Length
x=members(2-1)
end Code
<html>
<body>
<h3>Members</h3>
@For Each person In members
@<p>@person</p>
Next person
<p>The number of names in Members are @len</p>
<p>The person at position 2 is @x</p>
<p>Kai is now in position @i</p>
</body>
</html>
Programming Logic: Execute code based on conditions.
The If Condition
VB lets you execute code based on conditions.
To test a condition you use the if statement. The if statement returns true or false, based on your test:
- The if statement starts a code block
- The condition is written between if and then
- The code between if ... then and end if is executed if the test is true
Example
@Code
Dim price=50
End Code
<html>
<body>
@If price>30 Then
@<p>The price is too high.</p>
End If
</body>
</html>
The Else Condition
An if statement can include an else condition.
The else condition defines the code to be executed if the condition is false.
Example
@Code
Dim price=20
End Code
<html>
<body>
@if price>30 then
@<p>The price is too high.</p>
Else
@<p>The price is OK.</p>
End If
</body>
</html>
Note: In the example above, if the first condition is true, it will be executed. The else condition covers "everything else".
The ElseIf Condition
Multiple conditions can be tested with an else if condition:
Example
@Code
Dim price=25
End Code
<html>
<body>
@If price>=30 Then
@<p>The price is high.</p>
ElseIf price>20 And price<30 then
@<p>The price is OK.</p>
Else
@<p>The price is low.</p>
End If
</body>
</html>
In the example above, if the first condition is true, it will be executed.
If not, then if the next condition is true, this condition will be executed.
You can have any number of else if conditions.
If none of the if or else if conditions are true, the last else block (without a condition) covers "everything else".
Select Conditions
A select block can be used to test a number of individual conditions:
Example
@Code
Dim weekday=DateTime.Now.DayOfWeek
Dim day=weekday.ToString()
Dim message=""
End Code
<html>
<body>
@Select Case day
Case "Monday"
message="This is the first weekday."
Case "Thursday"
message="Only one day before weekend."
Case "Friday"
message="Tomorrow is weekend!"
Case Else
message="Today is " & day
End Select
<p>@message</p>
</body>
</html>
"Select Case" is followed by the test value (day). Each individual test condition has a case value, and any number of code lines. If the test value matches the case value, the code lines are executed.
A select block can have a default case (Case Else) for "everything else" that runs if none of the other cases are true.
ASP is an old (but still powerful) tool for making dynamic Web pages.
ASP is a technology (much like PHP) for executing scripts on a web server.
In this tutorial you will learn all you need to know about ASP.
Easy Learning with "Show Example"
This ASP tutorial contains hundreds of examples.
Our "Show Example" tool makes it easy to learn ASP, because it shows ASP code with parallel HTML output.
Example
<!DOCTYPE html>
<html>
<body>
<%
response.write("My first ASP script!")
%>
</body>
</html>
Click on the "Show Example" button to see how it works!
What is ASP?
- ASP stands for Active Server Pages
- ASP is a Microsoft Technology
- ASP is a program that runs inside a web server
What is an ASP File?
- An ASP file has the file extension ".asp"
- An ASP file is just the same as an HTML file
- An ASP file can contain server scripts in addition to HTML
- Server scripts in an ASP file are executed on the server
What can ASP do for you?
- Edit, change, add content, or customize any web page
- Respond to user queries or data submitted from HTML forms
- Access databases or other server data and return results to a browser
- Provide web security since ASP code cannot be viewed in a browser
- Offer simplicity and speed
How Does it Work?
When a browser requests a normal HTML file, the server just returns the file.
When a browser requests an ASP file, the server passes the request to the ASP engine which reads the ASP file and executes the server scripts in the file.
Finally the ASP file is returned to the browser as plain HTML.
ASP References
At W3Schools you will find complete ASP references about built-in objects and components, and their properties and methods.
ASP Examples
Learn by 100 examples! Because ASP scripts are executed on the server, you can not view ASP code in a browser, you will only see the output from ASP which is plain HTML. At W3Schools every example displays the hidden ASP code. This will make it easier for you to understand how it works.
.jpg)
All our examples shows the ASP code in red.
This makes it easier for you to understand how ASP works.
ASP Uses VBScript
The default scripting language in ASP is VBScript.
A scripting language is a lightweight programming language.
VBScript is a light version of Microsoft's Visual Basic.
ASP Files
ASP files can be ordinary HTML files. In addition, ASP files can also contain server scripts.
Scripts surrounded by <% and %> are executed on the server.
The Response.Write() method is used by ASP to write output to HTML.
The following example writes "Hello World" into HTML:
Example
<!DOCTYPE html>
<html>
<body>
<%
Response.Write("Hello World!")
%>
</body>
</html>
VBScript is case insensitive. Response.Write() can be written as response.write().
Using JavaScript in ASP
To set JavaScript as the scripting language for a web page you must insert a language specification at the top of the page:
Example
<%@ language="javascript"%>
<!DOCTYPE html>
<html>
<body>
<%
Response.Write("Hello World!")
%>
</body>
</html>
This tutorial uses the VBScript scripting language.
More Examples
There is an easy shortcut to Response.Write(). You can use an equal sign (=) instead.
The following example also writes "Hello World" into HTML:
Example
<!DOCTYPE html>
<html>
<body>
<%
="Hello World!"
%>
</body>
</html>
HTML tags can be a part of the output:
Example
<!DOCTYPE html>
<html>
<body>
<%
Response.Write("<h2>You can use HTML tags to format the text!</h2>")
%>
</body>
</html>
HTML attributes can be a part of the output:
Example
<!DOCTYPE html>
<html>
<body>
<%
Response.Write("<p style='color:#0000ff'>This text is styled.</p>")
%>
</body>
</html>
VBScript Examples
This tutorial contains a lot of VBScript examples.
VBScript Reference
This tutorial has complete VBScript reference.
ASP Variables
Variables are "containers" for storing information.
More Examples
This example demonstrates how to declare a variable, assign a value to it, and use the value in a text.
Arrays are used to store a series of related data items. This example demonstrates how to create an array that stores names.
How to loop through the six headings in HTML.
This example will display a different message to the user depending on the time on the server.
This example is the same as the one above, but the syntax is different.
How to create a variable, assign a value to it, and then change the value of it.
How to insert a variable value in a text.
Do You Remember Algebra from School?
Do you remember algebra from school? x=5, y=6, z=x+y
Do you remember that a letter (like x) could be used to hold a value (like 5), and that you could use the information above to calculate the value of z to be 11?
These letters are called variables, and variables can be used to hold values (x=5) or expressions (z=x+y).
VBScript Variables
As with algebra, VBScript variables are used to hold values or expressions.
A variable can have a short name, like x, or a more descriptive name, like carname.
Rules for VBScript variable names:
- Must begin with a letter
- Cannot contain a period (.)
- Cannot exceed 255 characters
In VBScript, all variables are of type variant, that can store different types of data.
Declaring (Creating) VBScript Variables
Creating variables in VBScript is most often referred to as "declaring" variables.
You can declare VBScript variables with the Dim, Public or the Private statement. Like this:
Now you have created two variables. The name of the variables are "x" and "carname".
You can also declare variables by using its name in a script. Like this:
Now you have also created a variable. The name of the variable is "carname". However, this method is not a good practice, because you can misspell the variable name later in your script, and that can cause strange results when your script is running.
If you misspell for example the "carname" variable to "carnime", the script will automatically create a new variable called "carnime". To prevent your script from doing this, you can use the Option Explicit statement. This statement forces you to declare all your variables with the dim, public or private statement.
Put the Option Explicit statement on the top of your script. Like this:
Option Explicit
Dim carname
carname=some value
Assigning Values to Variables
You assign a value to a variable like this:
The variable name is on the left side of the expression and the value you want to assign to the variable is on the right. Now the variable "carname" has the value of "Volvo", and the variable "x" has the value of "10".
VBScript Array Variables
An array variable is used to store multiple values in a single variable.
In the following example, an array containing 3 elements is declared:
The number shown in the parentheses is 2. We start at zero so this array contains 3 elements. This is a fixed-size array. You assign data to each of the elements of the array like this:
names(0)="Tove"
names(1)="Jani"
names(2)="Stale"
Similarly, the data can be retrieved from any element using the index of the particular array element you want. Like this:
You can have up to 60 dimensions in an array. Multiple dimensions are declared by separating the numbers in the parentheses with commas. Here we have a two-dimensional array consisting of 5 rows and 7 columns:
Assign data to a two-dimensional array:
Example
<% Dim x(2,2) x(0,0)="Volvo" x(0,1)="BMW" x(0,2)="Ford" x(1,0)="Apple" x(1,1)="Orange" x(1,2)="Banana" x(2,0)="Coke" x(2,1)="Pepsi" x(2,2)="Sprite" for i=0 to 2 response.write("
")
for j=0 to 2
response.write(x(i,j) & "
")
next
response.write("
") next %>
The Lifetime of Variables
A variable declared outside a procedure can be accessed and changed by any script in the ASP file.
A variable declared inside a procedure is created and destroyed every time the procedure is executed. No scripts outside the procedure can access or change the variable.
To declare variables accessible to more than one ASP file, declare them as session variables or application variables.
Session Variables
Session variables are used to store information about ONE single user, and are available to all pages in one application. Typically information stored in session variables are name, id, and preferences.
Application Variables
Application variables are also available to all pages in one application. Application variables are used to store information about ALL users in one specific application.
ASP Procedures
In ASP you can call a JavaScript procedure from a VBScript and vice versa.
Procedures
The ASP source code can contain procedures and functions:
Example
<% sub vbproc(num1,num2) response.write(num1*num2) end sub %>
Result: <%call vbproc(3,4)%>
Insert the <%@ language="language" %> line above the tag to write the procedure/function in another scripting language:
Example
<%@ language="javascript" %> <% function jsproc(num1,num2) { Response.Write(num1*num2) } %>
Result: <%jsproc(3,4)%>
Differences Between VBScript and JavaScript
When calling a VBScript or a JavaScript procedure from an ASP file written in VBScript, you can use the "call" keyword followed by the procedure name. If a procedure requires parameters, the parameter list must be enclosed in parentheses when using the "call" keyword. If you omit the "call" keyword, the parameter list must not be enclosed in parentheses. If the procedure has no parameters, the parentheses are optional.
When calling a JavaScript or a VBScript procedure from an ASP file written in JavaScript, always use parentheses after the procedure name.
VBScript Procedures
VBScript has two kinds procedures:
- Sub procedure
- Function procedure
VBScript Sub Procedures
A Sub procedure:
- is a series of statements, enclosed by the Sub and End Sub statements
- can perform actions, but does not return a value
- can take arguments
Sub mysub()
some statements
End Sub
or
Sub mysub(argument1,argument2)
some statements
End Sub
Example
Sub mysub()
response.write("I was written by a sub procedure")
End Sub
VBScript Function Procedures
A Function procedure:
- is a series of statements, enclosed by the Function and End Function statements
- can perform actions and can return a value
- can take arguments that are passed to it by a calling procedure
- without arguments, must include an empty set of parentheses ()
- returns a value by assigning a value to its name
Function myfunction()
some statements
myfunction=some value
End Function
or
Function myfunction(argument1,argument2)
some statements
myfunction=some value
End Function
Example
function myfunction()
myfunction=Date()
end function
Calling a Procedure
This simple function procedures is called to calculate the sum of two arguments:
Example
Function myfunction(a,b)
myfunction=a+b
End Function
response.write(myfunction(5,9))
The function "myfunction" will return the sum of argument "a" and argument "b". In this case 14.
When you call a procedure you can use the Call statement, like this:
Or, you can omit the Call statement, like this:
More Examples
How to call both a JavaScript procedure and a VBScript procedure in an ASP file.
Conditional Statements
Conditional statements are used to perform different actions for different decisions.
In VBScript we have four conditional statements:
- If statement - executes a set of code when a condition is true
- If...Then...Else statement - select one of two sets of lines to execute
- If...Then...ElseIf statement - select one of many sets of lines to execute
- Select Case statement - select one of many sets of lines to execute
If...Then...Else
Use the If...Then...Else statement if you want to
- execute some code if a condition is true
- select one of two blocks of code to execute
If you want to execute only one statement when a condition is true, you can write the code on one line:
If i=10 Then response.write("Hello")
There is no ..Else.. in this syntax. You just tell the code to perform one action if a condition is true (in this case If i=10).
If you want to execute more than one statement when a condition is true, you must put each statement on separate lines, and end the statement with the keyword "End If":
If i=10 Then
response.write("Hello")
i = i+1
End If
There is no ..Else.. in the example above either. You just tell the code to perform multiple actions if the condition is true.
If you want to execute a statement if a condition is true and execute another statement if the condition is not true, you must add the "Else" keyword:
Example
i=hour(time)
If i < 10 Then
response.write("Good morning!")
Else
response.write("Have a nice day!")
End If
In the example above, the first block of code will be executed if the condition is true, and the other block will be executed otherwise (if i is greater than 10).
If...Then...ElseIf
You can use the If...Then...ElseIf statement if you want to select one of many blocks of code to execute:
Example
i=hour(time)
If i = 10 Then
response.write("Just started...!")
ElseIf i = 11 Then
response.write("Hungry!")
ElseIf i = 12 Then
response.write("Ah, lunch-time!")
ElseIf i = 16 Then
response.write("Time to go home!")
Else
response.write("Unknown")
End If
Select Case
You can also use the "Select Case" statement if you want to select one of many blocks of code to execute:
Example
d=weekday(date)
Select Case d
Case 1
response.write("Sleepy Sunday")
Case 2
response.write("Monday again!")
Case 3
response.write("Just Tuesday!")
Case 4
response.write("Wednesday!")
Case 5
response.write("Thursday...")
Case 6
response.write("Finally Friday!")
Case else
response.write("Super Saturday!!!!")
End Select
This is how it works: First we have a single expression (most often a variable), that is evaluated once. The value of the expression is then compared with the values for each Case in the structure. If there is a match, the block of code associated with that Case is executed.
Looping Statements
Looping statements are used to run the same block of code a specified number of times.
In VBScript we have four looping statements:
- For...Next statement - runs code a specified number of times
- For Each...Next statement - runs code for each item in a collection or each element of an array
- Do...Loop statement - loops while or until a condition is true
- While...Wend statement - Do not use it - use the Do...Loop statement instead
For...Next Loop
Use the For...Next statement to run a block of code a specified number of times.
The For statement specifies the counter variable (i), and its start and end values. The Next statement increases the counter variable (i) by one.
Example
<%
For i = 0 To 5
response.write("The number is " & i & "
")
Next
%>
The Step Keyword
With the Step keyword, you can increase or decrease the counter variable by the value you specify.
In the example below, the counter variable (i) is INCREASED by two, each time the loop repeats.
For i=2 To 10 Step 2
some code
Next
To decrease the counter variable, you must use a negative Step value. You must specify an end value that is less than the start value.
In the example below, the counter variable (i) is DECREASED by two, each time the loop repeats.
For i=10 To 2 Step -2
some code
Next
Exit a For...Next
You can exit a For...Next statement with the Exit For keyword.
For i=1 To 10
If i=5 Then Exit For
some code
Next
For Each...Next Loop
A For Each...Next loop repeats a block of code for each item in a collection, or for each element of an array.
Example
<%
Dim cars(2)
cars(0)="Volvo"
cars(1)="Saab"
cars(2)="BMW"
For Each x In cars
response.write(x & "
")
Next
%>
Do...Loop
If you don't know how many repetitions you want, use a Do...Loop statement.
The Do...Loop statement repeats a block of code while a condition is true, or until a condition becomes true.
Repeat Code While a Condition is True
You use the While keyword to check a condition in a Do...Loop statement.
Do While i>10
some code
Loop
If i equals 9, the code inside the loop above will never be executed.
Do
some code
Loop While i>10
The code inside this loop will be executed at least one time, even if i is less than 10.
Repeat Code Until a Condition Becomes True
You use the Until keyword to check a condition in a Do...Loop statement.
Do Until i=10
some code
Loop
If i equals 10, the code inside the loop will never be executed.
Do
some code
Loop Until i=10
The code inside this loop will be executed at least one time, even if i is equal to 10.
Exit a Do...Loop
You can exit a Do...Loop statement with the Exit Do keyword.
Do Until i=10
i=i-1
If i<10 Then Exit Do
Loop
The code inside this loop will be executed as long as i is different from 10, and as long as i is greater than 10.
More Examples
How to loop through the six headings in html.
How to make a simple Do...While loop.
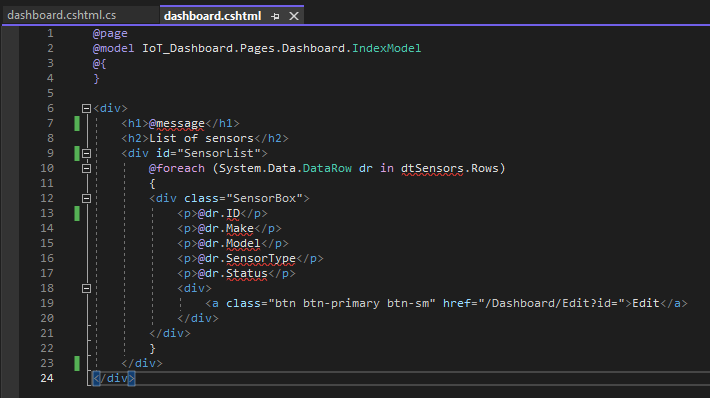
The Request.QueryString and Request.Form commands are used to retrieve user input from forms.
User Input
The Request object can be used to retrieve user information from forms.
User input can be retrieved with the Request.QueryString or Request.Form command.
Request.QueryString
The Request.QueryString command is used to collect values in a form with method="get".
Information sent from a form with the GET method is visible to everyone (it will be displayed in the browser's address bar) and has limits on the amount of information to send.
Example HTML form
<form method="get" action="simpleform.asp">
First Name: <input type="text" name="fname"><br>
Last Name: <input type="text" name="lname"><br><br>
<input type="submit" value="Submit">
</form>
If a user typed "Bill" and "Gates" in the HTML form above, the URL sent to the server would look like this:
https://www.w3schools.com/simpleform.asp?fname=Bill&lname=Gates
Assume that "simpleform.asp" contains the following ASP script:
<body>
Welcome
<%
response.write(request.querystring("fname"))
response.write(" " & request.querystring("lname"))
%>
</body>
The browser will display the following in the body of the document:
Welcome Bill Gates
Request.Form
The Request.Form command is used to collect values in a form with method="post".
Information sent from a form with the POST method is invisible to others and has no limits on the amount of information to send.
Example HTML form
<form method="post" action="simpleform.asp">
First Name: <input type="text" name="fname"><br>
Last Name: <input type="text" name="lname"><br><br>
<input type="submit" value="Submit">
</form>
If a user typed "Bill" and "Gates" in the HTML form above, the URL sent to the server would look like this:
https://www.w3schools.com/simpleform.asp
Assume that "simpleform.asp" contains the following ASP script:
<body>
Welcome
<%
response.write(request.form("fname"))
response.write(" " & request.form("lname"))
%>
</body>
The browser will display the following in the body of the document:
Welcome Bill Gates
Form Validation
User input should be validated on the browser whenever possible (by client scripts). Browser validation is faster and reduces the server load.
You should consider server validation if the user input will be inserted into a database. A good way to validate a form on the server is to post the form to itself, instead of jumping to a different page. The user will then get the error messages on the same page as the form. This makes it easier to discover the error.
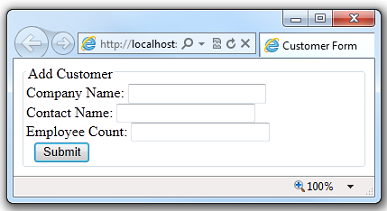
A cookie is often used to identify a user.
More Examples
How to create a Welcome cookie.
What is a Cookie?
A cookie is often used to identify a user. A cookie is a small file that the server embeds on the user's computer. Each time the same computer requests a page with a browser, it will send the cookie too. With ASP, you can both create and retrieve cookie values.
How to Create a Cookie?
The "Response.Cookies" command is used to create cookies.
Note: The Response.Cookies command must appear BEFORE the <html> tag.
In the example below, we will create a cookie named "firstname" and assign the value "Alex" to it:
<%
Response.Cookies("firstname")="Alex"
%>
It is also possible to assign properties to a cookie, like setting a date when the cookie should expire:
<%
Response.Cookies("firstname")="Alex"
Response.Cookies("firstname").Expires=#May 10,2012#
%>
How to Retrieve a Cookie Value?
The "Request.Cookies" command is used to retrieve a cookie value.
In the example below, we retrieve the value of the cookie named "firstname" and display it on a page:
<%
fname=Request.Cookies("firstname")
response.write("Firstname=" & fname)
%>
Output: Firstname=Alex
A Cookie with Keys
If a cookie contains a collection of multiple values, we say that the cookie has Keys.
In the example below, we will create a cookie collection named "user". The "user" cookie has Keys that contains information about a user:
<%
Response.Cookies("user")("firstname")="John"
Response.Cookies("user")("lastname")="Smith"
Response.Cookies("user")("country")="Norway"
Response.Cookies("user")("age")="25"
%>
Read all Cookies
Look at the following code:
<%
Response.Cookies("firstname")="Alex"
Response.Cookies("user")("firstname")="John"
Response.Cookies("user")("lastname")="Smith"
Response.Cookies("user")("country")="Norway"
Response.Cookies("user")("age")="25"
%>
Assume that your server has sent all the cookies above to a user.
Now we want to read all the cookies sent to a user. The example below shows how to do it (note that the code below checks if a cookie has Keys with the HasKeys property):
<!DOCTYPE html>
<html>
<body>
<%
dim x,y
for each x in Request.Cookies
response.write("<p>")
if Request.Cookies(x).HasKeys then
for each y in Request.Cookies(x)
response.write(x & ":" & y & "=" & Request.Cookies(x)(y))
response.write("<br>")
next
else
Response.Write(x & "=" & Request.Cookies(x) & "<br>")
end if
response.write "</p>"
next
%>
</body>
</html>
Output:
firstname=Alex
user:firstname=John
user:lastname=Smith
user:country=Norway
user:age=25
What if a Browser Does NOT Support Cookies?
If your application deals with browsers that do not support cookies, you will have to use other methods to pass information from one page to another in your application. There are two ways of doing this:
1. Add parameters to a URL
You can add parameters to a URL:
<a href="welcome.asp?fname=John&lname=Smith">Go to Welcome Page</a>
And retrieve the values in the "welcome.asp" file like this:
<%
fname=Request.querystring("fname")
lname=Request.querystring("lname")
response.write("<p>Hello " & fname & " " & lname & "!</p>")
response.write("<p>Welcome to my Web site!</p>")
%>
2. Use a form
You can use a form. The form passes the user input to "welcome.asp" when the user clicks on the Submit button:
<form method="post" action="welcome.asp">
First Name: <input type="text" name="fname" value="">
Last Name: <input type="text" name="lname" value="">
<input type="submit" value="Submit">
</form>
Retrieve the values in the "welcome.asp" file like this:
<%
fname=Request.form("fname")
lname=Request.form("lname")
response.write("<p>Hello " & fname & " " & lname & "!</p>")
response.write("<p>Welcome to my Web site!</p>")
%>
A Session object stores information about, or change settings for a user session.
The Session object
When you are working with an application on your computer, you open it, do some changes and then you close it. This is much like a Session. The computer knows who you are. It knows when you open the application and when you close it. However, on the internet there is one problem: the web server does not know who you are and what you do, because the HTTP address doesn't maintain state.
ASP solves this problem by creating a unique cookie for each user. The cookie is sent to the user's computer and it contains information that identifies the user. This interface is called the Session object.
The Session object stores information about, or change settings for a user session.
Variables stored in a Session object hold information about one single user, and are available to all pages in one application. Common information stored in session variables are name, id, and preferences. The server creates a new Session object for each new user, and destroys the Session object when the session expires.
When does a Session Start?
A session starts when:
- A new user requests an ASP file, and the Global.asa file includes a Session_OnStart procedure
- A value is stored in a Session variable
- A user requests an ASP file, and the Global.asa file uses the <object> tag to instantiate an object with session scope
When does a Session End?
A session ends if a user has not requested or refreshed a page in the application for a specified period. By default, this is 20 minutes.
If you want to set a timeout interval that is shorter or longer than the default, use the Timeout property.
The example below sets a timeout interval of 5 minutes:
<%
Session.Timeout=5
%>
Use the Abandon method to end a session immediately:
<%
Session.Abandon
%>
Note: The main problem with sessions is WHEN they should end. We do not know if the user's last request was the final one or not. So we do not know how long we should keep the session "alive". Waiting too long for an idle session uses up resources on the server, but if the session is deleted too soon the user has to start all over again because the server has deleted all the information. Finding the right timeout interval can be difficult!
Tip: Only store SMALL amounts of data in session variables!
Store and Retrieve Session Variables
The most important thing about the Session object is that you can store variables in it.
The example below will set the Session variable username to "Donald Duck" and the Session variable age to "50":
<%
Session("username")="Donald Duck"
Session("age")=50
%>
When the value is stored in a session variable it can be reached from ANY page in the ASP application:
Welcome <%Response.Write(Session("username"))%>
The line above returns: "Welcome Donald Duck".
You can also store user preferences in the Session object, and then access that preference to choose what page to return to the user.
The example below specifies a text-only version of the page if the user has a low screen resolution:
<%If Session("screenres")="low" Then%>
This is the text version of the page
<%Else%>
This is the multimedia version of the page
<%End If%>
Remove Session Variables
The Contents collection contains all session variables.
It is possible to remove a session variable with the Remove method.
The example below removes the session variable "sale" if the value of the session variable "age" is lower than 18:
<%
If Session.Contents("age")<18 then
Session.Contents.Remove("sale")
End If
%>
To remove all variables in a session, use the RemoveAll method:
<%
Session.Contents.RemoveAll()
%>
Loop Through the Contents Collection
The Contents collection contains all session variables. You can loop through the Contents collection, to see what's stored in it:
<%
Session("username")="Donald Duck"
Session("age")=50
dim i
For Each i in Session.Contents
Response.Write(i & "<br>")
Next
%>
Result:
username
age
If you do not know the number of items in the Contents collection, you can use the Count property:
<%
dim i
dim j
j=Session.Contents.Count
Response.Write("Session variables: " & j)
For i=1 to j
Response.Write(Session.Contents(i) & "<br>")
Next
%>
Result:
Session variables: 2
Donald Duck
50
Loop Through the StaticObjects Collection
You can loop through the StaticObjects collection, to see the values of all objects stored in the Session object:
<%
dim i
For Each i in Session.StaticObjects
Response.Write(i & "<br>")
Next
%>
A group of ASP files that work together to perform some purpose is called an application. The Application object is used to tie these files together.
Application Object
An application on the Web may consists of several ASP files that work together to perform some purpose. The Application object is used to tie these files together.
The Application object is used to store and access variables from any page, just like the Session object. The difference is that ALL users share ONE Application object (with Sessions there is ONE Session object for EACH user).
The Application object holds information that will be used by many pages in the application (like database connection information). The information can be accessed from any page. The information can also be changed in one place, and the changes will automatically be reflected on all pages.
The Application object's collections, methods, and events are described below:
Collections
|
Collection
|
Description
|
|
Contents
|
Contains all the items appended to the application through a script command
|
|
StaticObjects
|
Contains all the objects appended to the application with the HTML <object> tag
|
Methods
|
Method
|
Description
|
|
Contents.Remove
|
Deletes an item from the Contents collection
|
|
Contents.RemoveAll()
|
Deletes all items from the Contents collection
|
|
Lock
|
Prevents other users from modifying the variables in the Application object
|
|
Unlock
|
Enables other users to modify the variables in the Application object (after it has been locked using the Lock method)
|
Events
|
Event
|
Description
|
|
Application_OnEnd
|
Occurs when all user sessions are over, and the application ends
|
|
Application_OnStart
|
Occurs before the first new session is created (when the Application object is first referenced)
|
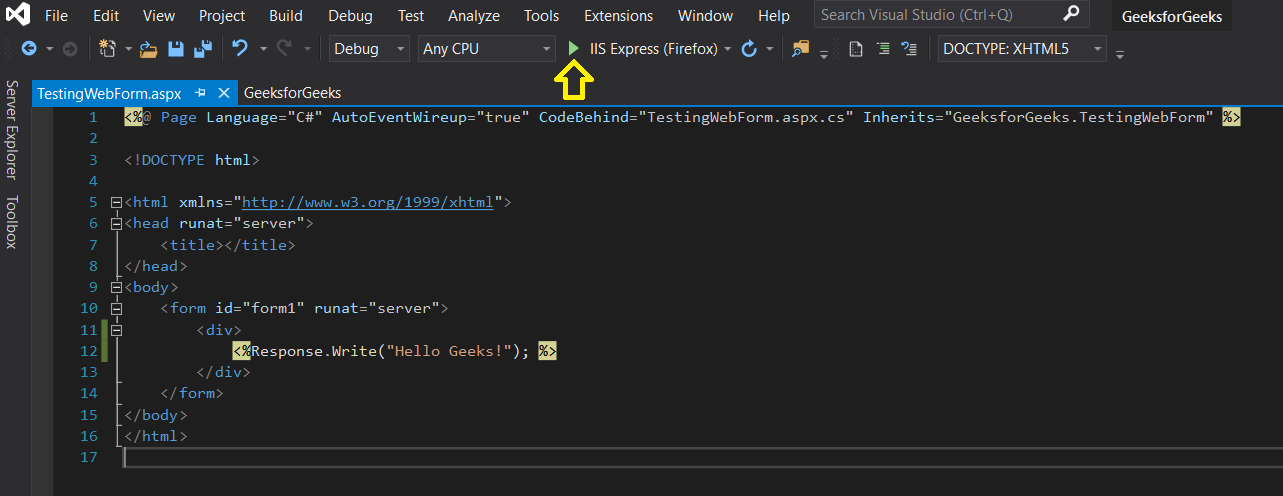
The #include Directive
You can insert the content of one ASP file into another ASP file before the server executes it, with the #include directive.
The #include directive is used to create functions, headers, footers, or elements that will be reused on multiple pages.
How to Use the #include Directive
Here is a file called "mypage.asp":
<!DOCTYPE html>
<html>
<body>
<h3>Words of Wisdom:</h3>
<p><!--#include file="wisdom.inc"--></p>
<h3>The time is:</h3>
<p><!--#include file="time.inc"--></p>
</body>
</html>
Here is the "wisdom.inc" file:
"One should never increase, beyond what is necessary,
the number of entities required to explain anything."
Here is the "time.inc" file:
<%
Response.Write(Time)
%>
If you look at the source code in a browser, it will look something like this:
<!DOCTYPE html>
<html>
<body>
<h3>Words of Wisdom:</h3>
<p>"One should never increase, beyond what is necessary,
the number of entities required to explain anything."</p>
<h3>The time is:</h3>
<p>11:33:42 AM</p>
</body>
</html>
Syntax for Including Files
To include a file in an ASP page, place the #include directive inside comment tags:
<!--#include virtual="somefilename"-->
or
<!--#include file ="somefilename"-->
The Virtual Keyword
Use the virtual keyword to indicate a path beginning with a virtual directory.
If a file named "header.inc" resides in a virtual directory named /html, the following line would insert the contents of "header.inc":
<!-- #include virtual ="/html/header.inc" -->
The File Keyword
Use the file keyword to indicate a relative path. A relative path begins with the directory that contains the including file.
If you have a file in the html directory, and the file "header.inc" resides in htmlheaders, the following line would insert "header.inc" in your file:
<!-- #include file ="headersheader.inc" -->
Note that the path to the included file (headersheader.inc) is relative to the including file. If the file containing this #include statement is not in the html directory, the statement will not work.
Tips and Notes
In the sections above we have used the file extension ".inc" for included files. Notice that if a user tries to browse an INC file directly, its content will be displayed. If your included file contains confidential information or information you do not want any users to see, it is better to use an ASP extension. The source code in an ASP file will not be visible after the interpretation. An included file can also include other files, and one ASP file can include the same file more than once.
Important: Included files are processed and inserted before the scripts are executed. The following script will NOT work because ASP executes the #include directive before it assigns a value to the variable:
<%
fname="header.inc"
%>
<!--#include file="<%fname%>"-->
You cannot open or close a script delimiter in an INC file. The following script will NOT work:
<%
For i = 1 To n
<!--#include file="count.inc"-->
Next
%>
But this script will work:
<% For i = 1 to n %>
<!--#include file="count.inc" -->
<% Next %>
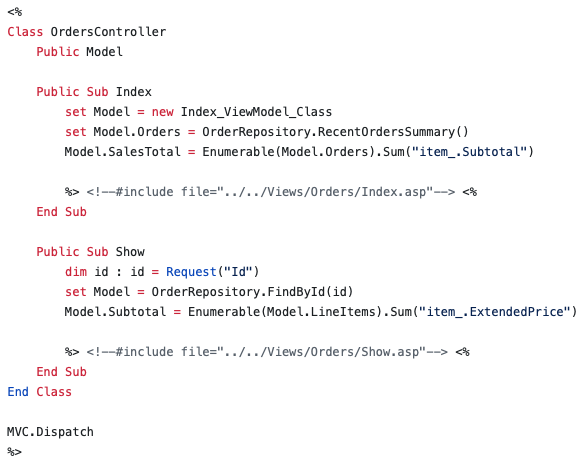
The Global.asa file
The Global.asa file is an optional file that can contain declarations of objects, variables, and methods that can be accessed by every page in an ASP application.
All valid browser scripts (JavaScript, VBScript, JScript, PerlScript, etc.) can be used within Global.asa.
The Global.asa file can contain only the following:
- Application events
- Session events
- <object> declarations
- TypeLibrary declarations
- the #include directive
Note: The Global.asa file must be stored in the root directory of the ASP application, and each application can only have one Global.asa file.
Events in Global.asa
In Global.asa you can tell the application and session objects what to do when the application/session starts and what to do when the application/session ends. The code for this is placed in event handlers. The Global.asa file can contain four types of events:
Application_OnStart - Occurs when the FIRST user calls the first page in an ASP application. This event occurs after the Web server is restarted or after the Global.asa file is edited. The "Session_OnStart" event occurs immediately after this event.
Session_OnStart - This event occurs EVERY time a NEW user requests his or her first page in the ASP application.
Session_OnEnd - This event occurs EVERY time a user ends a session. A user-session ends after a page has not been requested by the user for a specified time (by default this is 20 minutes).
Application_OnEnd - This event occurs after the LAST user has ended the session. Typically, this event occurs when a Web server stops. This procedure is used to clean up settings after the Application stops, like delete records or write information to text files.
A Global.asa file could look something like this:
<script language="vbscript" runat="server">
sub Application_OnStart
'some code
end sub
sub Application_OnEnd
'some code
end sub
sub Session_OnStart
'some code
end sub
sub Session_OnEnd
'some code
end sub
</script>
Note: Because we cannot use the ASP script delimiters (<% and %>) to insert scripts in the Global.asa file, we put subroutines inside an HTML <script> element.
<object> Declarations
It is possible to create objects with session or application scope in Global.asa by using the <object> tag.
Note: The <object> tag should be outside the <script> tag!
Syntax
<object runat="server" scope="scope" id="id" {progid="progID"|classid="classID"}>
....
</object>
| Parameter |
Description |
| scope |
Sets the scope of the object (either Session or Application) |
| id |
Specifies a unique id for the object |
| ProgID |
An id associated with a class id. The format for ProgID is [Vendor.]Component[.Version]
Either ProgID or ClassID must be specified.
|
| ClassID |
Specifies a unique id for a COM class object.
Either ProgID or ClassID must be specified.
|
Examples
The first example creates an object of session scope named "MyAd" by using the ProgID parameter:
<object runat="server" scope="session" id="MyAd" progid="MSWC.AdRotator">
</object>
The second example creates an object of application scope named "MyConnection" by using the ClassID parameter:
<object runat="server" scope="application" id="MyConnection"
classid="Clsid:8AD3067A-B3FC-11CF-A560-00A0C9081C21">
</object>
The objects declared in the Global.asa file can be used by any script in the application:
GLOBAL.ASA:
<object runat="server" scope="session" id="MyAd" progid="MSWC.AdRotator">
</object>
You could reference the object "MyAd" from any page in the ASP application:
SOME .ASP FILE:
<%=MyAd.GetAdvertisement("/banners/adrot.txt")%>
TypeLibrary Declarations
A TypeLibrary is a container for the contents of a DLL file corresponding to a COM object. By including a call to the TypeLibrary in the Global.asa file, the constants of the COM object can be accessed, and errors can be better reported by the ASP code. If your Web application relies on COM objects that have declared data types in type libraries, you can declare the type libraries in Global.asa.
Syntax
<!--METADATA TYPE="TypeLib"
file="filename" uuid="id" version="number" lcid="localeid"
-->
| Parameter |
Description |
| file |
Specifies an absolute path to a type library.
Either the file parameter or the uuid parameter is required
|
| uuid |
Specifies a unique identifier for the type library.
Either the file parameter or the uuid parameter is required
|
| version |
Optional. Used for selecting version. If the requested version is not found, then the most recent version is used |
| lcid |
Optional. The locale identifier to be used for the type library |
Error Values
The server can return one of the following error messages:
| Error Code |
Description |
| ASP 0222 |
Invalid type library specification |
| ASP 0223 |
Type library not found |
| ASP 0224 |
Type library cannot be loaded |
| ASP 0225 |
Type library cannot be wrapped |
Note: METADATA tags can appear anywhere in the Global.asa file (both inside and outside <script> tags). However, it is recommended that METADATA tags appear near the top of the Global.asa file.
Restrictions
Restrictions on what you can include in the Global.asa file:
- You cannot display text written in the Global.asa file. This file can't display information
- You can only use Server and Application objects in the Application_OnStart and Application_OnEnd subroutines. In the Session_OnEnd subroutine, you can use Server, Application, and Session objects. In the Session_OnStart subroutine you can use any built-in object
How to use the Subroutines
Global.asa is often used to initialize variables.
The example below shows how to detect the exact time a visitor first arrives on a Web site. The time is stored in a Session variable named "started", and the value of the "started" variable can be accessed from any ASP page in the application:
<script language="vbscript" runat="server">
sub Session_OnStart
Session("started")=now()
end sub
</script>
Global.asa can also be used to control page access.
The example below shows how to redirect every new visitor to another page, in this case to a page called "newpage.asp":
<script language="vbscript" runat="server">
sub Session_OnStart
Response.Redirect("newpage.asp")
end sub
</script>
And you can include functions in the Global.asa file.
In the example below the Application_OnStart subroutine occurs when the Web server starts. Then the Application_OnStart subroutine calls another subroutine named "getcustomers". The "getcustomers" subroutine opens a database and retrieves a record set from the "customers" table. The record set is assigned to an array, where it can be accessed from any ASP page without querying the database:
<script language="vbscript" runat="server">
sub Application_OnStart
getcustomers
end sub
sub getcustomers
set conn=Server.CreateObject("ADODB.Connection")
conn.Provider="Microsoft.Jet.OLEDB.4.0"
conn.Open "c:/webdata/northwind.mdb"
set rs=conn.execute("select name from customers")
Application("customers")=rs.GetRows
rs.Close
conn.Close
end sub
</script>
Global.asa Example
In this example we will create a Global.asa file that counts the number of current visitors.
- The Application_OnStart sets the Application variable "visitors" to 0 when the server starts
- The Session_OnStart subroutine adds one to the variable "visitors" every time a new visitor arrives
- The Session_OnEnd subroutine subtracts one from "visitors" each time this subroutine is triggered
The Global.asa file:
<script language="vbscript" runat="server">
Sub Application_OnStart
Application("visitors")=0
End Sub
Sub Session_OnStart
Application.Lock
Application("visitors")=Application("visitors")+1
Application.UnLock
End Sub
Sub Session_OnEnd
Application.Lock
Application("visitors")=Application("visitors")-1
Application.UnLock
End Sub
</script>
To display the number of current visitors in an ASP file:
<!DOCTYPE html>
<html>
<head>
</head>
<body>
<p>There are <%response.write(Application("visitors"))%> online now!</p>
</body>
</html>
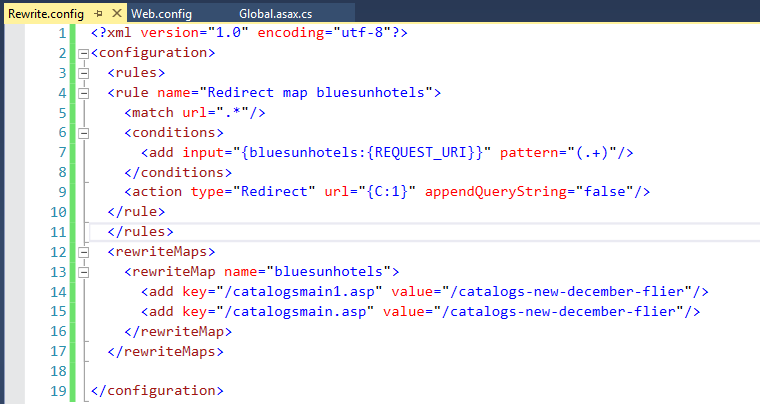
AJAX is about updating parts of a web page, without reloading the whole page.
What is AJAX?
AJAX = Asynchronous JavaScript and XML.
AJAX is a technique for creating fast and dynamic web pages.
AJAX allows web pages to be updated asynchronously by exchanging small amounts of data with the server behind the scenes. This means that it is possible to update parts of a web page, without reloading the whole page.
Classic web pages, (which do not use AJAX) must reload the entire page if the content should change.
Examples of applications using AJAX: Google Maps, Gmail, Youtube, and Facebook tabs.
How AJAX Works
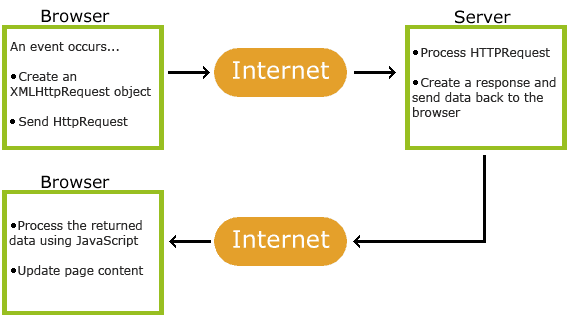
AJAX is Based on Internet Standards
AJAX is based on internet standards, and uses a combination of:
- XMLHttpRequest object (to exchange data asynchronously with a server)
- JavaScript/DOM (to display/interact with the information)
- CSS (to style the data)
- XML (often used as the format for transferring data)
AJAX applications are browser- and platform-independent!
Google Suggest
AJAX was made popular in 2005 by Google, with Google Suggest.
Google Suggest is using AJAX to create a very dynamic web interface: When you start typing in Google's search box, a JavaScript sends the letters off to a server and the server returns a list of suggestions.
Start Using AJAX Today
In our ASP tutorial, we will demonstrate how AJAX can update parts of a web page, without reloading the whole page. The server script will be written in ASP.
If you want to learn more about AJAX, visit our
AJAX ASP Example
The following example will demonstrate how a web page can communicate with a web server while a user type characters in an input field:
Example
Start typing a name in the input field below:
First name:
Suggestions:
Example Explained
In the example above, when a user types a character in the input field, a function called "showHint()" is executed.
The function is triggered by the onkeyup event.
Here is the HTML code:
Example
<html>
<head>
<script>
function showHint(str) {
if (str.length == 0) {
document.getElementById("txtHint").innerHTML = "";
return;
} else {
var xmlhttp = new XMLHttpRequest();
xmlhttp.onreadystatechange = function() {
if (this.readyState == 4 && this.status == 200) {
document.getElementById("txtHint").innerHTML = this.responseText;
}
};
xmlhttp.open("GET", "gethint.asp?q=" + str, true);
xmlhttp.send();
}
}
</script>
</head>
<body>
<p><b>Start typing a name in the input field below:</b></p>
<form>
First name: <input type="text" onkeyup="showHint(this.value)">
</form>
<p>Suggestions: <span id="txtHint"></span></p>
</body>
</html>
Code explanation:
First, check if the input field is empty (str.length == 0). If it is, clear the content of the txtHint placeholder and exit the function.
However, if the input field is not empty, do the following:
- Create an XMLHttpRequest object
- Create the function to be executed when the server response is ready
- Send the request off to an ASP file (gethint.asp) on the server
- Notice that q parameter is added gethint.asp?q="+str
- The str variable holds the content of the input field
The ASP File - "gethint.asp"
The ASP file checks an array of names, and returns the corresponding name(s) to the browser:
<%
response.expires=-1
dim a(30)
'Fill up array with names
a(1)="Anna"
a(2)="Brittany"
a(3)="Cinderella"
a(4)="Diana"
a(5)="Eva"
a(6)="Fiona"
a(7)="Gunda"
a(8)="Hege"
a(9)="Inga"
a(10)="Johanna"
a(11)="Kitty"
a(12)="Linda"
a(13)="Nina"
a(14)="Ophelia"
a(15)="Petunia"
a(16)="Amanda"
a(17)="Raquel"
a(18)="Cindy"
a(19)="Doris"
a(20)="Eve"
a(21)="Evita"
a(22)="Sunniva"
a(23)="Tove"
a(24)="Unni"
a(25)="Violet"
a(26)="Liza"
a(27)="Elizabeth"
a(28)="Ellen"
a(29)="Wenche"
a(30)="Vicky"
'get the q parameter from URL
q=ucase(request.querystring("q"))
'lookup all hints from array if length of q>0
if len(q)>0 then
hint=""
for i=1 to 30
if q=ucase(mid(a(i),1,len(q))) then
if hint="" then
hint=a(i)
else
hint=hint & " , " & a(i)
end if
end if
next
end if
'Output "no suggestion" if no hint were found
'or output the correct values
if hint="" then
response.write("no suggestion")
else
response.write(hint)
end if
%>
AJAX can be used for interactive communication with a database.
AJAX Database Example
The following example will demonstrate how a web page can fetch information from a database with AJAX:
Example
Select a customer: Alfreds Futterkiste North/South Wolski Zajazd
Customer info will be listed here...
Example Explained - The HTML Page
When a user selects a customer in the dropdown list above, a function called "showCustomer()" is executed. The function is triggered by the "onchange" event:
<!DOCTYPE html>
<html>
<head>
<script>
function showCustomer(str)
{
if (str=="")
{
document.getElementById("txtHint").innerHTML="";
return;
}
if (window.XMLHttpRequest)
{// code for IE7+, Firefox, Chrome, Opera, Safari
xmlhttp=new XMLHttpRequest();
}
else
{// code for IE6, IE5
xmlhttp=new ActiveXObject("Microsoft.XMLHTTP");
}
xmlhttp.onreadystatechange=function()
{
if (this.readyState==4 && this.status==200)
{
document.getElementById("txtHint").innerHTML=this.responseText;
}
}
xmlhttp.open("GET","getcustomer.asp?q="+str,true);
xmlhttp.send();
}
</script>
</head
<body>
<form>
<select name="customers" onchange="showCustomer(this.value)">
<option value="">Select a customer:</option>
<option value="ALFKI">Alfreds Futterkiste</option>
<option value="NORTS ">North/South</option>
<option value="WOLZA">Wolski Zajazd</option>
</select>
</form>
<
<div id="txtHint">Customer info will be listed here...</div>
</body>
</html>
Source code explanation:
If no customer is selected (str.length==0), the function clears the content of the txtHint placeholder and exits the function.
If a customer is selected, the showCustomer() function executes the following:
- Create an XMLHttpRequest object
- Create the function to be executed when the server response is ready
- Send the request off to a file on the server
- Notice that a parameter (q) is added to the URL (with the content of the dropdown list)
The ASP File
The page on the server called by the JavaScript above is an ASP file called "getcustomer.asp".
The source code in "getcustomer.asp" runs a query against a database, and returns the result in an HTML table:
<%
response.expires=-1
sql="SELECT * FROM CUSTOMERS WHERE CUSTOMERID="
sql=sql & "'" & request.querystring("q") & "'"
set conn=Server.CreateObject("ADODB.Connection")
conn.Provider="Microsoft.Jet.OLEDB.4.0"
conn.Open(Server.Mappath("/datafolder/northwind.mdb"))
set rs=Server.CreateObject("ADODB.recordset")
rs.Open sql,conn
response.write("<table>")
do until rs.EOF
for each x in rs.Fields
response.write("<tr><td><b>" & x.name & "</b></td>")
response.write("<td>" & x.value & "</td></tr>")
next
rs.MoveNext
loop
response.write("</table>")
%>
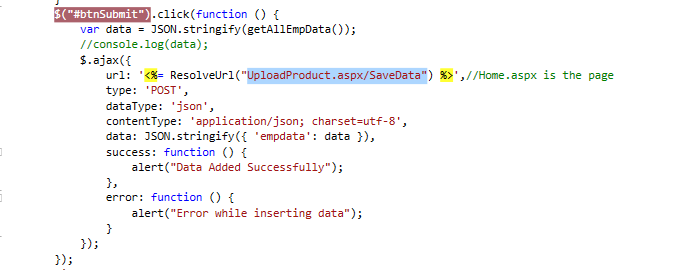
CDOSYS is a built-in component in ASP. This component is used to send e-mails with ASP.
Sending e-mail with CDOSYS
CDO (Collaboration Data Objects) is a Microsoft technology that is designed to simplify the creation of messaging applications.
CDOSYS is a built-in component in ASP. We will show you how to use this component to send e-mail with ASP.
How about CDONTs?
Microsoft has discontinued the use of CDONTs on Windows 2000, Windows XP and Windows 2003. If you have used CDONTs in your ASP applications, you should update the code and use the new CDO technology.
Examples using CDOSYS
Sending a text e-mail:
<%
Set myMail = CreateObject("CDO.Message")
myMail.Subject = "Sending email with CDO"
myMail.From = "[email protected]"
myMail.To = "[email protected]"
myMail.TextBody = "This is a message."
myMail.Send
set myMail = nothing
%>
Sending a text e-mail with Bcc and CC fields:
<%
Set myMail = CreateObject("CDO.Message")
myMail.Subject = "Sending email with CDO"
myMail.From = "[email protected]"
myMail.To = "[email protected]"
myMail.Bcc = "[email protected]"
myMail.Cc = "[email protected]"
myMail.TextBody = "This is a message."
myMail.Send
set myMail = nothing
%>
Sending an HTML e-mail:
<%
Set myMail = CreateObject("CDO.Message")
myMail.Subject = "Sending email with CDO"
myMail.From = "[email protected]"
myMail.To = "[email protected]"
myMail.HTMLBody = "<h1>This is a message.</h1>"
myMail.Send
set myMail = nothing
%>
Sending an HTML e-mail that sends a webpage from a website:
<%
Set myMail = CreateObject("CDO.Message")
myMail.Subject = "Sending email with CDO"
myMail.From = "[email protected]"
myMail.To ="[email protected]"
myMail.CreateMHTMLBody "https://www.w3schools.com/asp/"
myMail.Send
set myMail = nothing
%>
Sending an HTML e-mail that sends a webpage from a file on your computer:
<%
Set myMail = CreateObject("CDO.Message")
myMail.Subject = "Sending email with CDO"
myMail.From = "[email protected]"
myMail.To = "[email protected]"
myMail.CreateMHTMLBody "file://c:/mydocuments/test.htm"
myMail.Send
set myMail = nothing
%>
Sending a text e-mail with an Attachment:
<%
Set myMail = CreateObject("CDO.Message")
myMail.Subject = "Sending email with CDO"
myMail.From = "[email protected]"
myMail.To = "[email protected]"
myMail.TextBody = "This is a message."
myMail.AddAttachment "c:mydocumentstest.txt"
myMail.Send
set myMail = nothing
%>
Sending a text e-mail using a remote server:
<%
Set myMail = CreateObject("CDO.Message")
myMail.Subject = "Sending email with CDO"
myMail.From = "[email protected]"
myMail.To = "[email protected]"
myMail.TextBody = "This is a message."
myMail.Configuration.Fields.Item _
("http://schemas.microsoft.com/cdo/configuration/sendusing") = 2
'Name or IP of remote SMTP server
myMail.Configuration.Fields.Item _
("http://schemas.microsoft.com/cdo/configuration/smtpserver") = "smtp.server.com"
'Server port
myMail.Configuration.Fields.Item _
("http://schemas.microsoft.com/cdo/configuration/smtpserverport") = 25
myMail.Configuration.Fields.Update
myMail.Send
set myMail = nothing
%>

ASP and VBScript Examples
ASP Output
VbScript Variables
VBScript Looping
VBScript Date and Time Functions
Some Other Built-in VBScript Functions
Procedures
VBScript vs JavaScript
VBScript Conditional Statements
ASP Forms
ASP Cookies
ASP Response Object
ASP Request Object
ASP Session Object
ASP Server Object
ASP FileSystem Object
ASP TextStream Object
ASP Drive Object
ASP File Object
ASP Dictionary Object
ASP AdRotator
ASP Browser Capabilities
ASP ContentRotator
ASP Content Linking
ADO Display
ADO Queries
ADO Sort
ADO Recordset Object
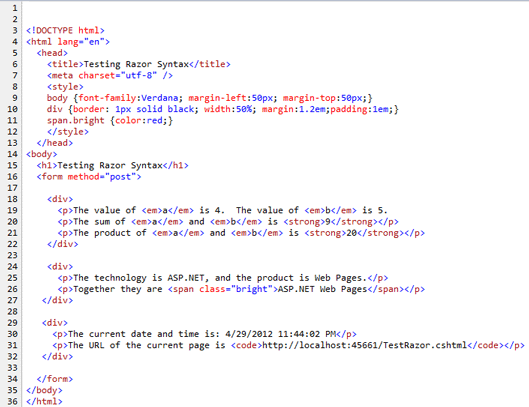
This page contains all the built-in VBScript functions. The page is divided into following sections:
- Date/Time functions
- Conversion functions
- Format functions
|
- Math functions
- Array functions
|
- String functions
- Other functions
|
Date/Time Functions
| Function |
Description |
| CDate |
Converts a valid date and time expression to the variant of subtype Date |
| Date |
Returns the current system date |
| DateAdd |
Returns a date to which a specified time interval has been added |
| DateDiff |
Returns the number of intervals between two dates |
| DatePart |
Returns the specified part of a given date |
| DateSerial |
Returns the date for a specified year, month, and day |
| DateValue |
Returns a date |
| Day |
Returns a number that represents the day of the month (between 1 and 31, inclusive) |
| FormatDateTime |
Returns an expression formatted as a date or time |
| Hour |
Returns a number that represents the hour of the day (between 0 and 23, inclusive) |
| IsDate |
Returns a Boolean value that indicates if the evaluated expression can be converted to a date |
| Minute |
Returns a number that represents the minute of the hour (between 0 and 59, inclusive) |
| Month |
Returns a number that represents the month of the year (between 1 and 12, inclusive) |
| MonthName |
Returns the name of a specified month |
| Now |
Returns the current system date and time |
| Second |
Returns a number that represents the second of the minute (between 0 and 59, inclusive) |
| Time |
Returns the current system time |
| Timer |
Returns the number of seconds since 12:00 AM |
| TimeSerial |
Returns the time for a specific hour, minute, and second |
| TimeValue |
Returns a time |
| Weekday |
Returns a number that represents the day of the week (between 1 and 7, inclusive) |
| WeekdayName |
Returns the weekday name of a specified day of the week |
| Year |
Returns a number that represents the year |
Conversion Functions
| Function |
Description |
| Asc |
Converts the first letter in a string to ANSI code |
| CBool |
Converts an expression to a variant of subtype Boolean |
| CByte |
Converts an expression to a variant of subtype Byte |
| CCur |
Converts an expression to a variant of subtype Currency |
| CDate |
Converts a valid date and time expression to the variant of subtype Date |
| CDbl |
Converts an expression to a variant of subtype Double |
| Chr |
Converts the specified ANSI code to a character |
| CInt |
Converts an expression to a variant of subtype Integer |
| CLng |
Converts an expression to a variant of subtype Long |
| CSng |
Converts an expression to a variant of subtype Single |
| CStr |
Converts an expression to a variant of subtype String |
| Hex |
Returns the hexadecimal value of a specified number |
| Oct |
Returns the octal value of a specified number |
Format Functions
| Function |
Description |
| FormatCurrency |
Returns an expression formatted as a currency value |
| FormatDateTime |
Returns an expression formatted as a date or time |
| FormatNumber |
Returns an expression formatted as a number |
| FormatPercent |
Returns an expression formatted as a percentage |
Math Functions
| Function |
Description |
| Abs |
Returns the absolute value of a specified number |
| Atn |
Returns the arctangent of a specified number |
| Cos |
Returns the cosine of a specified number (angle) |
| Exp |
Returns e raised to a power |
| Hex |
Returns the hexadecimal value of a specified number |
| Int |
Returns the integer part of a specified number |
| Fix |
Returns the integer part of a specified number |
| Log |
Returns the natural logarithm of a specified number |
| Oct |
Returns the octal value of a specified number |
| Rnd |
Returns a random number less than 1 but greater or equal to 0 |
| Sgn |
Returns an integer that indicates the sign of a specified number |
| Sin |
Returns the sine of a specified number (angle) |
| Sqr |
Returns the square root of a specified number |
| Tan |
Returns the tangent of a specified number (angle) |
Array Functions
| Function |
Description |
| Array |
Returns a variant containing an array |
| Filter |
Returns a zero-based array that contains a subset of a string array based on a filter criteria |
| IsArray |
Returns a Boolean value that indicates whether a specified variable is an array |
| Join |
Returns a string that consists of a number of substrings in an array |
| LBound |
Returns the smallest subscript for the indicated dimension of an array |
| Split |
Returns a zero-based, one-dimensional array that contains a specified number of substrings |
| UBound |
Returns the largest subscript for the indicated dimension of an array |
String Functions
| Function |
Description |
| InStr |
Returns the position of the first occurrence of one string within another. The search begins at the first character of the string |
| InStrRev |
Returns the position of the first occurrence of one string within another. The search begins at the last character of the string |
| LCase |
Converts a specified string to lowercase |
| Left |
Returns a specified number of characters from the left side of a string |
| Len |
Returns the number of characters in a string |
| LTrim |
Removes spaces on the left side of a string |
| RTrim |
Removes spaces on the right side of a string |
| Trim |
Removes spaces on both the left and the right side of a string |
| Mid |
Returns a specified number of characters from a string |
| Replace |
Replaces a specified part of a string with another string a specified number of times |
| Right |
Returns a specified number of characters from the right side of a string |
| Space |
Returns a string that consists of a specified number of spaces |
| StrComp |
Compares two strings and returns a value that represents the result of the comparison |
| String |
Returns a string that contains a repeating character of a specified length |
| StrReverse |
Reverses a string |
| UCase |
Converts a specified string to uppercase |
Other Functions
| Function |
Description |
| CreateObject |
Creates an object of a specified type |
| Eval |
Evaluates an expression and returns the result |
| IsEmpty |
Returns a Boolean value that indicates whether a specified variable has been initialized or not |
| IsNull |
Returns a Boolean value that indicates whether a specified expression contains no valid data (Null) |
| IsNumeric |
Returns a Boolean value that indicates whether a specified expression can be evaluated as a number |
| IsObject |
Returns a Boolean value that indicates whether the specified expression is an automation object |
| RGB |
Returns a number that represents an RGB color value |
| Round |
Rounds a number |
| ScriptEngine |
Returns the scripting language in use |
| ScriptEngineBuildVersion |
Returns the build version number of the scripting engine in use |
| ScriptEngineMajorVersion |
Returns the major version number of the scripting engine in use |
| ScriptEngineMinorVersion |
Returns the minor version number of the scripting engine in use |
| TypeName |
Returns the subtype of a specified variable |
| VarType |
Returns a value that indicates the subtype of a specified variable |
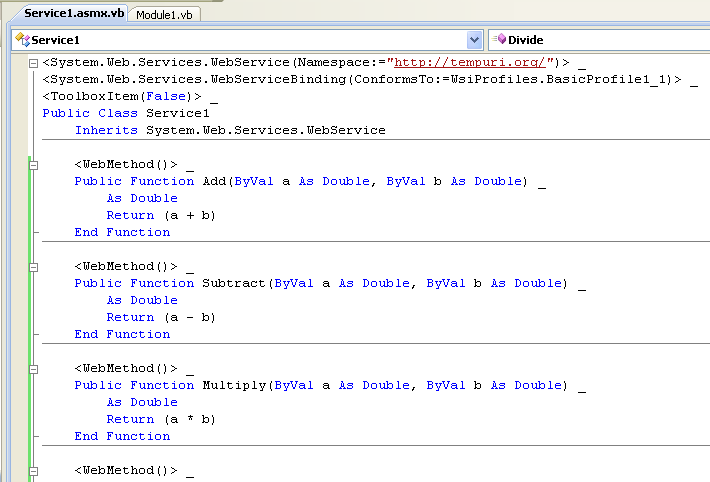
VBScript Keywords
VBScript Keywords
| Keyword |
Description |
| Empty |
Used to indicate an uninitialized variable value. A variable value is uninitialized when it is first created and no value is assigned to it, or when a variable value is explicitly set to empty.
Example:
Dim x 'the variable x is uninitialized!
x="ff" 'the variable x is NOT uninitialized anymore
x=Empty 'the variable x is uninitialized!
Note: This is not the same as Null!!
|
| IsEmpty |
Used to test if a variable is uninitialized.
Example: If (IsEmpty(x)) 'is x uninitialized?
|
| Nothing |
Used to indicate an uninitialized object value, or to disassociate an object variable from an object to release system resources.
Example: Set myObject=Nothing
|
| Is Nothing |
Used to test if a value is an initialized object.
Example: If (myObject Is Nothing) 'is it unset?
Note: If you compare a value to Nothing, you will not get the right result! Example: If (myObject = Nothing) 'always false!
|
| Null |
Used to indicate that a variable contains no valid data.
One way to think of Null is that someone has explicitly set the value to "invalid", unlike Empty where the value is "not set".
Note: This is not the same as Empty or Nothing!!
Example: x=Null 'x contains no valid data
|
| IsNull |
Used to test if a value contains invalid data.
Example: if (IsNull(x)) 'is x invalid?
|
| True |
Used to indicate a Boolean condition that is correct |
| False |
Used to indicate a Boolean condition that is not correct (False has a value of 0) |
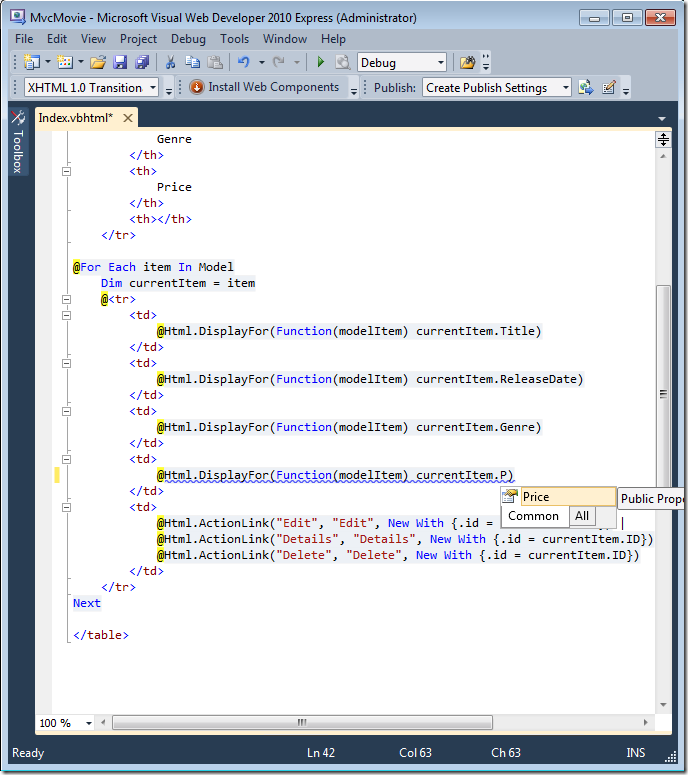
The ASP Response object is used to send output to the user from the server.
More Examples
Write text with ASP
How to write text with ASP.
Format text with HTML tags in ASP
How to combine text and HTML tags with ASP.
Redirect the user to a different URL
How to redirect the user to a different URL.
Show a random link
How to create a random link.
Controlling the buffer
How to control the buffer.
Clear the buffer
How to clear the buffer.
End a script in the middle of processing and return the result
How to end a script in the middle of processing.
Set how many minutes a page will be cached in a browser before it expires
How to specify how many minutes a page will be cached in a browser before it expires.
Set a date/time when a page cached in a browser will expire
How to specify a date/time a page cached in a browser will expire.
Check if the user is still connected to the server
How to check if a user is disconnected from the server.
Set the type of content
How to specify the type of content.
Set the name of the character set
How to specify the name of the character set.
Response Object
The ASP Response object is used to send output to the user from the server. Its collections, properties, and methods are described below:
Collections
|
Collection
|
Description
|
|
Cookies
|
Sets a cookie value. If the cookie does not exist, it will be created, and take the value that is specified
|
Properties
|
Property
|
Description
|
|
Buffer
|
Specifies whether to buffer the page output or not
|
|
CacheControl
|
Sets whether a proxy server can cache the output generated by ASP or not
|
|
Charset
|
Appends the name of a character-set to the content-type header in the Response object
|
|
ContentType
|
Sets the HTTP content type for the Response object
|
|
Expires
|
Sets how long (in minutes) a page will be cached on a browser before it expires
|
|
ExpiresAbsolute
|
Sets a date and time when a page cached on a browser will expire
|
|
IsClientConnected
|
Indicates if the client has disconnected from the server
|
|
Pics
|
Appends a value to the PICS label response header
|
|
Status
|
Specifies the value of the status line returned by the server
|
Methods
|
Method
|
Description
|
|
AddHeader
|
Adds a new HTTP header and a value to the HTTP response
|
|
AppendToLog
|
Adds a string to the end of the server log entry
|
|
BinaryWrite
|
Writes data directly to the output without any character conversion
|
|
Clear
|
Clears any buffered HTML output
|
|
End
|
Stops processing a script, and returns the current result
|
|
Flush
|
Sends buffered HTML output immediately
|
|
Redirect
|
Redirects the user to a different URL
|
|
Write
|
Writes a specified string to the output
|
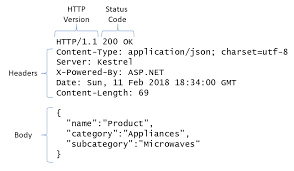
The Request object is used to get information from a visitor.
QueryString Collection Examples
Send query information when a user clicks on a link
How to send query information to a page within a link, and retrieve that information on the destination page (which is, in this example, the same page).
A QueryString collection in its simplest use
Use the QueryString collection to retrieve the values from a form (the form uses the get method - the information sent is visible to everybody).
How to use information from forms
How to use the values retrieved from a form.
More information from a form
What the QueryString collection contains if several input fields have equal names. It also shows how to use the Count keyword to count the "name" property.
Form Collection Examples
A form collection in its simplest use
How the Form collection retrieves the values from a form (the form uses the post method - the information sent is invisible to others).
How to use information from forms
How to use the values retrieved from a form.
More information from a form
What the Form collection contains if several input fields have equal names. It also shows how to use the Count keyword to count the "name" property.
A form with radio buttons
How to interact with the user through radio buttons.
A form with checkboxes
How to interact with the user through checkboxes.
Other Examples
Get the server variables
How to get the visitor's browser type, IP address, and more.
Create a welcome cookie
How to create a Welcome Cookie.
Find the total number of bytes the user sent
How to find the total number of bytes the user sent in the Request object.
Request Object
When a browser asks for a page from a server, it is called a request. The Request object is used to get information from a visitor. Its collections, properties, and methods are described below:
Collections
|
Collection
|
Description
|
|
ClientCertificate
|
Contains all the field values stored in the client certificate
|
|
Cookies
|
Contains all the cookie values sent in a HTTP request
|
|
Form
|
Contains all the form (input) values from a form that uses the post method
|
|
QueryString
|
Contains all the variable values in a HTTP query string
|
|
ServerVariables
|
Contains all the server variable values
|
Properties
|
Property
|
Description
|
|
TotalBytes
|
Returns the total number of bytes the client sent in the body of the request
|
Methods
|
Method
|
Description
|
|
BinaryRead
|
Retrieves the data sent to the server from the client as part of a post request and stores it in a safe array
|
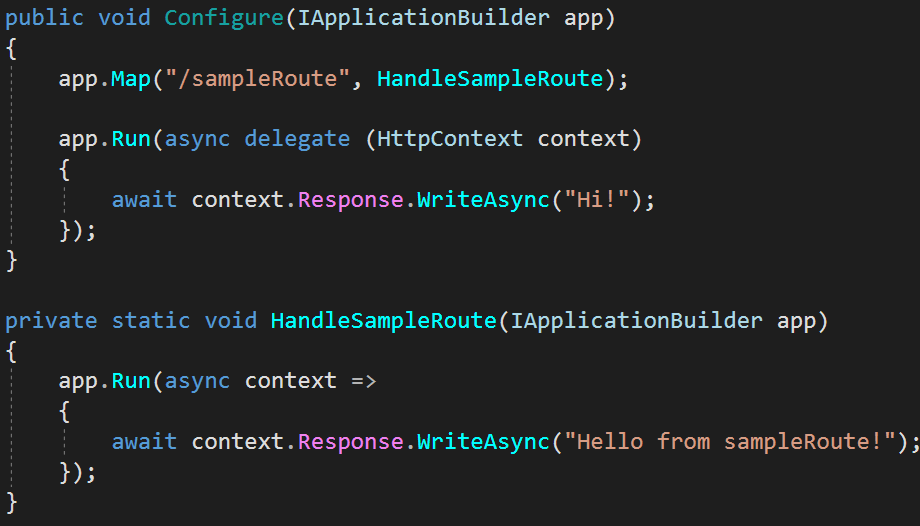
A group of ASP files that work together to perform some purpose
is called an application.
The Application object is used to tie these files together.
Application Object
An application on the Web may consists of several ASP files that work together to perform some purpose.
The Application object is used to tie these files together.
The Application object is used to store and access variables from any page, just like the Session object. The difference
is that ALL users share ONE Application object (with Sessions there is ONE Session object for EACH user).
The Application object holds information that will be used by many pages in the application (like database connection information).
The information can be accessed from any page. The information can also be changed in one place, and the changes will automatically be reflected
on all pages.
The Application object's collections, methods, and events are described
below:
Collections
| Collection |
Description |
|
Contains all the items appended to the application
through a script command |
|
Contains all the objects appended to the application with the HTML <object> tag |
Methods
| Method |
Description |
|
Deletes an item from the Contents collection |
|
Deletes all items from the Contents collection |
|
Prevents other users from modifying the variables in the
Application object |
|
Enables other users to modify the variables in the Application object
(after it has been locked using the Lock method) |
Events
| Event |
Description |
|
Occurs when all user sessions are over, and the application ends |
|
Occurs before the first new session is created (when the Application object is first referenced) |
A Session object stores information about, or change settings for a user session.
More Examples
Set or return an integer that specifies a location or region. Contents like date,
time, and currency will be displayed according to that location or region.
Return
a unique id for each user. The id is generated by the server.
Set and return the timeout (in minutes) of a session.
Session Object
When you are working with an application on your computer, you open it, do some changes and then
you close it. This is much like a Session. The computer knows who you are. It
knows when you open the application and when you close it. However, on the internet there is one
problem: the web server does not know who you are and what you do, because the HTTP address doesn't maintain state.
ASP solves this problem by creating a unique cookie for each user. The cookie
is sent to the user's computer and it contains information that identifies the user. This
interface is called the Session object.
The Session object stores information about, or change settings for a user session.
Variables stored in a Session object hold information about one single user, and are available to all pages in one application. Common information
stored in session variables are name, id, and preferences. The server creates a new Session object for each new user, and destroys the Session object when the session expires.
The Session object's collections, properties, methods, and events are
described below:
Collections
| Collection |
Description |
|
Contains all the items appended to the session through a script command |
|
Contains all the objects appended to the session with the HTML
<object> tag |
Properties
| Property |
Description |
|
Specifies the character set that will be used when
displaying dynamic content |
|
Sets or returns an integer that specifies a location or
region. Contents like date, time, and currency will be displayed according
to that location or region |
|
Returns a unique id for each user. The unique id is
generated by the server |
|
Sets or returns the timeout period (in minutes) for the
Session object in this application |
Methods
| Method |
Description |
|
Destroys a user session |
|
Deletes an item from the Contents collection |
|
Deletes all items from the Contents collection |
Events
| Event |
Description |
|
Occurs when a session ends |
|
Occurs when a session starts |
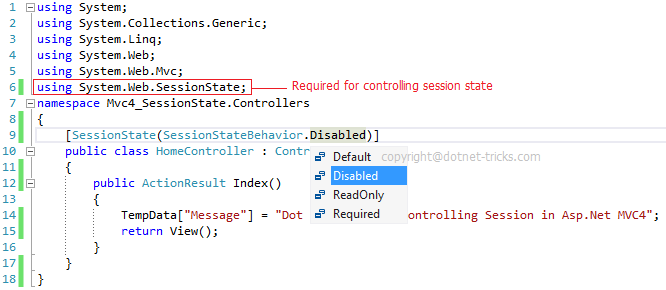
The Server object is used to access properties and methods on the server.
More Examples
When was a file last modified?
Check when a file was last modified.
Open a text file for reading
Open "Textfile.txt" for reading.
Homemade hit counter
Server Object
The ASP Server object is used to access properties and methods on the server. Its properties and methods are described below:
Properties
|
Property
|
Description
|
|
ScriptTimeout
|
Sets or returns the maximum number of seconds a script can run before it is terminated
|
Methods
|
Method
|
Description
|
|
CreateObject
|
Creates an instance of an object
|
|
Execute
|
Executes an ASP file from inside another ASP file
|
|
GetLastError()
|
Returns an ASPError object that describes the error condition that occurred
|
|
HTMLEncode
|
Applies HTML encoding to a specified string
|
|
MapPath
|
Maps a specified path to a physical path
|
|
Transfer
|
Sends (transfers) all the information created in one ASP file to a second ASP file
|
|
URLEncode
|
Applies URL encoding rules to a specified string
|
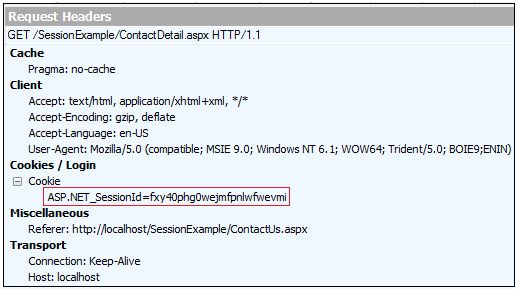
The ASPError object displays information about errors in scripts.
The ASPError Object
The ASPError object was implemented in ASP 3.0 and is available in IIS5 and later.
The ASPError object is used to display detailed information of any error that occurs in scripts in an ASP page.
Note: The ASPError object is created when Server.GetLastError is called, so the error information can only be accessed by using the Server.GetLastError method.
The ASPError object's properties are described below (all properties are read-only):
Properties
|
Property
|
Description
|
|
ASPCode
|
Returns an error code generated by IIS
|
|
ASPDescription
|
Returns a detailed description of the error (if the error is ASP-related)
|
|
Category
|
Returns the source of the error (was the error generated by ASP? By a scripting language? By an object?)
|
|
Column
|
Returns the column position within the file that generated the error
|
|
Description
|
Returns a short description of the error
|
|
File
|
Returns the name of the ASP file that generated the error
|
|
Line
|
Returns the line number where the error was detected
|
|
Number
|
Returns the standard COM error code for the error
|
|
Source
|
Returns the actual source code of the line where the error occurred
|
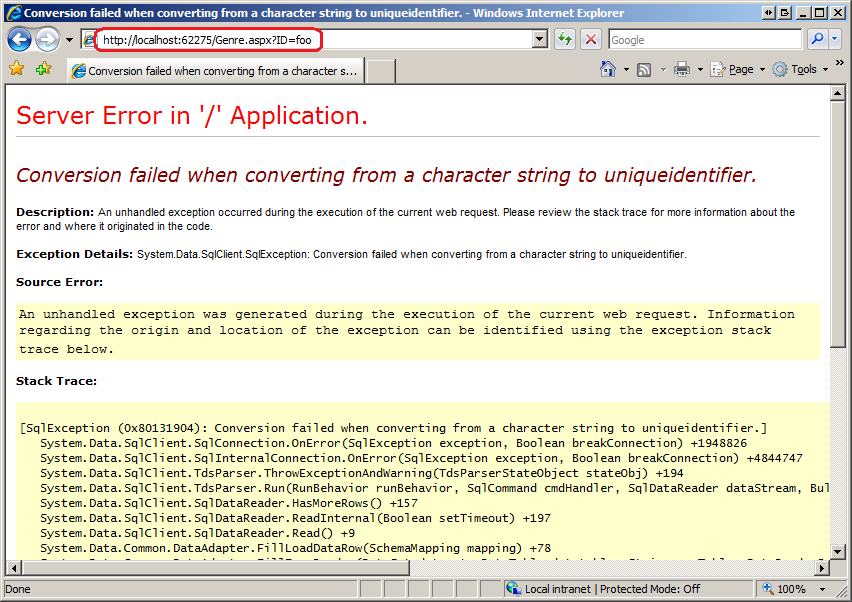
The FileSystemObject object is used to access the file system on a server.
More Examples
Does a specified file exist?
How to check if a file exists.
Does a specified folder exist?
How to check if a folder exists.
Does a specified drive exist?
How to check if a drive exists.
Get the name of a specified drive
How to get the name of a specified drive.
Get the name of the parent folder of a specified path
How to get the name of the parent folder of a specified path.
Get file name
How to get the file name of the last component in a specified path.
Get the file extension
How to get the file extension of the last component in a specified path.
Get the base name of a file or folder
How to get the base name of a file or folder, in a specified path.
The FileSystemObject Object
The FileSystemObject object is used to access the file system on a server.
This object can manipulate files, folders, and directory paths. It is also possible to retrieve file system information with this object.
The following code creates a text file (c:test.txt) and then writes some text to the file:
<%
dim fs,fname
set fs=Server.CreateObject("Scripting.FileSystemObject")
set fname=fs.CreateTextFile("c:test.txt",true)
fname.WriteLine("Hello World!")
fname.Close
set fname=nothing
set fs=nothing
%>
The FileSystemObject object's properties and methods are described below:
Properties
|
Property
|
Description
|
|
Drives
|
Returns a collection of all Drive objects on the computer
|
Methods
|
Method
|
Description
|
|
BuildPath
|
Appends a name to an existing path
|
|
CopyFile
|
Copies one or more files from one location to another
|
|
CopyFolder
|
Copies one or more folders from one location to another
|
|
CreateFolder
|
Creates a new folder
|
|
CreateTextFile
|
Creates a text file and returns a TextStream object that can be used to read from, or write to the file
|
|
DeleteFile
|
Deletes one or more specified files
|
|
DeleteFolder
|
Deletes one or more specified folders
|
|
DriveExists
|
Checks if a specified drive exists
|
|
FileExists
|
Checks if a specified file exists
|
|
FolderExists
|
Checks if a specified folder exists
|
|
GetAbsolutePathName
|
Returns the complete path from the root of the drive for the specified path
|
|
GetBaseName
|
Returns the base name of a specified file or folder
|
|
GetDrive
|
Returns a Drive object corresponding to the drive in a specified path
|
|
GetDriveName
|
Returns the drive name of a specified path
|
|
GetExtensionName
|
Returns the file extension name for the last component in a specified path
|
|
GetFile
|
Returns a File object for a specified path
|
|
GetFileName
|
Returns the file name or folder name for the last component in a specified path
|
|
GetFolder
|
Returns a Folder object for a specified path
|
|
GetParentFolderName
|
Returns the name of the parent folder of the last component in a specified path
|
|
GetSpecialFolder
|
Returns the path to some of Windows' special folders
|
|
GetTempName
|
Returns a randomly generated temporary file or folder
|
|
MoveFile
|
Moves one or more files from one location to another
|
|
MoveFolder
|
Moves one or more folders from one location to another
|
|
OpenTextFile
|
Opens a file and returns a TextStream object that can be used to access the file
|

The TextStream object is used to access the contents of a text file.
More Examples
Read textfile
How to read from a text file.
Read only a part of a textfile
How to only read a part of a TextStream file.
Read one line of a textfile
How to read one line from a TextStream file.
Read all lines from a textfile
How to read all the lines from a TextStream file.
Skip a part of a textfile
How to skip a specified number of characters when reading the TextStream file.
Skip a line of a textfile
How to skip a line when reading the TextStream file.
Return line-number
How to return the current line number in a TextStream file.
Get column number
How to get the column number of the current character in a file.
The TextStream Object
The TextStream object is used to access the contents of text files.
The following code creates a text file (c:test.txt) and then writes some text to the file (the variable f is an instance of the TextStream object):
<%
dim fs,f
set fs=Server.CreateObject("Scripting.FileSystemObject")
set f=fs.CreateTextFile("c:test.txt",true)
f.WriteLine("Hello World!")
f.Close
set f=nothing
set fs=nothing
%>
To create an instance of the TextStream object you can use the CreateTextFile or OpenTextFile methods of the FileSystemObject object, or you can use the OpenAsTextStream method of the File object.
The TextStream object's properties and methods are described below:
Properties
|
Property
|
Description
|
|
AtEndOfLine
|
Returns true if the file pointer is positioned immediately before the end-of-line marker in a TextStream file, and false if not
|
|
AtEndOfStream
|
Returns true if the file pointer is at the end of a TextStream file, and false if not
|
|
Column
|
Returns the column number of the current character position in an input stream
|
|
Line
|
Returns the current line number in a TextStream file
|
Methods
|
Method
|
Description
|
|
Close
|
Closes an open TextStream file
|
|
Read
|
Reads a specified number of characters from a TextStream file and returns the result
|
|
ReadAll
|
Reads an entire TextStream file and returns the result
|
|
ReadLine
|
Reads one line from a TextStream file and returns the result
|
|
Skip
|
Skips a specified number of characters when reading a TextStream file
|
|
SkipLine
|
Skips the next line when reading a TextStream file
|
|
Write
|
Writes a specified text to a TextStream file
|
|
WriteLine
|
Writes a specified text and a new-line character to a TextStream file
|
|
WriteBlankLines
|
Writes a specified number of new-line character to a TextStream file
|
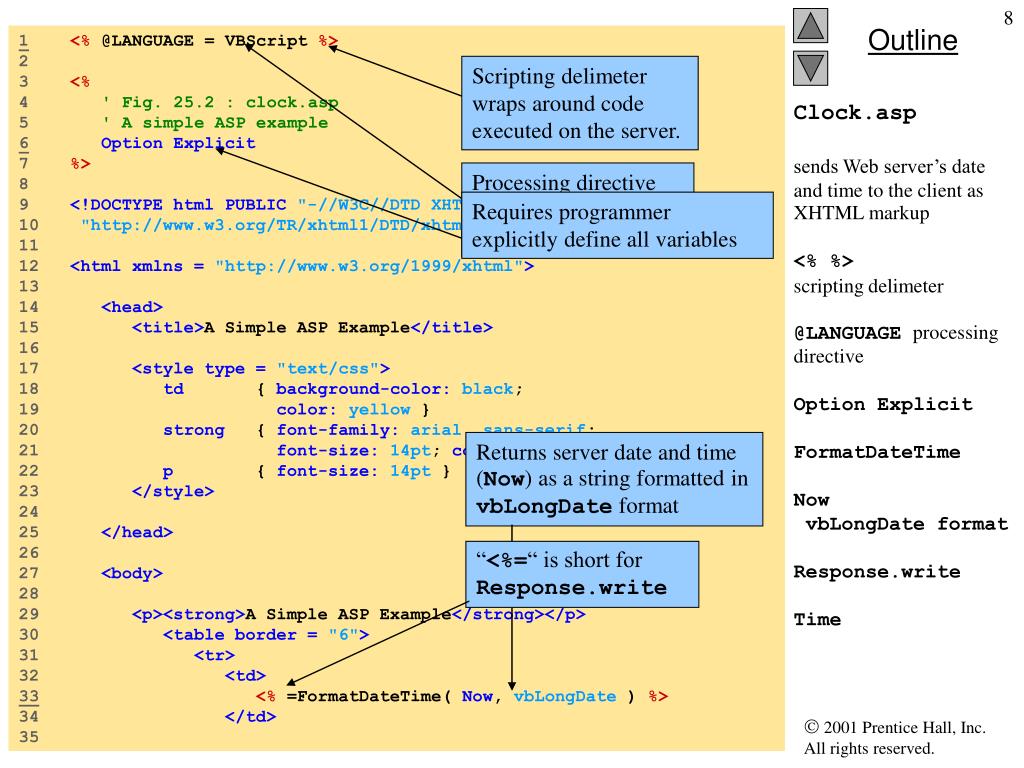
The Drive object is used to get information about a local disk drive or a network share.
More Examples
Get the total size of a specified drive
How to get the total size of a specified drive.
Get the available space of a specified drive
How to get the available space of a specified drive.
Get the free space of a specified drive
How to get the free space of a specified drive.
Get the drive letter of a specified drive
How to get the drive letter of a specified drive.
Get the drive type of a specified drive
How to get the drive type of a specified drive.
Get the file system of a specified drive
How to get the file system of a specified drive.
Is the drive ready?
How to check whether a specified drive is ready.
Get the path of a specified drive
How to get the path of a specified drive.
Get the root folder of a specified drive
How to get the root folder of a specified drive.
Get the serialnumber of a specified drive
How to get the serialnumber of a specified drive.
The Drive Object
The Drive object is used to return information about a local disk drive or a network share. The Drive object can return information about a drive's type of file system, free space, serial number, volume name, and more.
Note: You cannot return information about a drive's content with the Drive object. For this purpose you will have to use the Folder object.
To work with the properties of the Drive object, you will have to create an instance of the Drive object through the FileSystemObject object. First; create a FileSystemObject object and then instantiate the Drive object through the GetDrive method or the Drives property of the FileSystemObject object.
The Drive object's properties are described below:
Properties
|
Property
|
Description
|
|
AvailableSpace
|
Returns the amount of available space to a user on a specified drive or network share
|
|
DriveLetter
|
Returns one uppercase letter that identifies the local drive or a network share
|
|
DriveType
|
Returns the type of a specified drive
|
|
FileSystem
|
Returns the file system in use for a specified drive
|
|
FreeSpace
|
Returns the amount of free space to a user on a specified drive or network share
|
|
IsReady
|
Returns true if the specified drive is ready and false if not
|
|
Path
|
Returns an uppercase letter followed by a colon that indicates the path name for a specified drive
|
|
RootFolder
|
Returns a Folder object that represents the root folder of a specified drive
|
|
SerialNumber
|
Returns the serial number of a specified drive
|
|
ShareName
|
Returns the network share name for a specified drive
|
|
TotalSize
|
Returns the total size of a specified drive or network share
|
|
VolumeName
|
Sets or returns the volume name of a specified drive
|
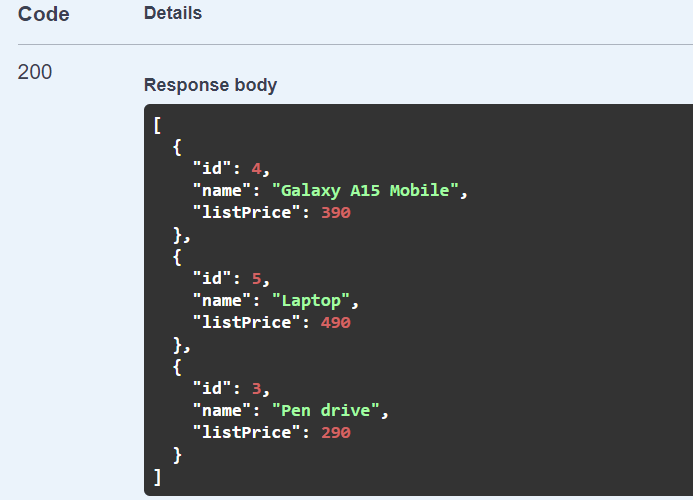
The File object is used to return information about a specified file.
More Examples
When was the file last modified?
How to get the date and time a specified file was last modified.
When was the file last accessed?
How to get the date and time a specified file was last accessed.
Return the attributes of a specified file
How to return the attributes of a specified file.
The File Object
The File object is used to return information about a specified file.
To work with the properties and methods of the File object, you will have to create an instance of the File object through the FileSystemObject object. First; create a FileSystemObject object and then instantiate the File object through the GetFile method of the FileSystemObject object or through the Files property of the Folder object.
The following code uses the GetFile method of the FileSystemObject object to instantiate the File object and the DateCreated property to return the date when the specified file was created:
Example
<%
Dim fs,f
Set fs=Server.CreateObject("Scripting.FileSystemObject")
Set f=fs.GetFile("c:test.txt")
Response.Write("File created: " & f.DateCreated)
set f=nothing
set fs=nothing
%>
The File object's properties and methods are described below:
Properties
|
Property
|
Description
|
|
Attributes
|
Sets or returns the attributes of a specified file
|
|
DateCreated
|
Returns the date and time when a specified file was created
|
|
DateLastAccessed
|
Returns the date and time when a specified file was last accessed
|
|
DateLastModified
|
Returns the date and time when a specified file was last modified
|
|
Drive
|
Returns the drive letter of the drive where a specified file or folder resides
|
|
Name
|
Sets or returns the name of a specified file
|
|
ParentFolder
|
Returns the folder object for the parent of the specified file
|
|
Path
|
Returns the path for a specified file
|
|
ShortName
|
Returns the short name of a specified file (the 8.3 naming convention)
|
|
ShortPath
|
Returns the short path of a specified file (the 8.3 naming convention)
|
|
Size
|
Returns the size, in bytes, of a specified file
|
|
Type
|
Returns the type of a specified file
|
Methods
|
Method
|
Description
|
|
Copy
|
Copies a specified file from one location to another
|
|
Delete
|
Deletes a specified file
|
|
Move
|
Moves a specified file from one location to another
|
|
OpenAsTextStream
|
Opens a specified file and returns a TextStream object to access the file
|
The Folder Object is used to return information about a specified folder.
The Folder Object
The Folder object is used to return information about a specified folder.
To work with the properties and methods of the Folder object, you will have to create an instance of the Folder object through the FileSystemObject object. First; create a FileSystemObject object and then instantiate the Folder object through the GetFolder method of the FileSystemObject object.
The following code uses the GetFolder method of the FileSystemObject object to instantiate the Folder object and the DateCreated property to return the date when the specified folder was created:
<%
Dim fs,fo
Set fs=Server.CreateObject("Scripting.FileSystemObject")
Set fo=fs.GetFolder("c:test")
Response.Write("Folder created: " & fo.DateCreated)
set fo=nothing
set fs=nothing
%>
Output:
Folder created: 10/22/2008 10:01:19 AM
The Folder object's collections, properties, and methods are described below:
Collections
| Collection |
Description |
| |
Returns a collection of all the files in a specified folder |
| |
Returns a collection of all subfolders in a specified folder |
Properties
| Property |
Description |
| |
Sets or returns the attributes of a specified folder |
| |
Returns the date and time when a specified folder was created |
| |
Returns the date and time when a specified folder was last accessed |
| |
Returns the date and time when a specified folder was last modified |
| |
Returns the drive letter of the drive where the specified folder resides |
| |
Returns true if a folder is the root folder and false if not |
| |
Sets or returns the name of a specified folder |
| |
Returns the parent folder of a specified folder |
| |
Returns the path for a specified folder |
| |
Returns the short name of a specified folder (the 8.3 naming convention) |
| |
Returns the short path of a specified folder (the 8.3 naming convention) |
| |
Returns the size of a specified folder |
| |
Returns the type of a specified folder |
Methods
| Method |
Description |
| |
Copies a specified folder from one location to another |
| |
Deletes a specified folder |
| |
Moves a specified folder from one location to another |
| |
Creates a new text file in the specified folder and returns a TextStream object to access the file |
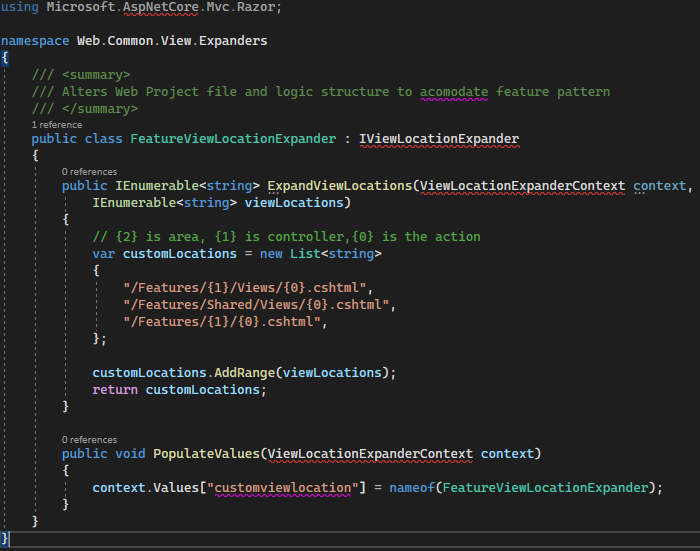
The Dictionary object stores information in name/value pairs.
More Examples
Does a specified key exist?
How to create a Dictionary object, and then use the Exists method to check if a specified key exists.
Return an array of all items
How to use the Items method to return an array of all the items.
Return an array of all keys
How to use the Keys method to return an array of all the keys.
Return the value of an item
How to use the Item property to return the value of an item.
Set a key
How to use the Key property to set a key in a Dictionary object.
Return the number of key/item pairs
How to use the Count property to return the number of key/item pairs.
The Dictionary Object
The Dictionary object is used to store information in name/value pairs (referred to as key and item). The Dictionary object might seem similar to Arrays, however, the Dictionary object is a more desirable solution to manipulate related data.
Comparing Dictionaries and Arrays:
- Keys are used to identify the items in a Dictionary object
- You do not have to call ReDim to change the size of the Dictionary object
- When deleting an item from a Dictionary, the remaining items will automatically shift up
- Dictionaries cannot be multidimensional, Arrays can
- Dictionaries have more built-in functions than Arrays
- Dictionaries work better than arrays on accessing random elements frequently
- Dictionaries work better than arrays on locating items by their content
The following example creates a Dictionary object, adds some key/item pairs to it, and retrieves the item value for the key gr:
<%
Dim d
Set d=Server.CreateObject("Scripting.Dictionary")
d.Add "re","Red"
d.Add "gr","Green"
d.Add "bl","Blue"
d.Add "pi","Pink"
Response.Write("The value of key gr is: " & d.Item("gr"))
%>
Output:
The value of key gr is: Green
The Dictionary object's properties and methods are described below:
Properties
| Property |
Description |
| CompareMode |
Sets or returns the comparison mode for comparing keys in a Dictionary object |
| Count |
Returns the number of key/item pairs in a Dictionary object |
| Item |
Sets or returns the value of an item in a Dictionary object |
| Key |
Sets a new key value for an existing key value in a Dictionary object |
Methods
| Method |
Description |
| Add |
Adds a new key/item pair to a Dictionary object |
| Exists |
Returns a Boolean value that indicates whether a specified key exists in the Dictionary object |
| Items |
Returns an array of all the items in a Dictionary object |
| Keys |
Returns an array of all the keys in a Dictionary object |
| Remove |
Removes one specified key/item pair from the Dictionary object |
| RemoveAll |
Removes all the key/item pairs in the Dictionary object |
ASP AdRotator Component
The ASP AdRotator component creates an AdRotator object that displays a different image each time a user enters or refreshes a page. A text file includes information about the images.
Note: The AdRotator does not work with Internet Information Server 7 (IIS7).
Syntax
<%
set adrotator=server.createobject("MSWC.AdRotator")
adrotator.GetAdvertisement("textfile.txt")
%>
ASP AdRotator Example
Assume that we have the following text file, named "ads.txt":
REDIRECT banners.asp
*
w3s.gif
https://www.w3schools.com
Free Tutorials from W3Schools
50
xmlspy.gif
https://www.altova.com
XML Editor from Altova
50
The lines below the asterisk in the text file above specifies the name of the images (ads) to be displayed, the hyperlink addresses, the alternate text (for the images), and the display rates (in percent).
The first line in the text file above specifies what to happen when a visitor clicks on one of the images. The redirection page (banners.asp) will receive a querystring with the URL to redirect to.
Tip: To specify the height, width, and border of the image, you can insert the following lines under REDIRECT:
REDIRECT banners.asp
WIDTH 468
HEIGHT 60
BORDER 0
*
w3s.gif
...
The "banners.asp" file looks like this:
Example
<%
url=Request.QueryString("url")
If url<>"" then Response.Redirect(url)
%>
<!DOCTYPE html>
<html>
<body>
<%
set adrotator=Server.CreateObject("MSWC.AdRotator")
response.write(adrotator.GetAdvertisement("textfile.txt"))
%>
</body>
</html>
That's all!!
ASP AdRotator Properties
|
Property
|
Description
|
Example
|
|
Border
|
Specifies the size of the borders around the advertisement
|
<%
set adrot=Server.CreateObject("MSWC.AdRotator")
adrot.Border="2"
Response.Write(adrot.GetAdvertisement("ads.txt"))
%>
|
|
Clickable
|
Specifies whether the advertisement is a hyperlink
|
<%
set adrot=Server.CreateObject("MSWC.AdRotator")
adrot.Clickable=false
Response.Write(adrot.GetAdvertisement("ads.txt"))
%>
|
|
TargetFrame
|
Name of the frame to display the advertisement
|
<%
set adrot=Server.CreateObject("MSWC.AdRotator")
adrot.TargetFrame="target='_blank'"
Response.Write(adrot.GetAdvertisement("ads.txt"))
%>
|
ASP AdRotator Methods
|
Method
|
Description
|
Example
|
|
GetAdvertisement
|
Returns HTML that displays the advertisement in the page
|
<%
set adrot=Server.CreateObject("MSWC.AdRotator")
Response.Write(adrot.GetAdvertisement("ads.txt"))
%>
|
ASP Browser Capabilities Component
The ASP Browser Capabilities component creates a BrowserType object that determines the type, capabilities and version number of a visitor's browser.
When a browser connects to a server, a User Agent header is also sent to the server. This header contains information about the browser.
The BrowserType object compares the information in the header with information in a file on the server called "Browscap.ini".
If there is a match between the browser type and version number in the header and the information in the "Browscap.ini" file, the BrowserType object can be used to list the properties of the matching browser. If there is no match for the browser type and version number in the Browscap.ini file, it will set every property to "UNKNOWN".
Syntax
<%
Set MyBrow=Server.CreateObject("MSWC.BrowserType")
%>
ASP Browser Capabilities Example
The example below creates a BrowserType object in an ASP file, and displays some of the capabilities of your browser:
Example
<%
Set MyBrow=Server.CreateObject("MSWC.BrowserType")
%>
| Client OS |
<%=MyBrow.platform%> |
| Web Browser |
<%=MyBrow.browser%> |
| Browser version |
<%=MyBrow.version%> |
| Frame support? |
<%=MyBrow.frames%> |
| Table support? |
<%=MyBrow.tables%> |
| Sound support? |
<%=MyBrow.backgroundsounds%> |
| Cookies support? |
<%=MyBrow.cookies%> |
| VBScript support? |
<%=MyBrow.vbscript%> |
| JavaScript support? |
<%=MyBrow.javascript%> |
Output:
|
Client OS
|
WinNT
|
|
Web Browser
|
IE
|
|
Browser version
|
5.0
|
|
Frame support?
|
True
|
|
Table support?
|
True
|
|
Sound support?
|
True
|
|
Cookies support?
|
True
|
|
VBScript support?
|
True
|
|
JavaScript support?
|
True
|
The Browscap.ini File
The "Browscap.ini" file is used to declare properties and to set default values for browsers.
This section is not a tutorial on how to maintain "Browscap.ini" files, it only shows you the basics; so you get an idea what the file is all about.
The "Browscap.ini" file can contain the following:
[;comments]
[HTTPUserAgentHeader]
[parent=browserDefinition]
[property1=value1]
[propertyN=valueN]
[Default Browser Capability Settings]
[defaultProperty1=defaultValue1]
[defaultPropertyN=defaultValueN]
|
Parameter
|
Description
|
|
comments
|
Optional. Any line that starts with a semicolon are ignored by the BrowserType object
|
|
HTTPUserAgentHeader
|
Optional. Specifies the HTTP User Agent header to associate with the browser-property value statements specified in propertyN. Wildcard characters are allowed
|
|
browserDefinition
|
Optional. Specifies the HTTP User Agent header-string of a browser to use as the parent browser. The current browser's definition will inherit all of the property values declared in the parent browser's definition
|
|
propertyN
|
Optional. Specifies the browser properties. The following table lists some possible properties:
- ActiveXControls - Support ActiveX controls?
- Backgroundsounds - Support background sounds?
- Cdf - Support Channel Definition Format for Webcasting?
- Tables - Support tables?
- Cookies - Support cookies?
- Frames - Support frames?
- Javaapplets - Support Java applets?
- Javascript - Supports JScript?
- Vbscript - Supports VBScript?
- Browser - Specifies the name of the browser
- Beta - Is the browser beta software?
- Platform - Specifies the platform that the browser runs on
- Version - Specifies the version number of the browser
|
|
valueN
|
Optional. Specifies the value of propertyN. Can be a string, an integer (prefix with #), or a Boolean value
|
|
defaultPropertyN
|
Optional. Specifies the name of the browser property to which to assign a default value if none of the defined HTTPUserAgentHeader values match the HTTP User Agent header sent by the browser
|
|
defaultValueN
|
Optional. Specifies the value of defaultPropertyN. Can be a string, an integer (prefix with #), or a Boolean value
|
A "Browscap.ini" file might look something like this:
;IE 5.0
[IE 5.0]
browser=IE
Version=5.0
majorver=#5
minorver=#0
frames=TRUE
tables=TRUE
cookies=TRUE
backgroundsounds=TRUE
vbscript=TRUE
javascript=TRUE
javaapplets=TRUE
ActiveXControls=TRUE
beta=False
;DEFAULT BROWSER
[*]
browser=Default
frames=FALSE
tables=TRUE
cookies=FALSE
backgroundsounds=FALSE
vbscript=FALSE
javascript=FALSE
More Examples
Build a table of contents.
Use the Content Linking Component to navigate between the pages in a text file.
ASP Content Linking Component
The ASP Content Linking component is used to create a quick and easy navigation system!
The Content Linking component returns a Nextlink object that is used to hold a list of Web pages to be navigated.
Syntax
<%
Set nl=Server.CreateObject("MSWC.NextLink")
%>
ASP Content Linking Example
First we create a text file - "links.txt":
asp_intro.asp ASP Intro
asp_syntax.asp ASP Syntax
asp_variables.asp ASP Variables
asp_procedures.asp ASP Procedures
The text file above contains the pages to be navigated. The pages must be listed in the same order you want them to be displayed, and it must also contain a description for each file name (use the tab key to separate file name from description).
Note: If you want to add a page, or change the order of the pages in the list; you only have to modify the text file! The navigation will automatically be corrected!
Then we create an include file, "nlcode.inc". The .inc file creates a NextLink object to navigate between the pages listed in "links.txt".
"nlcode.inc":
<% dim nl Set nl=Server.CreateObject("MSWC.NextLink") if (nl.GetListIndex("links.txt")>1) then Response.Write(" Previous Page") end if Response.Write(" Next Page") %>
In each of the .asp pages listed in the text file "links.txt", put one line of code: . This line will include the code in "nlcode.inc" on every page listed in "links.txt" and the navigation will work.
ASP Content Linking Component's Methods
| Method |
Description |
Example |
| GetListCount |
Returns the number of items listed in the Content Linking List file |
<%
dim nl,c
Set nl=Server.CreateObject("MSWC.NextLink")
c=nl.GetListCount("links.txt")
Response.Write("There are ")
Response.Write(c)
Response.Write(" items in the list")
%>
Output:
There are 4 items in the list
|
| GetListIndex |
Returns the index number of the current item in the Content Linking List file. The index number of the first item is 1. 0 is returned if the current page is not in the Content Linking List file |
<%
dim nl,c
Set nl=Server.CreateObject("MSWC.NextLink")
c=nl.GetListIndex("links.txt")
Response.Write("Item number ")
Response.Write(c)
%>
Output:
Item number 3
|
| GetNextDescription |
Returns the text description of the next item listed in the Content Linking List file. If the current page is not found in the list file it returns the text description of the last page on the list |
<%
dim nl,c
Set nl=Server.CreateObject("MSWC.NextLink")
c=nl.GetNextDescription("links.txt")
Response.Write("Next ")
Response.Write("description is: ")
Response.Write(c)
%>
Next description is: ASP Variables
|
| GetNextURL |
Returns the URL of the next item listed in the Content Linking List file. If the current page is not found in the list file it returns the URL of the last page on the list |
<%
dim nl,c
Set nl=Server.CreateObject("MSWC.NextLink")
c=nl.GetNextURL("links.txt")
Response.Write("Next ")
Response.Write("URL is: ")
Response.Write(c)
%>
Next URL is: asp_variables.asp
|
| GetNthDescription |
Returns the description of the Nth page listed in the Content Linking List file |
<%
dim nl,c
Set nl=Server.CreateObject("MSWC.NextLink")
c=nl.GetNthDescription("links.txt",3)
Response.Write("Third ")
Response.Write("description is: ")
Response.Write(c)
%>
Third description is: ASP Variables
|
| GetNthURL |
Returns the URL of the Nth page listed in the Content Linking List file |
<%
dim nl,c
Set nl=Server.CreateObject("MSWC.NextLink")
c=nl.GetNthURL("links.txt",3)
Response.Write("Third ")
Response.Write("URL is: ")
Response.Write(c)
%>
Third URL is: asp_variables.asp
|
| GetPreviousDescription |
Returns the text description of the previous item listed in the Content Linking List file. If the current page is not found in the list file it returns the text description of the first page on the list |
<%
dim nl,c
Set nl=Server.CreateObject("MSWC.NextLink")
c=nl.GetPreviousDescription("links.txt")
Response.Write("Previous ")
Response.Write("description is: ")
Response.Write(c)
%>
Previous description is: ASP Variables
|
| GetPreviousURL |
Returns the URL of the previous item listed in the Content Linking List file. If the current page is not found in the list file it returns the URL of the first page on the list |
<%
dim nl,c
Set nl=Server.CreateObject("MSWC.NextLink")
c=nl.GetPreviousURL("links.txt")
Response.Write("Previous ")
Response.Write("URL is: ")
Response.Write(c)
%>
Previous URL is: asp_variables.asp
|
ASP Content Rotator Component
The ASP Content Rotator component creates a ContentRotator object that displays a different content string each time a visitor enters or refreshes a page.
A text file, called the Content Schedule File, includes the information about the content strings.
The content strings can contain HTML tags so you can display any type of content that HTML can represent: text, images, colors, or hyperlinks.
Syntax
<%
Set cr=Server.CreateObject("MSWC.ContentRotator")
%>
ASP Content Rotator Example
The following example displays a different content each time a visitor views the Web page.
First, create a text file named "textads.txt" and place it in a subfolder called "text".
"textads.txt":
%% #3
<h2>This is a great day!!</h2>
%% #3
<img src="smiley.gif">
%% #4
<a href="https://www.w3schools.com">Visit W3Schools.com</a>
Notice the #number at the beginning of each content string. This number is an optional parameter that indicates the relative weight of the HTML content string. In the text file above, the Content Rotator will display the first and second content string three-tenth of the time, and the third string four-tenths of the time.
Then, create an ASP file, and insert the following code:
Example
<html>
<body>
<%
set cr=server.createobject("MSWC.ContentRotator")
response.write(cr.ChooseContent("text/textads.txt"))
%>
</body>
</html>
ASP Content Rotator Component's Methods
|
Method
|
Description
|
Example
|
|
ChooseContent
|
Gets and displays a content string
|
<%
dim cr
Set cr=Server.CreateObject("MSWC.ContentRotator")
response.write(cr.ChooseContent("text/textads.txt"))
%>
Output:

|
|
GetAllContent
|
Retrieves and displays all of the content strings in the text file
|
<%
dim cr
Set cr=Server.CreateObject("MSWC.ContentRotator")
response.write(cr.GetAllContent("text/textads.txt"))
%>
Output:
This is a great day!!

|
ASP Quick Reference from W3Schools. Print it, and fold it in your pocket.
Basic Syntax
ASP scripts are surrounded by <% and %>. To write some output to a browser:
<html>
<body>
<% response.write("Hello World!") %>
</body>
</html>
The default language in ASP is VBScript. To use another scripting language, insert a language specification at the top of the ASP page:
<%@ language="javascript" %>
<html>
<body>
<%
....
%>
Forms and User Input
Request.QueryString is used to collect values in a form with method="get". Information sent from a form with the GET method is visible to everyone (it will be displayed in the browser's address bar) and has limits on the amount of information to send.
Request.Form is used to collect values in a form with method="post". Information sent from a form with the POST method is invisible to others and has no limits on the amount of information to send.
ASP Cookies
A cookie is often used to identify a user. A cookie is a small file that the server embeds on the user's computer. Each time the same computer requests for a page with a browser, it will send the cookie too.
The Response.Cookies command is used to create cookies:
<%
Response.Cookies("firstname")="Alex"
Response.Cookies("firstname").Expires="May 10,2002"
%>
Note: The Response.Cookies command must appear BEFORE the <html> tag!
The "Request.Cookies" command is used to retrieve a cookie value:
<%
fname=Request.Cookies("firstname")
response.write("Firstname=" & fname)
%>
Including Files
You can insert the content of one ASP file into another ASP file before the server executes it, with the #include directive. The #include directive is used to create functions, headers, footers, or elements that will be reused on multiple pages
Syntax:
<!--#include virtual="somefile.inc"-->
or
<!--#include file ="somefile.inc"-->
Use the virtual keyword to indicate a path beginning with a virtual directory. If a file named "header.inc" resides in a virtual directory named /html, the following line would insert the contents of "header.inc":
<!-- #include virtual ="/html/header.inc" -->
Use the file keyword to indicate a relative path. A relative path begins with the directory that contains the including file. If you have a file in the html directory, and the file "header.inc" resides in htmlheaders, the following line would insert "header.inc" in your file:
<!-- #include file ="headersheader.inc" -->
Use the file keyword with the syntax (..) to include a file from a higher-level directory.
Global.asa
The Global.asa file is an optional file that can contain declarations of objects, variables, and methods that can be accessed by every page in an ASP application.
Note: The Global.asa file must be stored in the root directory of the ASP application, and each application can only have one Global.asa file.
The Global.asa file can contain only the following:
- Application events
- Session events
- <object> declarations
- TypeLibrary declarations
- the #include directive
Application and Session Events
In Global.asa you can tell the application and session objects what to do when the application/session starts and what to do when the application/session ends. The code for this is placed in event handlers. Note: We do not use <% and %>, to insert scripts in the Global.asa file, we have to put the subroutines inside the HTML <script> tag:
<script language="vbscript" runat="server">
sub Application_OnStart
' some code
end sub
sub Application_OnEnd
' some code
end sub
sub Session_OnStart
' some code
end sub
sub Session_OnEnd
' some code
end sub
</script>
<object> Declarations
It is also possible to create objects with session or application scope in Global.asa by using the <object> tag. Note: The <object> tag should be outside the <script> tag!
Syntax:
<object runat="server" scope="scope" id="id"
{progid="progID"|classid="classID"}>
.......
</object>
TypeLibrary Declarations
A TypeLibrary is a container for the contents of a DLL file corresponding to a COM object. By including a call to the TypeLibrary in the Global.asa file, the constants of the COM object can be accessed, and errors can be better reported by the ASP code. If your Web application relies on COM objects that have declared data types in type libraries, you can declare the type libraries in Global.asa.
Syntax:
<!--METADATA TYPE="TypeLib"
file="filename"
uuid="typelibraryuuid"
version="versionnumber"
lcid="localeid"
-->
The Session Object
The Session object is used to store information about, or change settings for a user session. Variables stored in the Session object hold information about one single user, and are available to all pages in one application.
Collections
- Contents - Holds every item added to the session with script commands
- StaticObjects - Holds every object added to the session with the <object> tag, and a given session
- Contents.Remove(item/index) - Deletes an item from the Contents collection
- Contents.RemoveAll() - Deletes every item from the Contents collection
Properties
- CodePage - Sets the code page that will be used to display dynamic content
- LCID - Sets the locale identifier that will be used to display dynamic content
- SessionID - Returns the session id
- Timeout - Sets the timeout for the session
Method
- Abandon - Kills every object in a session object
Application Object
A group of ASP files that work together to perform some purpose is called an application. The Application object in ASP is used to tie these files together. All users share one Application object. The Application object should hold information that will be used by many pages in the application (like database connection information).
Collections
- Contents - Holds every item added to the application with script commands
- StaticObjects - Holds every object added to the application with the <object> tag
- Contents.Remove - Deletes an item from a collection
- Contents.RemoveAll - Deletes every item from a collection
Methods
- Lock - Prevents a user from changing the application object properties
- Unlock - Allows a user to change the application object properties
The Response Object
The Response Object is used to send output to the user from the server.
Collection
- Cookies(name) - Sets a cookie value. If the cookie does not exist, it will be created, and take the value that is specified
Properties
- Buffer - Whether to buffer the output or not. When the output is buffered, the server will hold back the response until all of the server scripts have been processed, or until the script calls the Flush or End method. If this property is set, it should be before the <html> tag in the ASP file
- CacheControl - Sets whether proxy servers can cache the output or not. When set to Public, the output can be cached by a proxy server
- Charset(charset_name) - Sets the name of the character set (like "ISO8859-1") to the content type header
- ContentType - Sets the HTTP content type (like "text/html", "image/gif", "image/jpeg", "text/plain"). Default is "text/html"
- Expires - Sets how long a page will be cached on a browser before it expires
- ExpiresAbsolute - Sets a date and time when a page cached on a browser will expire
- IsClientConnected - Checks if the client is still connected to the server
- Pics(pics_label) - Adds a value to the pics label response header
- Status - Specifies the value of the status line
Methods
- AddHeader(name, value) - Adds an HTML header with a specified value
- AppendToLog string - Adds a string to the end of the server log entry
- BinaryWrite(data_to_write) - Writes the given information without any character-set conversion
- Clear - Clears the buffered output. Use this method to handle errors. If Response.Buffer is not set to true, this method will cause a run-time error
- End - Stops processing the script, and return the current result
- Flush - Sends buffered output immediately. If Response.Buffer is not set to true, this method will cause a run-time error
- Redirect(url) - Redirects the user to another url
- Write(data_to_write) - Writes a text to the user
Request Object
When a browser asks for a page from a server, it is called a request. The Request Object is used to get information from the user.
Collection
- ClientCertificate - Holds field values stored in the client certificate
- Cookies(name) - Holds cookie values
- Form(element_name) - Holds form (input) values. The form must use the post method
- QueryString(variable_name) - Holds variable values in the query string
- ServerVariables(server_variable) - Holds server variable values
Property
- TotalBytes - Holds the total number of bytes the client is sending in the body of the request
Method
- BinaryRead - Fetches the data that is sent to the server from the client as part of a post request
Server Object
The Server Object is used to access properties and methods on the server.
Property
- ScriptTimeout - Sets how long a script can run before it is terminated
Method
- CreateObject(type_of_object) - Creates an instance of an object
- Execute(path) - Executes an ASP file from inside another ASP file. After executing the called ASP file, the control is returned to the original ASP file
- GetLastError() - Returns an ASPError object that will describe the error that occurred
- HTMLEncode(string) - Applies HTML encoding to a string
- MapPath(path) - Maps a relative or virtual path to a physical path
- Transfer(path) - Sends all of the state information to another ASP file for processing. After the transfer, procedural control is not returned to the original ASP file
- URLEncode(string) - Applies URL encoding rules to a string
ADO can be used to access databases from your web pages.
What you should already know
Before you continue you should have a basic understanding of the following:
If you want to study these subjects first, go to our Home page
What is ADO?
- ADO is a Microsoft technology
- ADO stands for ActiveX Data Objects
- ADO is a Microsoft Active-X component
- ADO is automatically installed with Microsoft IIS
- ADO is a programming interface to access data in a database
Accessing a Database from an ASP Page
The common way to access a database from inside an ASP page is to:
- Create an ADO connection to a database
- Open the database connection
- Create an ADO recordset
- Open the recordset
- Extract the data you need from the recordset
- Close the recordset
- Close the connection
Before a database can be accessed from a web page, a database connection has to be established.
Create a DSN-less Database Connection
The easiest way to connect to a database is to use a DSN-less connection. A DSN-less connection can be used against any Microsoft Access database on your web site.
If you have a database called "northwind.mdb" located in a web directory like "c:/webdata/", you can connect to the database with the following ASP code:
<%
set conn=Server.CreateObject("ADODB.Connection")
conn.Provider="Microsoft.Jet.OLEDB.4.0"
conn.Open "c:/webdata/northwind.mdb"
%>
Note, from the example above, that you have to specify the Microsoft Access database driver (Provider) and the physical path to the database on your computer.
Create an ODBC Database Connection
If you have an ODBC database called "northwind" you can connect to the database with the following ASP code:
<%
set conn=Server.CreateObject("ADODB.Connection")
conn.Open "northwind"
%>
With an ODBC connection, you can connect to any database, on any computer in your network, as long as an ODBC connection is available.
An ODBC Connection to an MS Access Database
Here is how to create a connection to a MS Access Database:
- Open the ODBC icon in your Control Panel.
- Choose the System DSN tab.
- Click on Add in the System DSN tab.
- Select the Microsoft Access Driver. Click Finish.
- In the next screen, click Select to locate the database.
- Give the database a Data Source Name (DSN).
- Click OK.
Note that this configuration has to be done on the computer where your web site is located. If you are running Personal Web Server (PWS) or Internet Information Server (IIS) on your own computer, the instructions above will work, but if your web site is located on a remote server, you have to have physical access to that server, or ask your web host to do this for you.
The ADO Connection Object
The ADO Connection object is used to create an open connection to a data source. Through this connection, you can access and manipulate a database.
View all methods and properties of the Connection object.
To be able to read database data, the data must first be loaded into a recordset.
Create an ADO Table Recordset
After an ADO Database Connection has been created, as demonstrated in the previous chapter, it is possible to create an ADO Recordset.
Suppose we have a database named "Northwind", we can get access to the "Customers" table inside the database with the following lines:
<%
set conn=Server.CreateObject("ADODB.Connection")
conn.Provider="Microsoft.Jet.OLEDB.4.0"
conn.Open "c:/webdata/northwind.mdb"
set rs=Server.CreateObject("ADODB.recordset")
rs.Open "Customers", conn
%>
Create an ADO SQL Recordset
We can also get access to the data in the "Customers" table using SQL:
<%
set conn=Server.CreateObject("ADODB.Connection")
conn.Provider="Microsoft.Jet.OLEDB.4.0"
conn.Open "c:/webdata/northwind.mdb"
set rs=Server.CreateObject("ADODB.recordset")
rs.Open "Select * from Customers", conn
%>
Extract Data from the Recordset
After a recordset is opened, we can extract data from recordset.
Suppose we have a database named "Northwind", we can get access to the "Customers" table inside the database with the following lines:
<%
set conn=Server.CreateObject("ADODB.Connection")
conn.Provider="Microsoft.Jet.OLEDB.4.0"
conn.Open "c:/webdata/northwind.mdb"
set rs=Server.CreateObject("ADODB.recordset")
rs.Open "Select * from Customers", conn
for each x in rs.fields
response.write(x.name)
response.write(" = ")
response.write(x.value)
next
%>
The ADO Recordset Object
The ADO Recordset object is used to hold a set of records from a database table.
View all methods and properties of the Recordset object.

A common way to display data from a recordset, is to display the data in an HTML table.
Display the Field Names and Field Values
We have a database named "Northwind" and we want to display the data from the "Customers" table (remember to save the file with an .asp extension):
<html>
<body>
<%
set conn=Server.CreateObject("ADODB.Connection")
conn.Provider="Microsoft.Jet.OLEDB.4.0"
conn.Open "c:/webdata/northwind.mdb"
set rs = Server.CreateObject("ADODB.recordset")
rs.Open "SELECT * FROM Customers", conn
do until rs.EOF
for each x in rs.Fields
Response.Write(x.name)
Response.Write(" = ")
Response.Write(x.value & "<br>")
next
Response.Write("<br>")
rs.MoveNext
loop
rs.close
conn.close
%>
</body>
</html>
Display the Data in an HTML Table
We can also display the data from the "Customers" table inside an HTML table with the following lines (remember to save the file with an .asp extension):
<html>
<body>
<%
set conn=Server.CreateObject("ADODB.Connection")
conn.Provider="Microsoft.Jet.OLEDB.4.0"
conn.Open "c:/webdata/northwind.mdb"
set rs = Server.CreateObject("ADODB.recordset")
rs.Open "SELECT Companyname, Contactname FROM Customers", conn
%>
<table border="1" width="100%">
<%do until rs.EOF%>
<tr>
<%for each x in rs.Fields%>
<td><%Response.Write(x.value)%></td>
<%next
rs.MoveNext%>
</tr>
<%loop
rs.close
conn.close
%>
</table>
</body>
</html>
Add Headers to the HTML Table
We want to add headers to the HTML table to make it more readable (remember to save the file with an .asp extension):
<html>
<body>
<%
set conn=Server.CreateObject("ADODB.Connection")
conn.Provider="Microsoft.Jet.OLEDB.4.0"
conn.Open "c:/webdata/northwind.mdb"
set rs = Server.CreateObject("ADODB.recordset")
sql="SELECT Companyname, Contactname FROM Customers"
rs.Open sql, conn
%>
<table border="1" width="100%">
<tr>
<%for each x in rs.Fields
response.write("<th>" & x.name & "</th>")
next%>
</tr>
<%do until rs.EOF%>
<tr>
<%for each x in rs.Fields%>
<td><%Response.Write(x.value)%></td>
<%next
rs.MoveNext%>
</tr>
<%loop
rs.close
conn.close
%>
</table>
</body>
</html>
Add Colors to the HTML Table
We want to add colors to the HTML table to make it look nice (remember to save the file with an .asp extension):
<html>
<body>
<%
set conn=Server.CreateObject("ADODB.Connection")
conn.Provider="Microsoft.Jet.OLEDB.4.0"
conn.Open "c:/webdata/northwind.mdb"
set rs = Server.CreateObject("ADODB.recordset")
sql="SELECT Companyname, Contactname FROM Customers"
rs.Open sql, conn
%>
<table border="1" style="width;100%;background-color:#fff5ee;">
<tr>
<%for each x in rs.Fields
response.write("<th style='text-align:left;background-color:#b0c4de;'>" & x.name & "</th>")
next%>
</tr>
<%do until rs.EOF%>
<tr>
<%for each x in rs.Fields%>
<td><%Response.Write(x.value)%></td>
<%next
rs.MoveNext%>
</tr>
<%loop
rs.close
conn.close
%>
</table>
</body>
</html>
.jpg)
We may use SQL to create queries to specify only a selection of records (and fields) to view.
Display Selected Data
Display companies that starts with "A"
Here we want to display only the records from the "Customers" table that have a "Companyname" that starts with "A" (remember to save the file with an .asp extension):
<html>
<body>
<%
set conn=Server.CreateObject("ADODB.Connection")
conn.Provider="Microsoft.Jet.OLEDB.4.0"
conn.Open "c:/webdata/northwind.mdb"
set rs=Server.CreateObject("ADODB.recordset")
sql="SELECT Companyname, Contactname FROM Customers WHERE CompanyName LIKE 'A%'"
rs.Open sql, conn
%>
<table border="1" width="100%">
<tr>
<%for each x in rs.Fields
response.write("<th>" & x.name & "</th>")
next%>
</tr>
<%do until rs.EOF%>
<tr>
<%for each x in rs.Fields%>
<td><%Response.Write(x.value)%></td>
<%next
rs.MoveNext%>
</tr>
<%loop
rs.close
conn.close%>
</table>
</body>
</html>
Display customers from Spain
Here we want to display only the customers from Spain (remember to save the file with an .asp extension):
<html>
<body>
<%
set conn=Server.CreateObject("ADODB.Connection")
conn.Provider="Microsoft.Jet.OLEDB.4.0"
conn.Open "c:/webdata/northwind.mdb"
set rs=Server.CreateObject("ADODB.recordset")
sql="SELECT Companyname, Contactname FROM Customers WHERE Country='Spain'"
rs.Open sql, conn
%>
<table border="1" width="100%">
<tr>
<%for each x in rs.Fields
response.write("<th>" & x.name & "</th>")
next%>
</tr>
<%do until rs.EOF%>
<tr>
<%for each x in rs.Fields%>
<td><%Response.Write(x.value)%> </td>
<%next
rs.MoveNext%>
</tr>
<%loop
rs.close
conn.close
%>
</table>
</body>
</html>
Create a filter for the user
Here we want to create a filter and let the user choose which country to show customers from (remember to save the file with an .asp extension):
<html>
<body>
<%
set conn=Server.CreateObject("ADODB.Connection")
conn.Provider="Microsoft.Jet.OLEDB.4.0"
conn.Open "c:/webdata/northwind.mdb"
set rs=Server.CreateObject("ADODB.recordset")
sql="SELECT DISTINCT Country FROM Customers ORDER BY Country"
rs.Open sql, conn
country=request.form("country")
%>
<form method="post">
Choose Country <select name="country">
<% do until rs.EOF
response.write("<option")
if rs.fields("country")=country then
response.write(" selected")
end if
response.write(">")
response.write(rs.fields("Country"))
rs.MoveNext
loop
rs.Close
set rs=Nothing %>
</select>
<input type="submit" value="Show customers">
</form>
<%
if country<>"" then
sql="SELECT Companyname,Contactname,Country FROM Customers WHERE country='" & country & "'"
set rs=Server.CreateObject("ADODB.Recordset")
rs.Open sql,conn
%>
<table width="100%" cellspacing="0" cellpadding="2" border="1">
<tr>
<th>Companyname</th>
<th>Contactname</th>
<th>Country</th>
</tr>
<%
do until rs.EOF
response.write("<tr>")
response.write("<td>" & rs.fields("companyname") & "</td>")
response.write("<td>" & rs.fields("contactname") & "</td>")
response.write("<td>" & rs.fields("country") & "</td>")
response.write("</tr>")
rs.MoveNext
loop
rs.close
conn.Close
set rs=Nothing
set conn=Nothing%>
</table>
<% end if %>
</body>
</html>
.jpg)
ADO Sort Data
We may use SQL to specify how to sort the data in the record set.
Sort the Data
Here we want to display the "Companyname" and "Contactname" fields from the "Customers" table, ordered by "Companyname" (remember to save the file with an .asp extension):
<% set conn=Server.CreateObject("ADODB.Connection") conn.Provider="Microsoft.Jet.OLEDB.4.0" conn.Open "c:/webdata/northwind.mdb" set rs = Server.CreateObject("ADODB.recordset") sql="SELECT Companyname, Contactname FROM Customers ORDER BY CompanyName" rs.Open sql, conn %> <%for each x in rs.Fields response.write("") next%> <%do until rs.EOF%> <%for each x in rs.Fields%> <%next rs.MoveNext%> <%loop rs.close conn.close%>
| " & x.name & " |
| <%Response.Write(x.value)%> |
Here we want to display the "Companyname" and "Contactname" fields from the "Customers" table, ordered descending by "Companyname" (remember to save the file with an .asp extension):
<% set conn=Server.CreateObject("ADODB.Connection") conn.Provider="Microsoft.Jet.OLEDB.4.0" conn.Open "c:/webdata/northwind.mdb" set rs = Server.CreateObject("ADODB.recordset") sql="SELECT Companyname, Contactname FROM Customers ORDER BY CompanyName DESC" rs.Open sql, conn %> <%for each x in rs.Fields response.write("") next%> <%do until rs.EOF%> <%for each x in rs.Fields%> <%next rs.MoveNext%> <%loop rs.close conn.close%>
| " & x.name & " |
| <%Response.Write(x.value)%> |
ADO Add Records
We may use the SQL INSERT INTO command to add a record to a
table in a database.ÂÂ
Add a Record to a Table in a Database
We want to add a new record to the Customers table in the Northwind database.
We first create a form that contains the fields we want to collect data from:
When the user presses the submit button the form is sent to a file called "demo_add.asp".
The "demo_add.asp" file contains the code that will add a new record to the
Customers table:
<%
set conn=Server.CreateObject("ADODB.Connection")
conn.Provider="Microsoft.Jet.OLEDB.4.0"
conn.Open "c:/webdata/northwind.mdb"
sql="INSERT INTO customers (customerID,companyname,"
sql=sql & "contactname,address,city,postalcode,country)"
sql=sql & " VALUES "
sql=sql & "('" & Request.Form("custid") & "',"
sql=sql & "'" & Request.Form("compname") & "',"
sql=sql & "'" & Request.Form("contname") & "',"
sql=sql & "'" & Request.Form("address") & "',"
sql=sql & "'" & Request.Form("city") & "',"
sql=sql & "'" & Request.Form("postcode") & "',"
sql=sql & "'" & Request.Form("country") & "')"
on error resume next
conn.Execute sql,recaffected
if err<>0 then
  Response.Write("No update permissions!")
else
  Response.Write(" " & recaffected & " record added")
end if
conn.close
%>
Important
If you use the SQL INSERT command be aware of the following:
- If the table contains a primary key, make sure to append a unique,
non-Null value to the primary key field (if not, the provider may not append the
record, or an error occurs)
- If the table contains an AutoNumber field, do not include this field in
the SQL INSERT command (the value of this field will be taken care of
automatically by the provider)
What about Fields With no Data?
In a MS Access database, you can enter zero-length strings ("") in Text,
Hyperlink, and Memo fields IF you set the AllowZeroLength property to
Yes.
Note: Not all databases support zero-length strings and may cause an
error when a record with blank fields is added. It is important to check what
data types your database supports.
.png)
We may use the SQL UPDATE command to update a record in a table in a database.
Update a Record in a Table
We want to update a record in the Customers table in the Northwind database. We first create a table that lists all records in the Customers table:
<html>
<body>
<%
set conn=Server.CreateObject("ADODB.Connection")
conn.Provider="Microsoft.Jet.OLEDB.4.0"
conn.Open "c:/webdata/northwind.mdb"
set rs=Server.CreateObject("ADODB.Recordset")
rs.open "SELECT * FROM customers",conn
%>
<h2>List Database</h2>
<table border="1" width="100%">
<tr>
<%
for each x in rs.Fields
response.write("<th>" & ucase(x.name) & "</th>")
next
%>
</tr>
<% do until rs.EOF %>
<tr>
<form method="post" action="demo_update.asp">
<%
for each x in rs.Fields
if lcase(x.name)="customerid" then%>
<td>
<input type="submit" name="customerID" value="<%=x.value%>">
</td>
<%else%>
<td><%Response.Write(x.value)%></td>
<%end if
next
%>
</form>
<%rs.MoveNext%>
</tr>
<%
loop
conn.close
%>
</table>
</body>
</html>
If the user clicks on the button in the "customerID" column he or she will be taken to a new file called "demo_update.asp". The "demo_update.asp" file contains the source code on how to create input fields based on the fields from one record in the database table. It also contains a "Update record" button that will save your changes:
<html>
<body>
<h2>Update Record</h2>
<%
set conn=Server.CreateObject("ADODB.Connection")
conn.Provider="Microsoft.Jet.OLEDB.4.0"
conn.Open "c:/webdata/northwind.mdb"
cid=Request.Form("customerID")
if Request.form("companyname")="" then
set rs=Server.CreateObject("ADODB.Recordset")
rs.open "SELECT * FROM customers WHERE customerID='" & cid & "'",conn
%>
<form method="post" action="demo_update.asp">
<table>
<%for each x in rs.Fields%>
<tr>
<td><%=x.name%></td>
<td><input name="<%=x.name%>" value="<%=x.value%>"></td>
<%next%>
</tr>
</table>
<br><br>
<input type="submit" value="Update record">
</form>
<%
else
sql="UPDATE customers SET "
sql=sql & "companyname='" & Request.Form("companyname") & "',"
sql=sql & "contactname='" & Request.Form("contactname") & "',"
sql=sql & "address='" & Request.Form("address") & "',"
sql=sql & "city='" & Request.Form("city") & "',"
sql=sql & "postalcode='" & Request.Form("postalcode") & "',"
sql=sql & "country='" & Request.Form("country") & "'"
sql=sql & " WHERE customerID='" & cid & "'"
on error resume next
conn.Execute sql
if err<>0 then
response.write("No update permissions!")
else
response.write("Record " & cid & " was updated!")
end if
end if
conn.close
%>
</body>
</html>
We may use the SQL DELETE command to delete a record in a table in a database.
Delete a Record in a Table
We want to delete a record in the Customers table in the Northwind database. We first create a table that lists all records in the Customers table:
<html>
<body>
<%
set conn=Server.CreateObject("ADODB.Connection")
conn.Provider="Microsoft.Jet.OLEDB.4.0"
conn.Open "c:/webdata/northwind.mdb"
set rs=Server.CreateObject("ADODB.Recordset")
rs.open "SELECT * FROM customers",conn
%>
<h2>List Database</h2>
<table border="1" width="100%">
<tr>
<%
for each x in rs.Fields
response.write("<th>" & ucase(x.name) & "</th>")
next
%>
</tr>
<% do until rs.EOF %>
<tr>
<form method="post" action="demo_delete.asp">
<%
for each x in rs.Fields
if x.name="customerID" then%>
<td>
<input type="submit" name="customerID" value="<%=x.value%>">
</td>
<%else%>
<td><%Response.Write(x.value)%></td>
<%end if
next
%>
</form>
<%rs.MoveNext%>
</tr>
<%
loop
conn.close
%>
</table>
</body>
</html>
If the user clicks on the button in the "customerID" column he or she will be taken to a new file called "demo_delete.asp". The "demo_delete.asp" file contains the source code on how to create input fields based on the fields from one record in the database table. It also contains a "Delete record" button that will delete the current record:
<html>
<body>
<h2>Delete Record</h2>
<%
set conn=Server.CreateObject("ADODB.Connection")
conn.Provider="Microsoft.Jet.OLEDB.4.0"
conn.Open "c:/webdata/northwind.mdb"
cid=Request.Form("customerID")
if Request.form("companyname")="" then
set rs=Server.CreateObject("ADODB.Recordset")
rs.open "SELECT * FROM customers WHERE customerID='" & cid & "'",conn
%>
<form method="post" action="demo_delete.asp">
<table>
<%for each x in rs.Fields%>
<tr>
<td><%=x.name%></td>
<td><input name="<%=x.name%>" value="<%=x.value%>"></td>
<%next%>
</tr>
</table>
<br><br>
<input type="submit" value="Delete record">
</form>
<%
else
sql="DELETE FROM customers"
sql=sql & " WHERE customerID='" & cid & "'"
on error resume next
conn.Execute sql
if err<>0 then
response.write("No update permissions!")
else
response.write("Record " & cid & " was deleted!")
end if
end if
conn.close
%>
</body>
</html>
Command Object
The ADO Command object is used to execute a single query against a database. The query can perform actions like creating, adding, retrieving, deleting or updating records.
If the query is used to retrieve data, the data will be returned as a RecordSet object. This means that the retrieved data can be manipulated by properties, collections, methods, and events of the Recordset object.
The major feature of the Command object is the ability to use stored queries and procedures with parameters.
ProgID
set objCommand=Server.CreateObject("ADODB.command")
Properties
|
Property
|
Description
|
|
ActiveConnection
|
Sets or returns a definition for a connection if the connection is closed, or the current Connection object if the connection is open
|
|
CommandText
|
Sets or returns a provider command
|
|
CommandTimeout
|
Sets or returns the number of seconds to wait while attempting to execute a command
|
|
CommandType
|
Sets or returns the type of a Command object
|
|
Name
|
Sets or returns the name of a Command object
|
|
Prepared
|
Sets or returns a Boolean value that, if set to True, indicates that the command should save a prepared version of the query before the first execution
|
|
State
|
Returns a value that describes if the Command object is open, closed, connecting, executing or retrieving data
|
Methods
|
Method
|
Description
|
|
Cancel
|
Cancels an execution of a method
|
|
CreateParameter
|
Creates a new Parameter object
|
|
Execute
|
Executes the query, SQL statement or procedure in the CommandText property
|
Collections
|
Collection
|
Description
|
|
Parameters
|
Contains all the Parameter objects of a Command Object
|
|
Properties
|
Contains all the Property objects of a Command Object
|
.jpg)
Connection Object
The ADO Connection Object is used to create an open connection to a data source. Through this connection, you can access and manipulate a database.
If you want to access a database multiple times, you should establish a connection using the Connection object. You can also make a connection to a database by passing a connection string via a Command or Recordset object. However, this type of connection is only good for one specific, single query.
ProgID
set objConnection=Server.CreateObject("ADODB.connection")
Properties
|
Property
|
Description
|
|
Attributes
|
Sets or returns the attributes of a Connection object
|
|
CommandTimeout
|
Sets or returns the number of seconds to wait while attempting to execute a command
|
|
ConnectionString
|
Sets or returns the details used to create a connection to a data source
|
|
ConnectionTimeout
|
Sets or returns the number of seconds to wait for a connection to open
|
|
CursorLocation
|
Sets or returns the location of the cursor service
|
|
DefaultDatabase
|
Sets or returns the default database name
|
|
IsolationLevel
|
Sets or returns the isolation level
|
|
Mode
|
Sets or returns the provider access permission
|
|
Provider
|
Sets or returns the provider name
|
|
State
|
Returns a value describing if the connection is open or closed
|
|
Version
|
Returns the ADO version number
|
Methods
|
Method
|
Description
|
|
BeginTrans
|
Begins a new transaction
|
|
Cancel
|
Cancels an execution
|
|
Close
|
Closes a connection
|
|
CommitTrans
|
Saves any changes and ends the current transaction
|
|
Execute
|
Executes a query, statement, procedure or provider specific text
|
|
Open
|
Opens a connection
|
|
OpenSchema
|
Returns schema information from the provider about the data source
|
|
RollbackTrans
|
Cancels any changes in the current transaction and ends the transaction
|
Events
Note: You cannot handle events using VBScript or JScript (only Visual Basic, Visual C++, and Visual J++ languages can handle events).
|
Event
|
Description
|
|
BeginTransComplete
|
Triggered after the BeginTrans operation
|
|
CommitTransComplete
|
Triggered after the CommitTrans operation
|
|
ConnectComplete
|
Triggered after a connection starts
|
|
Disconnect
|
Triggered after a connection ends
|
|
ExecuteComplete
|
Triggered after a command has finished executing
|
|
InfoMessage
|
Triggered if a warning occurs during a ConnectionEvent operation
|
|
RollbackTransComplete
|
Triggered after the RollbackTrans operation
|
|
WillConnect
|
Triggered before a connection starts
|
|
WillExecute
|
Triggered before a command is executed
|
Collections
|
Collection
|
Description
|
|
Errors
|
Contains all the Error objects of the Connection object
|
|
Properties
|
Contains all the Property objects of the Connection object
|
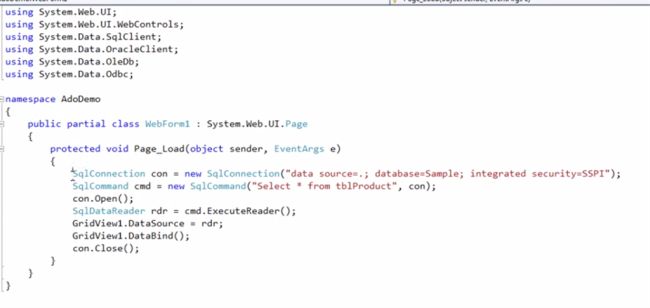
Error Object
The ADO Error object contains details about data access errors that have been generated during a single operation.
ADO generates one Error object for each error. Each Error object contains details of the specific error, and are stored in the Errors collection. To access the errors, you must refer to a specific connection.
To loop through the Errors collection:
<%
for each objErr in objConn.Errors
response.write("<p>")
response.write("Description: ")
response.write(objErr.Description & "<br>")
response.write("Help context: ")
response.write(objErr.HelpContext & "<br>")
response.write("Help file: ")
response.write(objErr.HelpFile & "<br>")
response.write("Native error: ")
response.write(objErr.NativeError & "<br>")
response.write("Error number: ")
response.write(objErr.Number & "<br>")
response.write("Error source: ")
response.write(objErr.Source & "<br>")
response.write("SQL state: ")
response.write(objErr.SQLState & "<br>")
response.write("</p>")
next
%>
Syntax
objErr.property
Properties
|
Property
|
Description
|
|
Description
|
Returns an error description
|
|
HelpContext
|
Returns the context ID of a topic in the Microsoft Windows help system
|
|
HelpFile
|
Returns the full path of the help file in the Microsoft Windows help system
|
|
NativeError
|
Returns an error code from the provider or the data source
|
|
Number
|
Returns a unique number that identifies the error
|
|
Source
|
Returns the name of the object or application that generated the error
|
|
SQLState
|
Returns a 5-character SQL error code
|
Field Object
The ADO Field object contains information about a column in a Recordset object. There is one Field object for each column in the Recordset.
ProgID
set objField=Server.CreateObject("ADODB.field")
Properties
|
Property
|
Description
|
|
ActualSize
|
Returns the actual length of a field's value
|
|
Attributes
|
Sets or returns the attributes of a Field object
|
|
DefinedSize
|
Returns the defined size of a field
|
|
Name
|
Sets or returns the name of a Field object
|
|
NumericScale
|
Sets or returns the number of decimal places allowed for numeric values in a Field object
|
|
OriginalValue
|
Returns the original value of a field
|
|
Precision
|
Sets or returns the maximum number of digits allowed when representing numeric values in a Field object
|
|
Status
|
Returns the status of a Field object
|
|
Type
|
Sets or returns the type of a Field object
|
|
UnderlyingValue
|
Returns the current value of a field
|
|
Value
|
Sets or returns the value of a Field object
|
Methods
|
Method
|
Description
|
|
AppendChunk
|
Appends long binary or character data to a Field object
|
|
GetChunk
|
Returns all or a part of the contents of a large text or binary data Field object
|
Collections
|
Collection
|
Description
|
|
Properties
|
Contains all the Property objects for a Field object
|
Parameter Object
The ADO Parameter object provides information about a single parameter used in a stored procedure or query.
A Parameter object is added to the Parameters Collection when it is created. The Parameters Collection is associated with a specific Command object, which uses the Collection to pass parameters in and out of stored procedures and queries.
Parameters can be used to create Parameterized Commands. These commands are (after they have been defined and stored) using parameters to alter some details of the command before it is executed. For example, an SQL SELECT statement could use a parameter to define the criteria of a WHERE clause.
There are four types of parameters: input parameters, output parameters, input/output parameters and return parameters.
Syntax
objectname.property
objectname.method
Properties
|
Property
|
Description
|
|
Attributes
|
Sets or returns the attributes of a Parameter object
|
|
Direction
|
Sets or returns how a parameter is passed to or from a procedure
|
|
Name
|
Sets or returns the name of a Parameter object
|
|
NumericScale
|
Sets or returns the number of digits stored to the right side of the decimal point for a numeric value of a Parameter object
|
|
Precision
|
Sets or returns the maximum number of digits allowed when representing numeric values in a Parameter
|
|
Size
|
Sets or returns the maximum size in bytes or characters of a value in a Parameter object
|
|
Type
|
Sets or returns the type of a Parameter object
|
|
Value
|
Sets or returns the value of a Parameter object
|
Methods
|
Method
|
Description
|
|
AppendChunk
|
Appends long binary or character data to a Parameter object
|
|
Delete
|
Deletes an object from the Parameters Collection
|
Property Object
The ADO Property object represents a dynamic characteristic of an ADO object that is defined by the provider.
Each provider that talks with ADO has different ways of interacting with ADO. Therefore, ADO needs to store information about the provider in some way. The solution is that the provider gives specific information (dynamic properties) to ADO. ADO stores each provider property in a Property object that is again stored in the Properties Collection. The Collection is assigned to either a Command object, Connection object, Field object, or a Recordset object.
ProgID
set objProperty=Server.CreateObject("ADODB.property")
Properties
|
Property
|
Description
|
|
Attributes
|
Returns the attributes of a Property object
|
|
Name
|
Sets or returns the name of a Property object
|
|
Type
|
Returns the type of a Property object
|
|
Value
|
Sets or returns the value of a Property object
|

Record Object (ADO version 2.5)
The ADO Record object is used to hold a row in a Recordset, a directory, or a file from a file system.
Only structured databases could be accessed by ADO in versions prior 2.5. In a structured database, each table has the exact same number of columns in each row, and each column is composed of the same data type.
The Record object allows access to data-sets where the number of columns and/or the data type can be different from row to row.
Syntax
objectname.property
objectname.method
Properties
|
Property
|
Description
|
|
ActiveConnection
|
Sets or returns which Connection object a Record object belongs to
|
|
Mode
|
Sets or returns the permission for modifying data in a Record object
|
|
ParentURL
|
Returns the absolute URL of the parent Record
|
|
RecordType
|
Returns the type of a Record object
|
|
Source
|
Sets or returns the src parameter of the Open method of a Record object
|
|
State
|
Returns the status of a Record object
|
Methods
|
Method
|
Description
|
|
Cancel
|
Cancels an execution of a CopyRecord, DeleteRecord, MoveRecord, or Open call
|
|
Close
|
Closes a Record object
|
|
CopyRecord
|
Copies a file or directory to another location
|
|
DeleteRecord
|
Deletes a file or directory
|
|
GetChildren
|
Returns a Recordset object where each row represents the files in the directory
|
|
MoveRecord
|
Moves a file or a directory to another location
|
|
Open
|
Opens an existing Record object or creates a new file or directory
|
Collections
|
Collection
|
Description
|
|
Properties
|
A collection of provider-specific properties
|
|
Fields
|
Contains all the Field objects in the Record object
|
The Fields Collection's Properties
|
Property
|
Description
|
|
Count
|
Returns the number of items in the fields collection. Starts at zero.
Example:
countfields=rec.Fields.Count
|
|
Item(named_item/number)
|
Returns a specified item in the fields collection.
Example:
itemfields=rec.Fields.Item(1)
or
itemfields = rec.Fields.Item("Name")
|
Recordset Object
The ADO Recordset object is used to hold a set of records from a database table.
A Recordset object consist of records and columns (fields).
In ADO, this object is the most important and the one used most often to
manipulate data from a database.
ProgID
set objRecordset=Server.CreateObject("ADODB.recordset")
When you first open a Recordset, the current record pointer will point to the first record and the BOF and EOF properties are
False. If there are no records, the BOF and EOF property are True.
Recordset objects can support two types of updating:ÂÂ
-
Immediate updating - all changes are written immediately to the
database once you call the Update method.
-
Batch updating - the provider will cache multiple changes and then
send them to the database with the UpdateBatch method.
In ADO there are 4 different cursor types defined:
-
Dynamic cursor - Allows you to see additions, changes, and deletions by other
users.
-
Keyset cursor - Like a dynamic cursor, except that
you cannot see additions by other users, and it prevents access to records that other users
have deleted. Data changes by other users will still be visible.
-
Static cursor - Provides a static copy of a recordset for you to use to find data or generate
reports. Additions, changes, or deletions by other users will not be visible. This is the only type of cursor allowed when you open a client-side Recordset object.
-
Forward-only cursor - Allows you to only scroll forward through the Recordset. Additions, changes, or deletions by other users will not be visible.ÂÂ
The cursor type can be set by the CursorType property or by the CursorType
parameter in the Open method.
Note: Not all providers support all methods or properties of the Recordset
object.
Properties
| Property |
Description |
|
Sets or returns a value that specifies the page number in the Recordset object |
|
Sets or returns a value that specifies the ordinal position of the current record in the Recordset object |
|
Returns the Command object associated with the Recordset |
|
Sets or returns a definition for a connection if the connection is closed,
or the current Connection object if the connection is open |
|
Returns true if the current record position is before the first record, otherwise false |
|
Sets or returns a bookmark. The bookmark saves the position of the current record |
|
Sets or returns the number of records that can be cached |
|
Sets or returns the location of the cursor service |
|
Sets or returns the cursor type of a Recordset object |
|
Sets or returns the name of the data member that will be
retrieved from the object referenced by the DataSource property |
|
Specifies an object containing data to be represented as a Recordset object |
|
Returns the editing status of the current record |
|
Returns true if the current record position is after the last record, otherwise false |
|
Sets or returns a filter for the data in a Recordset object |
|
Sets or returns the name of the current index for a
Recordset object |
|
Sets or returns a value that specifies the type of locking
when editing a record in a Recordset |
|
Sets or returns a value that specifies which records are to
be returned to the server |
|
Sets or returns the maximum number of records to return to a Recordset object from a query |
|
Returns the number of pages with data in a Recordset object |
|
Sets or returns the maximum number of records allowed on a
single page of a Recordset object |
|
Returns the number of records in a Recordset object |
|
Sets or returns the field names in the Recordset to sort on |
|
Sets a string value or a Command object reference, or
returns a String value that indicates the data source of the Recordset
object |
|
Returns a value that describes if the Recordset object is
open, closed, connecting, executing or retrieving data |
|
Returns the status of the current record with regard to
batch updates or other bulk operations |
|
Sets or returns whether the reference to the child records
will change when the parent record position changes |
Methods
| Method |
Description |
|
Creates a new record |
|
Cancels an execution |
|
Cancels a batch update |
|
Cancels changes made to a record of a Recordset
object
|
|
Creates a duplicate of an existing Recordset |
|
Closes a Recordset |
|
Compares two bookmarks |
|
Deletes a record or a group of records |
|
Searches for a record in a Recordset that
satisfies a specified criteria |
|
Copies multiple records from a Recordset object
into a two-dimensional array |
|
Returns a Recordset as a string |
|
Moves the record pointer in a Recordset object |
|
Moves the record pointer to the first record |
|
Moves the record pointer to the last record |
|
Moves the record pointer to the next record |
|
Moves the record pointer to the previous record |
|
Clears the current Recordset object and returns
the next Recordset object by looping through a series of commands |
| |
Opens a database element that gives you access
to records in a table, the results of a query, or to a saved Recordset |
|
Updates the data in a Recordset by re-executing
the query that made the original Recordset |
|
Refreshes the data in the current Recordset from the original database |
|
Saves a Recordset object to a file or a Stream
object |
|
Searches the index of a Recordset to find a
record that matches the specified values |
|
Returns a boolean value that defines whether or
not a Recordset object supports a specific type of functionality |
|
Saves all changes made to a single recordÂÂ
in a Recordset object |
|
Saves all changes in a Recordset to the database.
Used when working in batch update mode |
Events
Note: You cannot handle events using VBScript or JScript (only
Visual Basic, Visual C++, and Visual J++ languages can handle events).
| Event |
Description |
|
Triggered when you try to move to a record after the last record |
|
Triggered after all records in an asynchronous operation have
been fetched |
|
Triggered periodically in an asynchronous operation,
to state how many more records that have been fetched |
|
Triggered after the value of a Field object change |
|
Triggered after the current position in the Recordset has changed |
|
Triggered after a record has changed |
|
Triggered after the Recordset has changed |
|
Triggered before the value of a Field object change |
|
Triggered before a record change |
|
Triggered before a Recordset change |
|
Triggered before the current position in the Recordset changes |
Collections
| Collection |
Description |
| Fields |
Indicates the number of Field objects in the Recordset object |
| Properties |
Contains all the Property objects in the Recordset object |
The Fields Collection's Properties
| Property |
Description |
| Count |
Returns the number of items in the fields collection. Starts at zero.
Example:
countfields=rs.Fields.Count
|
| Item(named_item/number) |
Returns a specified item in the fields collection.
Example:
itemfields=rs.Fields.Item(1)
or
itemfields=rs.Fields.Item("Name")
|
The Properties Collection's Properties
| Property |
Description |
| Count |
Returns the number of items in the properties collection. Starts at zero.
Example:
countprop=rs.Properties.Count
|
| Item(named_item/number) |
Returns a specified item in the properties collection.
Example:
itemprop = rs.Properties.Item(1)
or
itemprop=rs.Properties.Item("Name")
|
Stream Object (ADO version 2.5)
The ADO Stream Object is used to read, write, and manage a stream of binary data or text.
A Stream object can be obtained in three ways:
- From a URL pointing to a document, a folder, or a Record object
- By instantiating a Stream object to store data for your application
- By opening the default Stream object associated with a Record object
Syntax
objectname.property
objectname.method
Properties
|
Property
|
Description
|
|
CharSet
|
Sets or returns a value that specifies into which character set the contents are to be translated. This property is only used with text Stream objects (type is adTypeText)
|
|
EOS
|
Returns whether the current position is at the end of the stream or not
|
|
LineSeparator
|
Sets or returns the line separator character used in a text Stream object
|
|
Mode
|
Sets or returns the available permissions for modifying data
|
|
Position
|
Sets or returns the current position (in bytes) from the beginning of a Stream object
|
|
Size
|
Returns the size of an open Stream object
|
|
State
|
Returns a value describing if the Stream object is open or closed
|
|
Type
|
Sets or returns the type of data in a Stream object
|
Methods
|
Method
|
Description
|
|
Cancel
|
Cancels an execution of an Open call on a Stream object
|
|
Close
|
Closes a Stream object
|
|
CopyTo
|
Copies a specified number of characters/bytes from one Stream object into another Stream object
|
|
Flush
|
Sends the contents of the Stream buffer to the associated underlying object
|
|
LoadFromFile
|
Loads the contents of a file into a Stream object
|
|
Open
|
Opens a Stream object
|
|
Read
|
Reads the entire stream or a specified number of bytes from a binary Stream object
|
|
ReadText
|
Reads the entire stream, a line, or a specified number of characters from a text Stream object
|
|
SaveToFile
|
Saves the binary contents of a Stream object to a file
|
|
SetEOS
|
Sets the current position to be the end of the stream (EOS)
|
|
SkipLine
|
Skips a line when reading a text Stream
|
|
Write
|
Writes binary data to a binary Stream object
|
|
WriteText
|
Writes character data to a text Stream object
|
The table below shows the ADO Data Type mapping between Access, SQL Server, and Oracle:
|
DataType Enum
|
Value
|
Access
|
SQLServer
|
Oracle
|
|
adBigInt
|
20
|
|
BigInt (SQL Server 2000 +)
|
|
|
adBinary
|
128
|
|
Binary
TimeStamp
|
Raw *
|
|
adBoolean
|
11
|
YesNo
|
Bit
|
|
|
adChar
|
129
|
|
Char
|
Char
|
|
adCurrency
|
6
|
Currency
|
Money
SmallMoney
|
|
|
adDate
|
7
|
Date
|
DateTime
|
|
|
adDBTimeStamp
|
135
|
DateTime (Access 97 (ODBC))
|
DateTime
SmallDateTime
|
Date
|
|
adDecimal
|
14
|
|
|
Decimal *
|
|
adDouble
|
5
|
Double
|
Float
|
Float
|
|
adGUID
|
72
|
ReplicationID (Access 97 (OLEDB)), (Access 2000 (OLEDB))
|
UniqueIdentifier (SQL Server 7.0 +)
|
|
|
adIDispatch
|
9
|
|
|
|
|
adInteger
|
3
|
AutoNumber
Integer
Long
|
Identity (SQL Server 6.5)
Int
|
Int *
|
|
adLongVarBinary
|
205
|
OLEObject
|
Image
|
Long Raw *
Blob (Oracle 8.1.x)
|
|
adLongVarChar
|
201
|
Memo (Access 97)
Hyperlink (Access 97)
|
Text
|
Long *
Clob (Oracle 8.1.x)
|
|
adLongVarWChar
|
203
|
Memo (Access 2000 (OLEDB))
Hyperlink (Access 2000 (OLEDB))
|
NText (SQL Server 7.0 +)
|
NClob (Oracle 8.1.x)
|
|
adNumeric
|
131
|
Decimal (Access 2000 (OLEDB))
|
Decimal
Numeric
|
Decimal
Integer
Number
SmallInt
|
|
adSingle
|
4
|
Single
|
Real
|
|
|
adSmallInt
|
2
|
Integer
|
SmallInt
|
|
|
adUnsignedTinyInt
|
17
|
Byte
|
TinyInt
|
|
|
adVarBinary
|
204
|
ReplicationID (Access 97)
|
VarBinary
|
|
|
adVarChar
|
200
|
Text (Access 97)
|
VarChar
|
VarChar
|
|
adVariant
|
12
|
|
Sql_Variant (SQL Server 2000 +)
|
VarChar2
|
|
adVarWChar
|
202
|
Text (Access 2000 (OLEDB))
|
NVarChar (SQL Server 7.0 +)
|
NVarChar2
|
|
adWChar
|
130
|
|
NChar (SQL Server 7.0 +)
|
|
* In Oracle 8.0.x - decimal and int are equal to number and number(10).
Login
|



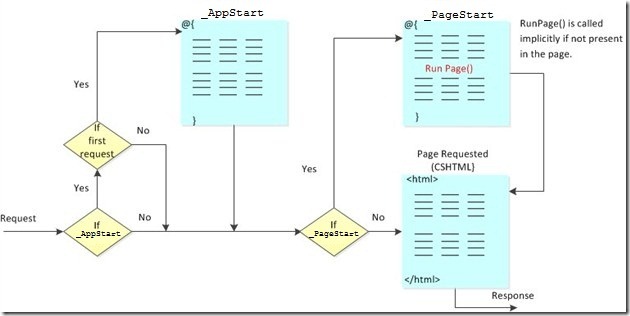
.jpg)


.jpg)


.jpg)
.jpg)

.png)


.jpg)


